Diferencia entre revisiones de «Paquete de Instalación para OS X»
- Instalación de Moodle
- Inicio Rápido de Instalación
- Cron
- Nginx
- Apache
- IIS
- Ruteo
- Instalar plugins
- Instalación FAQ
- Actualización
- Visión general de actualización
- Implementar actualizaciones automáticas
- Git para Administradores
- Administración por línea de comando
- Actualización FAQ
- Migración de Moodle
- Tamaño de archivo subido
- Crear archivo .htaccess
- Moodle en una netbook sin internet
({{Actualizar}}) |
(tidy up) |
||
| (No se muestra una edición intermedia de otro usuario) | |||
| Línea 19: | Línea 19: | ||
==Requisitos del sistema== | ==Requisitos del sistema== | ||
+ Apple | + Apple macOS Computer | ||
+ iMac, Mac mini, MacBook, MacBook Air, Mac Pro | + iMac, Mac mini, MacBook, MacBook Air, Mac Pro | ||
+ Processor: Intel x86_64 (i5 | + Processor: M1 or Intel x86_64 (i7, i5, Xeon, Core2Duo) | ||
+ RAM: 4 GB or better | + RAM: 4 GB or better | ||
+ Hard Disk: | + Hard Disk: 4 GB free | ||
+ System Software: | + System Software: macOS 10.10 up to macOS 13.4 | ||
==Descarga e instalación == | ==Descarga e instalación == | ||
'''Step 1:''' Download the disk image '''Moodle4Mac-MAMP.dmg''' from [http://download.moodle.org/macosx/ Moodle packages for | '''Step 1:''' Download the disk image '''Moodle4Mac-MAMP.dmg''' from [http://download.moodle.org/macosx/ Moodle packages for macOS]. You will find various image files for the different Moodle versions up to Moodle 4.0, 4.1, 4.2 and 4.3dev. The pictures in this manual are made with Moodle 2.8 ... please don't worry! | ||
'''Step 2:''' Double click the disk image '''Moodle4Mac-MAMP.dmg''' to mount the installation disk. | '''Step 2:''' Double click the disk image '''Moodle4Mac-MAMP.dmg''' to mount the installation disk. | ||
| Línea 254: | Línea 254: | ||
The different versions of the script UpdateMoodle.sh only differ in two parameters ... first we need to know the right folder for Moodle and second we must use the correct git tag for the Moodle version. The shown script upgrades Moodle 2.8. | The different versions of the script UpdateMoodle.sh only differ in two parameters ... first we need to know the right folder for Moodle and second we must use the correct git tag for the Moodle version. The shown script upgrades Moodle 2.8. | ||
* Moodle | * Moodle 3.9 uses <span style="color:red;">MOODLE_39_STABLE</span> | ||
* Moodle | * Moodle 3.11 uses <span style="color:red;">MOODLE_311_STABLE</span> | ||
* Moodle | * Moodle 4.0 uses <span style="color:red;">MOODLE_400_STABLE</span> | ||
* Moodle | * Moodle 4.1 uses <span style="color:red;">MOODLE_401_STABLE</span> | ||
* Moodle 4.2 uses <span style="color:red;">MOODLE_402_STABLE</span> | |||
* Moodle | * Moodle 4.3dev uses <span style="color:red;">master</span> | ||
<br /> | |||
* Moodle | |||
====Instalar Git==== | ====Instalar Git==== | ||
Revisión actual - 15:35 19 jun 2023
Esta página necesita actualizarse con la información existente en la documentación vigente/moderna/actualizada en el idioma inglés original para Moodle. Se le sugiere al lector que consulte la página original en idioma inglés cuyo enlace está al fondo de esta página. y que, por favor, actualice esta información y quite la plantilla {{Actualizar}} cuando haya terminado. (otras páginas pendientes de actualizar)
Nota: Esta es una traducción de una página de la documentación en idioma Inglés (Docs), que se considera particularmente importante, y que en su versión original se actualiza frecuentemente. Por ello, se le recomienda que revise la página original en idioma inglés: Complete Install Packages for Mac OS X.
Nota del traductor: Si desea ver la versión anterior de esta página vaya a 28/Paquete de Instalación para OS X.
Nota: Pendiente de Traducir. ¡Anímese a traducir esta página!. ( y otras páginas pendientes)
Resumen
The complete install packages for Mac OS X are named Moodle4Mac and allow a very easy way to install Moodle on your Mac computer (laptop, desktop or test server). Moodle4Mac is available from Moodle packages for Mac OS X.
Moodle4Mac is based on the software MAMP. MAMP contains everything that is necessary for the operation of Moodle - the Apache web server, MySQL database and PHP scripting language. Packages are available for different Moodle versions. Please check which Moodle your institution (school, college, university, company) uses on its server so that you can swap your materials between the two platforms easily.
You can also install the latest Moodle development version to find everything about upcoming opportunities and changes. However, please remember that a developer version is not yet a finished product, and thus may contain errors.
Moodle4Mac packages also include a special Git update script, enabling you to easily update your Moodle site without needing to download the whole package again and without reinstalling all your courses.
Note: Moodle4Mac is NOT intended to be used for a production server on the Internet. It is only intended for installation on a local computer to test and develop, as it is not optimized for security.
Requisitos del sistema
 + Apple macOS Computer
 + iMac, Mac mini, MacBook, MacBook Air, Mac Pro
 + Processor:  M1 or Intel x86_64 (i7, i5, Xeon, Core2Duo)
 + RAM: 4 GB or better
 + Hard Disk: 4 GB free
 + System Software: macOS 10.10 up to macOS 13.4
Descarga e instalación
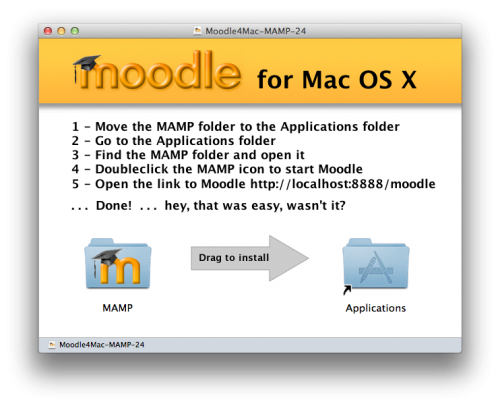
Step 1: Download the disk image Moodle4Mac-MAMP.dmg from Moodle packages for macOS. You will find various image files for the different Moodle versions up to Moodle 4.0, 4.1, 4.2 and 4.3dev. The pictures in this manual are made with Moodle 2.8 ... please don't worry!
Step 2: Double click the disk image Moodle4Mac-MAMP.dmg to mount the installation disk.
Step 3: Move the folder MAMP into the folder Applications. Moodle4Mac is based on MAMP (Mac OS X, Apache, MySQL, PHP). MAMP does not save parameters in a registry or in system variables. If you want to delete Moodle4Mac you only need to move the MAMP folder into the Trash. For more information about MAMP please look at the MAMP project page.
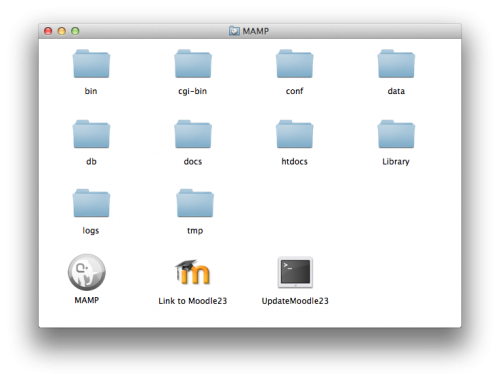
Step 4: Now you are ready to start your Moodle server. Go to the Applications folder. Find the MAMP folder and open it.
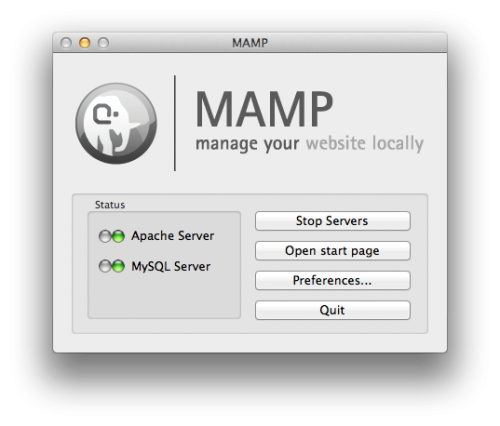
Step 5: Double click the MAMP icon to start the server.
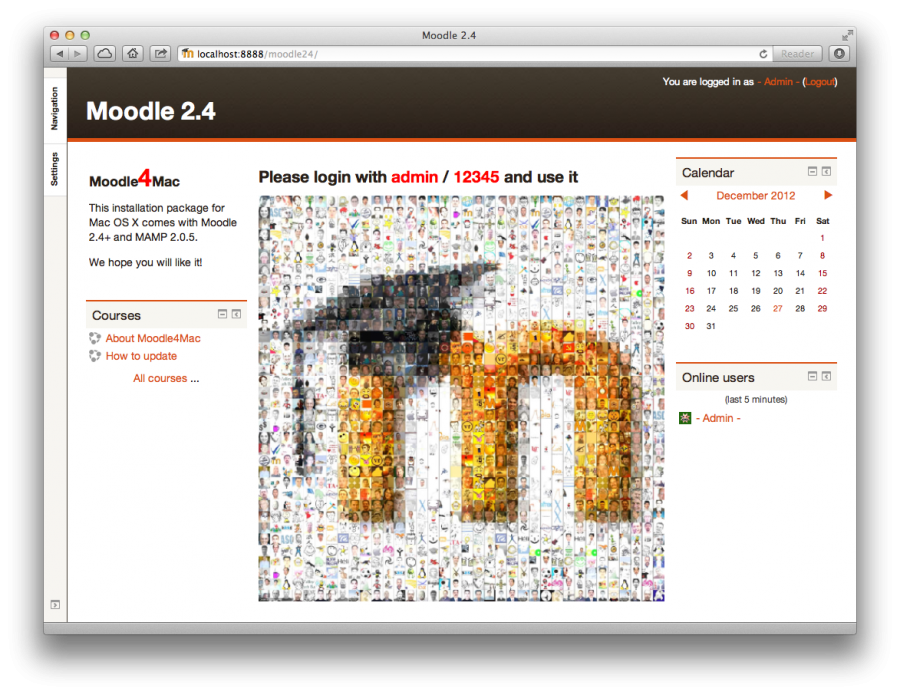
Step 6: Start your browser and type http://localhost:8888/moodle/ or http://127.0.0.1:8888/moodle/ into the address bar. You will start your preinstalled Moodle. You do not need to do any more installation. You are ready! Done ... hey, that was easy, wasn't it??
Step 7: Login with the username admin and the password 12345 and you will be the main administrator of your new local Moodle.
Paquetes de idiomas
Por defecto, Moodle4Mac está en idioma Inglés solamente; otros idiomas pueden instalarse. Por ejemplo, Usted podría querer cambiar su sitio al Español de México o al Español internacional. El paquete de idioma estándar es traduce (casi) todas las cadenas de caracteres de texto al Español internacional, mientras que el paquete "es_mx" traduce todas las cadenas al Español de México.
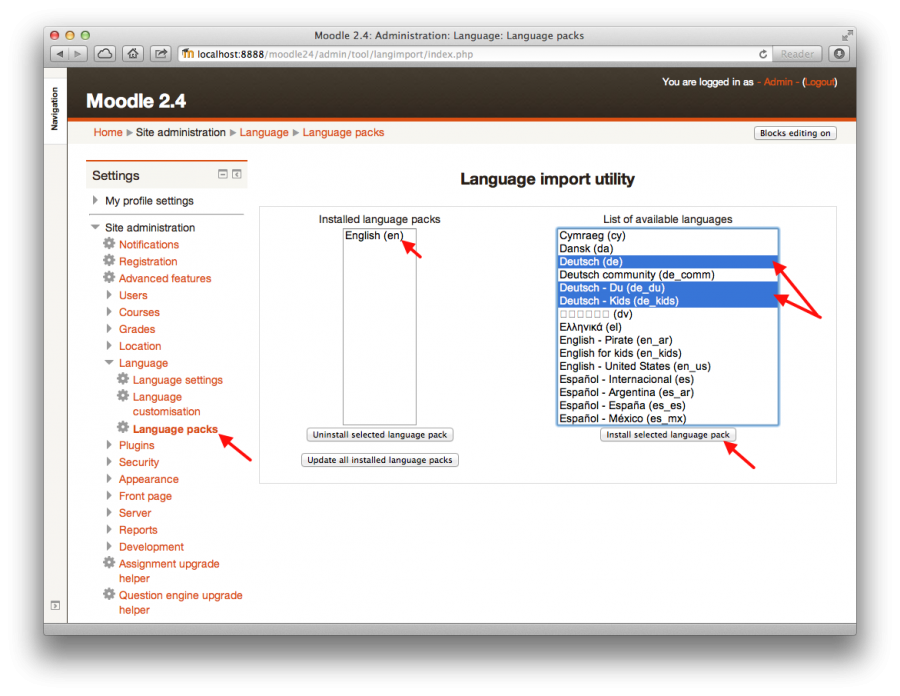
Los Paquetes de idioma adicionales pueden importarse via Administración > Administración del sitio > Idioma > Paquetes de idioma.
Después de importar el/los paquete(s) de idioma adicional(es), la configuración para el idioma por defecto para el usuario de la cuenta admin puede cambiarse al Español internacional o al Español de México.
Respaldar completamente su servidor
Just as you installed Moodle4Mac the first time on your computer, you can backup a customised system completely. Because all files and configurations are stored within the directory MAMP, you can easily backup your MAMP directory to an external disk. A snapshot of our Moodle site will be saved together with all settings and all the courses, and it can be recovered at any time in the same form.
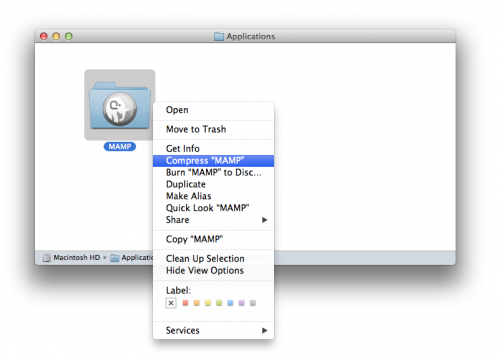
First stop all server processes like httpd and mysqld, then exit the MAMP program. After everything has stopped you can copy or move the MAMP directory. If you want to transfer MAMP to one or more other computers, you need to create a ZIP archive containing the MAMP directory. This ZIP archive can be copied anywhere ... to an USB memory stick, to a web server, on a burned CD ...
The target computer must be a Mac. On this Mac, unpack the ZIP archive and move the MAMP folder to the Application folder ... done! Everything is going exactly as in the section download and installation. In this way you can prepare your Moodle for a presentation or a training lab, and then distribute it.
Servidor en su red local
In various workshops we used Moodle4Mac as a quick server installation for our local network. Make sure that you change the passwords for Moodle and MySQL before you allow access to this server ... otherwise, you'll be amazed how creative your user group can be. Please read the safety instructions of Moodle4Mac.
In this section you will see all required settings to use the server in the local network. Only three steps are required. The first step is to change one line in the config.php for Moodle. In the second step you need to adjust the base address in Moodle. And in your third step you open the firewall for httpd.
To get your Moodle to another computer in your local network your Mac must be clearly addressable. You may use a fixed IP address or a DNS name. In local networks usually ip addresses of the private sections 10.xxx , 172.xxx , or 192.168.xx are assigned. If your Moodle4Mac gets an ip address this address must never change. Please do not use any static ip address if you do not know exactly what you do ... in case of doubt ask the administrator of the local network.
You can't use Moodle4Mac as a local server which is intended to work on different networks.
Editar config.php
For the following your computer should be a Mac in a computer lab. For this example it has the the fixed ip address 192.168.0.200. You must edit now the configuration /Applications/MAMP/htdocs/moodle24/config.php and change the wwwroot from localhost to 192.168.0.200. You must use your own address for your own network!!
After your changes you should get your Moodle with the address http://192.168.0.200/moodle24/
<?php  /// Moodle configuration file

unset($CFG);
global $CFG;
$CFG = new stdClass();

$CFG->dbtype    = 'mysqli';
$CFG->dblibrary = 'native';
$CFG->dbhost    = 'localhost';
$CFG->dbname    = 'moodle28';
$CFG->dbuser    = 'moodle';
$CFG->dbpass    = 'moodle';
$CFG->prefix    = 'mdl_';
$CFG->dboptions = array (
    'dbpersit' => 0,
    'dbport' => '',
    'dbsocket' => 1,
);

// localhost wird auf 192.168.0.200 geändert
// $CFG->wwwroot   = 'http://localhost:8888/moodle28';
$CFG->wwwroot   = 'http://192.168.0.200:8888/moodle28';
$CFG->dataroot  = '/Applications/MAMP/data/moodle28';
$CFG->admin     = 'admin';

$CFG->directorypermissions = 00777;  // try 02777 on a server in Safe Mode

require_once(dirname(__FILE__) . '/lib/setup.php');

// There is no php closing tag in this file,
// it is intentional because it prevents trailing whitespace problems!
Remplazra enlaces internos en Moodle
The original base address localhost is stored in many places within the database, your Moodle will not work properly with the modified base address. But images can not be displayed because they are accessible only from their correct address. From your local computer you might not see the problems but if you are outside on a computer getting access to the site.
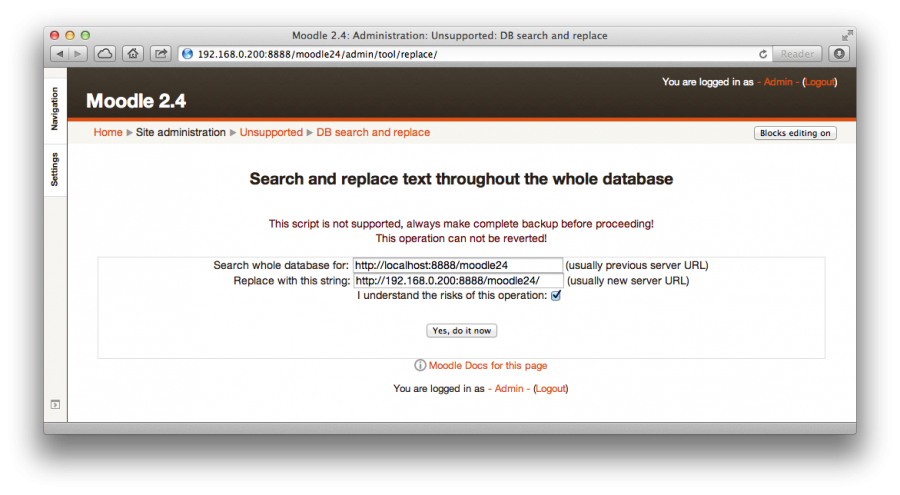
Moodle has a tool that allows you to replace the database entries from http://localhost:8888/moodle24/ to http://192.168.0.200:8888/moodle28/ .
You call this tool via the address http://192.168.0.200:8888/moodle28/admin/tool/replace/
No ... there is no menu option for it, probably because at thoughtless action with this tool also can shred the database ... in the first field enter http://localhost:8888/moodle28/, in the second field http://192.168.0.200:8888/moodle28/ (or the ip address that you have assigned in your installation). Use the correct spelling in both fields! With the hook you acknowledge that you know about the risk ...
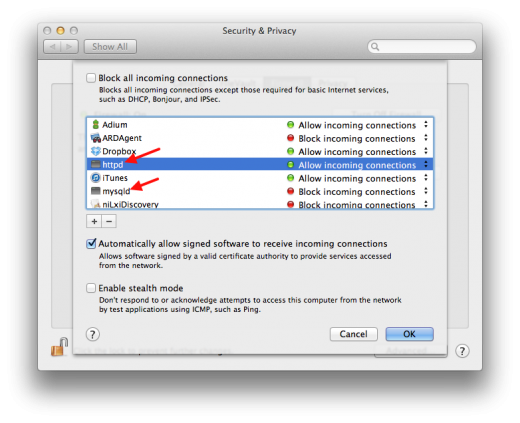
Abrir el cortafuegos (firewall)
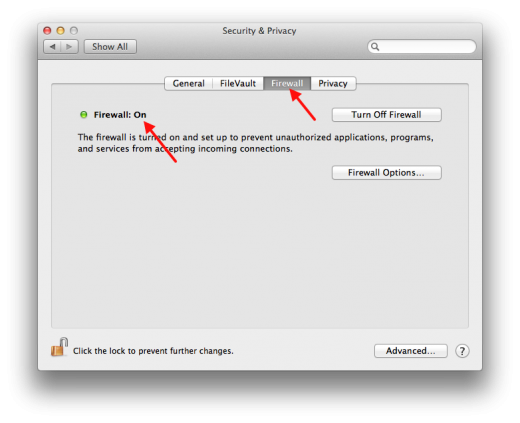
The firewall in OS X 10.6, 10.7, 10.8, and 10.9 can be enabled and disabled the System Preferences > Security > Firewall. If the firewall is disabled, although Moodle4Mac works without further settings in the network, but your computer is vulnerable to all requests from the outside ... the latter you should not do!
The the system firewall of OS X is a packet filter that determines for each program if a data packet should be passed or blocked. If the firewall is enabled every program must be entered on a list to respond to requests from outside. Moodle4Mac (or MAMP) uses the httpd program to deliver the sites. You will find httpd in the MAMP folder ... the path is /Application/MAMP/Library/bin/httpd. To enter httpd into the whitelist of the firewall you must click forward on this path ... no idea if there would be a configuration file which you can edit.
You need to get this setting for the firewall only once. If httpd is approved then all computers in your local network can access to Moodle ... by the way it is not important which is used by httpd ... port 8888 or port 80.
Do not open the firewall for mysqld because Moodle itself gets a connection to mysql on the server but no user should communicate with mysql directly from the client.
Conectar a Moodle con su red local
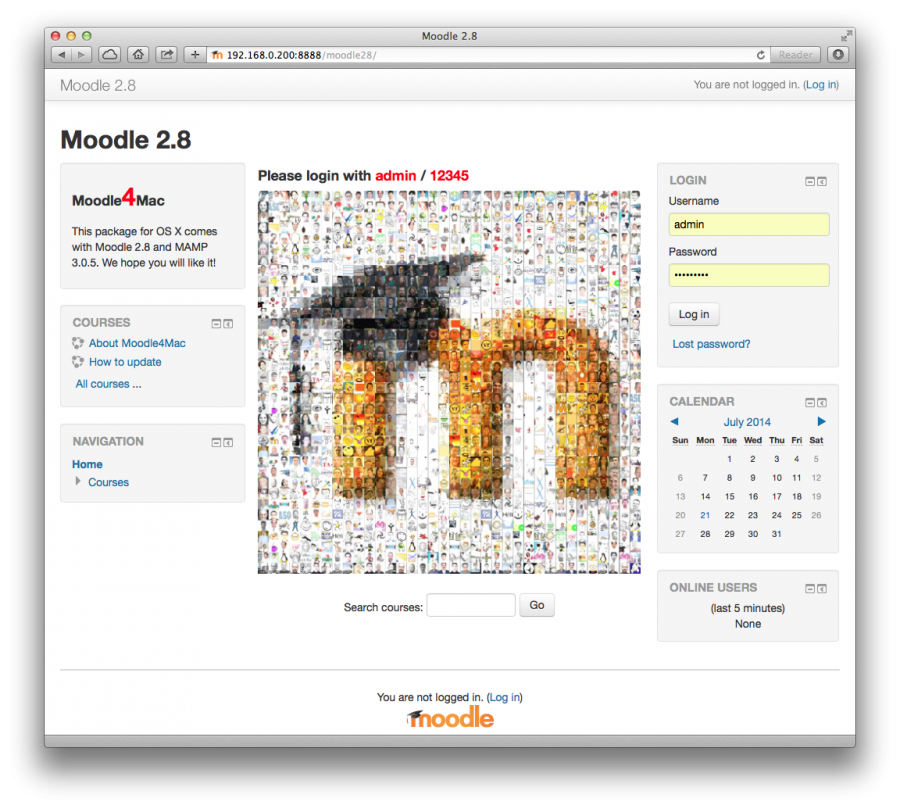
Your web server can be connected with the url http://192.168.0.200:8888/moodle28/ in your local network, where 192.168.0.200 is an example address which your Mac got from the local router. Usually such local numbers start with 10.x.x.x, 172.x.x.x, or 192.168.x.x and you will be able to do your settings even if they differ from this description.
When you got all settings right then all users from any computer in your network will see your Moodle via http://192.168.0.200:8888/moodle28/. And there will be no problem with any operating system.
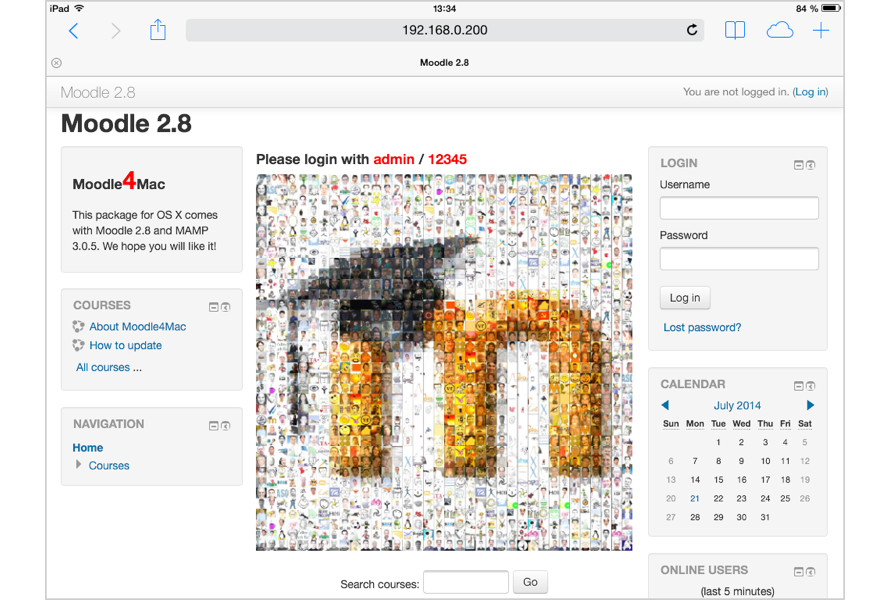
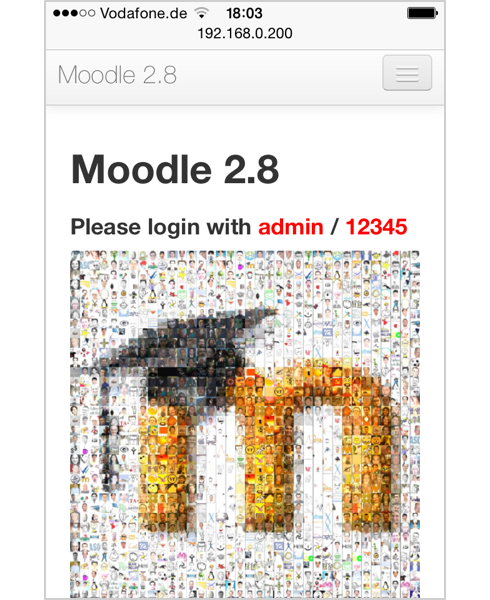
Conectar a Moodle en su red local con dispositivos móviles
Las siguientes imágenes muestran el sitio Moodle local con un iPad y un iPhone.
Algunas palabras acerca de la seguridad ...
¡MAMP no es seguro!
MAMP can be used for testing and developing web sites locally on a Mac computer. MAMP should not be used in a production environment because everybody knows all the settings and all the predefined passwords. MAMP is prepared for an easy start and not for a public web server!! But with some careful modifications, you can sufficiently secure MAMP and Moodle4Mac to use them in public development environments. Be careful!
¿Cómo asegurar MAMP?
Moodle4Mac is a preconfigured package where all the default settings are accessible. The password for the Moodle admin user is known and must necessarily be changed.
But please do not think that this should be enough! Your Moodle could also be attacked through the back door via the database. You definitely need to change the passwords of the database users root and moodle, because these passwords are known. Otherwise any hacker could change the password of the user account admin to get full access to all the information in Moodle. Alternatively, the hacker could also assign another user account to full admin access and he would be able to read all informations ... the main admin would probably not notice of such a change. It is also possible to delete the database completely if you know the root access to the database so that all information could be lost in this case.
Conexiones seguras con HTTPS
The text is copied from webopius web site (except for the last steps).
- stop MAMP
- backup your /Applications/MAMP/conf folder
- open a terminal
- enter: openssl genrsa -des3 -out server.key 1024. Enter a password twice.
- enter: openssl req -new -key server.key -out server.csr. Enter the previous password. You need to answer some questions. Common name expects your local name (for me it was jerome.moodle.local)
- enter: openssl x509 -req -days 365 -in server.csr -signkey server.key -out server.crt
- enter: cp server.key server.tmp
- enter: openssl rsa -in server.tmp -out server.key. Enter the previous password.
- enter: mkdir /Applications/MAMP/conf/ssl
- enter: cp server.crt /Applications/MAMP/conf/ssl
- enter: cp server.key /Applications/MAMP/conf/ssl
- Edit Applications/MAMP/conf/apache/ssl.conf:
- comment <IfDefine SSL> tag to closing tag (but not the content)
- SSLCertificateFile /Applications/MAMP/conf/ssl/server.crt
- SSLCertificateKeyFile /Applications/MAMP/conf/ssl/server.key
- Edit /Applications/MAMP/conf/apache/httpd.conf:
- Listen 80
- comment <IfDefine SSL> tag to closing tag (but not the content)
- Edit /Application/MAMP/conf/apache/ssl.conf, change the document root (DocumentRoot) for the one you have into /Application/MAMP/conf/apache/httpd.conf
- in a terminal enter: cd /Applications/MAMP/bin/apache2/bin
- enter: sudo ./apachectl startssl
- start MAMP
From now MAMP should start/stop with the SSL support activated. Note that these steps have only be tested with Apache port set to 80 into MAMP preferences.
Como actualizar su Moodle4Mac
It is very simple to update your locally installed Moodle. You start the update with a double click and everything happens automatically. All courses rest in Moodle. You do not need to renew your local Moodle completely ... you only get the new Moodle files.
Update the local Moodle via Git
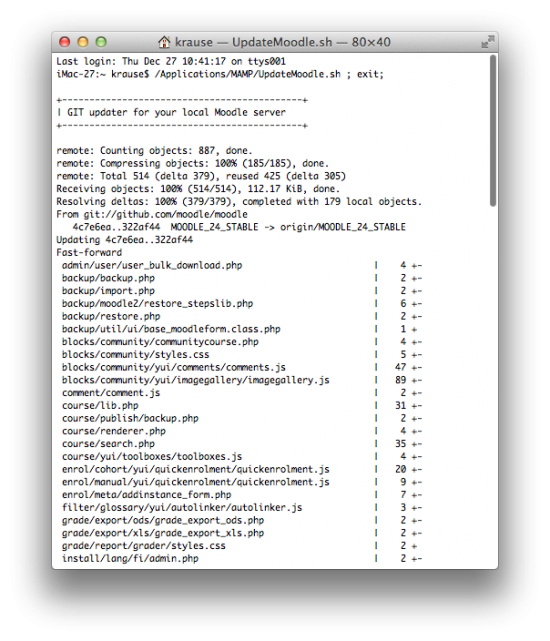
Make sure that the Git program is installed on your Mac (see instructions below). You also need an Internet connection because the files are downloaded from the Moodle update server. A double click on the icon UpdateMoodle.sh starts the script and updating occurs automatically. That's really all ... could it be easier?
The Git program connects to the Moodle server and controls which files are new, which have changed and which have been deleted. The transmission time depends on the internet connection. With Git only really necessary files will be transmitted. If the transfer takes too long, you can abort the process with <ctrl>-c. You can easily start the update again later.
Control mediante script ... vista interna ...
If you want to see what is inside the document UpdateMoodle.sh please feel free to open it with a text editor, e.g. TextWrangler.
It is only a text file but it uses a OS X feature to open and execute the script with the Terminal program. You don't need to learn anything ... doubleclick to update everything.
#! /bin/sh
#
#  This GIT installer for Mac OS X is part
#  of the installation package Moodle4Mac
#
#  20150511 - Ralf Krause
#

echo
echo "+--------------------------------------------+"
echo "| GIT updater for your local Moodle server"
echo "+--------------------------------------------+"
echo

cd /Applications/MAMP/htdocs

if ! test -e moodle28/.git ; then
    ## the first git update must get everything including .git
    git clone --depth 1 -b MOODLE_28_STABLE git://github.com/moodle/moodle.git moodle28-git
    if test -e moodle28-git ; then
		if test -e moodle28 ; then
			if test -e moodle28/config.php ; then
				cp moodle28/config.php moodle28-git/.
			fi
			DATE=`date +%Y%m%d-%H%M`
			mv moodle28 moodle28-$DATE
		fi
        mv moodle28-git moodle28
    fi
    ## the old folder can be deleted now
    ## if you want to do this please remove '##' from the following line
    ## sudo rm -R moodle28-*
else
    ## the next git update only gets the new files
    cd moodle28
    git pull
    cd ..
fi
The different versions of the script UpdateMoodle.sh only differ in two parameters ... first we need to know the right folder for Moodle and second we must use the correct git tag for the Moodle version. The shown script upgrades Moodle 2.8.
- Moodle 3.9 uses MOODLE_39_STABLE
- Moodle 3.11 uses MOODLE_311_STABLE
- Moodle 4.0 uses MOODLE_400_STABLE
- Moodle 4.1 uses MOODLE_401_STABLE
- Moodle 4.2 uses MOODLE_402_STABLE
- Moodle 4.3dev uses master
Instalar Git
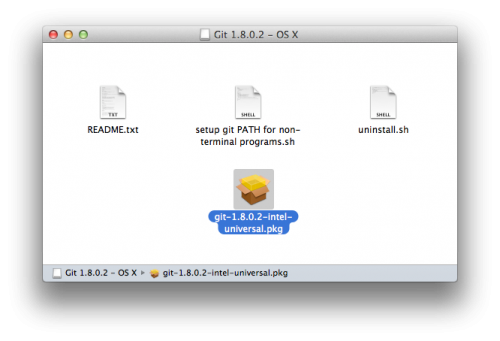
Download the Git program from http://git-scm.com/download/ ... it's free and open source.
Open the disk image and doubleclick the installer git-xxx-osx.pkg. If you want to know more about Git then read the Git documentation on their web site ... but if you only want to update Moodle the script UpdateMoodle.sh should also work without reading
