Certificate templates
Overview
Certificate templates act as blueprints for Certificates when they are issued.
Certificate templates contain static elements (such as company name or logo), dynamic elements (such as username or certification title), and verification elements (such as code or digital signature). Based on the certification template, individual certificates are generated and assigned to users.
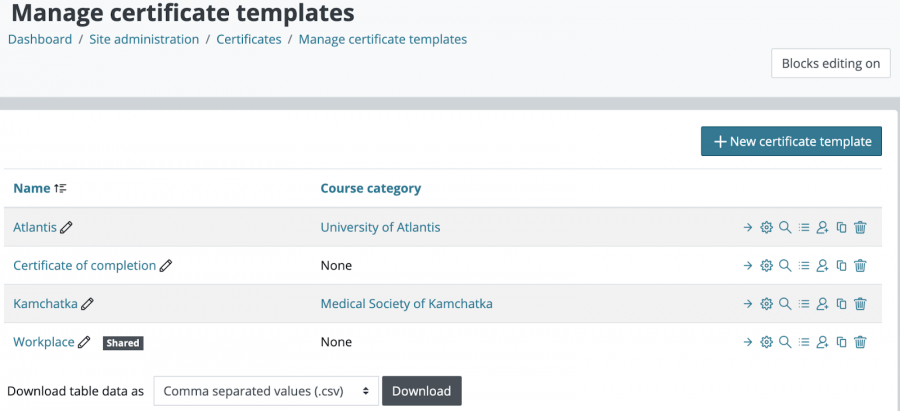
Certificate templates can be accessed instantly from the Workplace launcher or via Site administration > Certificates > Manage certificate templates. The permission Manage certificates (tool/certificate:manage) has to be granted to access this feature.
You see a list of certificate templates. On the right of each item, you see several actions, some of which are the usual Workplace icons (Edit, Details, Preview, Duplicate, and Delete), while others are specific to certificates (Certificates issued and Issue certificates).
Adding a new certificate template
To create a new certificate template, select the New certificate template button.
- Name: The certificate template name doesn't have to be unique, but it is recommended not to use the same name more than once.
- Course category: The certificate is available in the tenant that uses the selected course category, as defined in the tenant settings. If the option Available in sub-categories and courses is enabled, users (with permission) will be able to use this template inside all courses in this category as well as sub-categories. If this option is disabled, the template will be available in the selected category. When no course category is selected, the certificate is shared across all tenants. Note, that this behaviour differs from other tools supporting multi-tenancy because certificates are linked to course categories and not tenants. That means that tenant users have access to certificates defined in their tenant's category or shared certificates defined at system level.
- Page width and Page height: The default values depend on your server locale and use landscape format. If you want to create a certificate in portrait format, you will need to change the values round. For reference, the dimensions of A4 are 297 mm x 210 mm; the ones for letter size are 279 mm x 216 mm, respectively.
- Left margin and Right margin: These are for the edge width on the left and right in mm. The default is 0.
As soon as you save the certificate template, you are directed to the certificate designer which lets you add certificate elements.
Designing certificates
The certificate designer lets you create multi-page certificate templates that include static elements, such as a company logo, and dynamic elements, for example, the date of issue or the username, and verification elements, for instance a QR code.
The following controls are available in the certificate designer:
- Adding elements to the certificate template By changing the order of the elements using the standard Move icon it will change which element is displayed in front of another. Each item can be renamed via the inline editing option or by simply clicking the label. The Settings symbol opens the parameters pop-up window for each item, while the Delete icon removes the entry.
- Adding a new page You have to specify the page height and width, as well as the page margins. The default values are the ones for the current page.
- Expand and collapse the current page
- Page actions Move up and down (only multi-page certificates), Settings (dimensions of the page), and Delete (only multi-page certificates)
- Certificate canvas, for dragging and dropping elements
Each item has an Element name, and this will be used to identify this element when you're editing a certificate. Note that this will not be displayed on the certificate.
Certificate elements
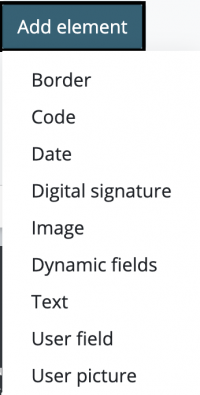
To add certificate elements, select the Add element button and select the element you wish to place on the certificate template.
Each element has an Element name which is used to identify the element when editing a certificate template. Note that the name will not be displayed on the certificate itself.
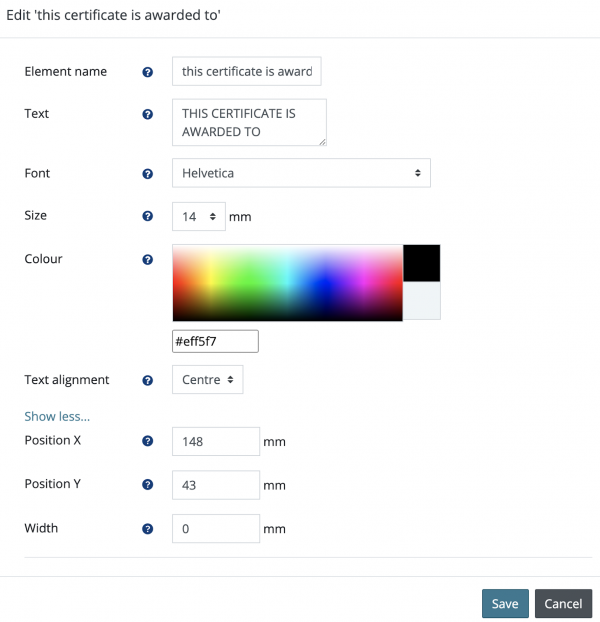
There are a number of settings which are available for all textual elements:
- Font: The font of the text (Free Sans by default)
- Size: The size of the text (in mm)
- Colour: The colour of the text
- Text alignment: Right alignment of the text means that the element coordinates' Position X and Position Y will refer to the top-right corner of the textbox; in Center alignment, they will refer to the top middle, and in Left alignment, they will refer to the top-left corner, respectively.
Some of the following additional settings might be located in the Show more… section:
- Position X and Position Y: The apex at the top-left of the certificate template, that is the position in mm from the top left corner you wish the element’s reference point to locate in the x and y direction, respectively. Usually, you position your element by dragging and dropping it onto the canvas; however, sometimes, it is useful to position elements manually, especially when you need to align multiple items horizontally or vertically.
- Width: This setting is useful if you wish to scale your element to a particular size, for example, 210 mm to cover the full width of an A4 page. Zero (0) means there is no width-constraint, that is, the element can run over the margins of the page.
- Height: Only available for images. If set to the default value of zero (0) the height will be calculated automatically.
The list of elements shown in the Add element menu can be adjusted in Site administration > Plugins > Admin tools > Manage certificate element plugins.
Adding static elements
Static elements are fixed for every certificate issued from the certificate template. They will be identical on every certificate generated.
Border
The Border element lets you specify the Colour and Width of a certificate frame.
The Width element of the border is specified in mm (default is 1). The default Colour is black (#000000).
A certificate template can contain multiple border elements. A border cannot be positioned on the canvas; it will be placed automatically.
Image
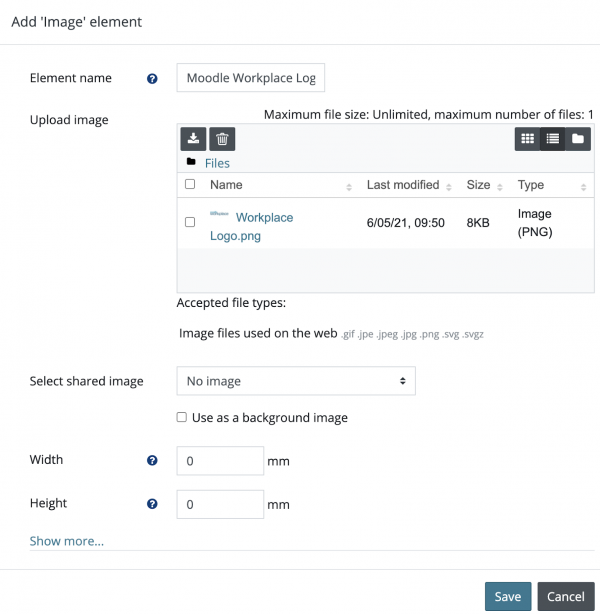
The Image element lets you place a picture on the certificate. You need to upload an image in one of the supported file types: GIF, JPG, JPEG, PNG, SVG, and SVGZ. Alternatively, you can select a shared image from the pool of images that are available site-wide (see Certificate images).
If you tick the Use as a background image box, the image will be stretched across the entire certificate and shown behind all other elements. It is recommended that you use a picture with added transparency when using one as a background. Once the background image option has been selected, the options Width, Height, Position X and Position Y are not editable anymore.
Text
The Text element provides you with a customized label that can be placed freely on the canvas.
Adding dynamic elements
Dynamic elements are going to be replaced with specific data for every certificate that will be issued from the certificate template. Each dynamic element acts as a mini placeholder on the certificate template. Typical dynamic values include the name of the receiver, the title of a program, or simply the date when the certificate will be issued.
Date
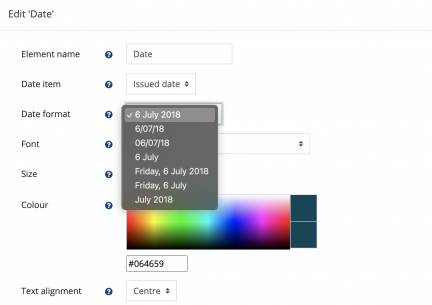
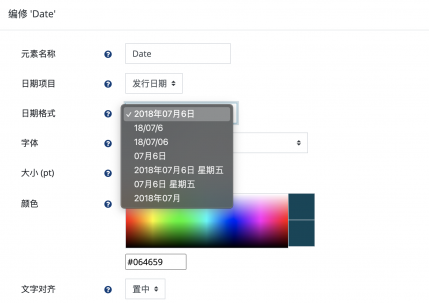
The Date element adds a Date item to the certificate template. This can either be the Issued date (when the PDF will be generated) or the Expiry date (when the validity of the certificate ends). You can also choose from one of the seven available Date format options.
Note that the Date format options will be adjusted according to the active language pack while you're editing the certificate template.
Dynamic fields
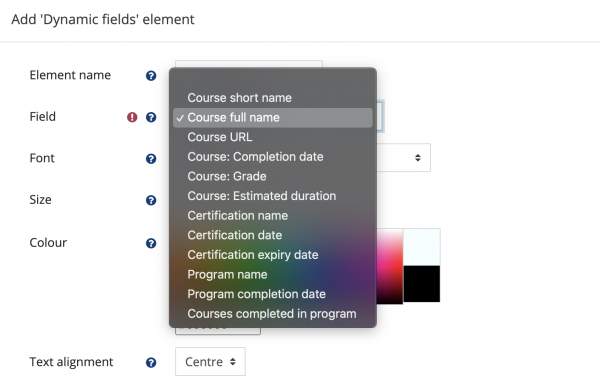
The Dynamic fields element provides a number of placeholders which will be populated when a certificate is created automatically, for example, via the Course certificate or Dynamic rules.
There are three types of fields that can be placed on the certificate template:
- Course
- Course short name
- Course full name
- Course URL
- Course Completion date
- Course Grade
- All course custom fields (here Course Estimated duration)
- Certification
- Certification name
- Certification date
- Certification expiry date
- Program
- Program name
- Program completion date
- Courses completed in program
If you want to select multiple related fields – for instance, all three certification fields – you will need to add a separate element for each field.
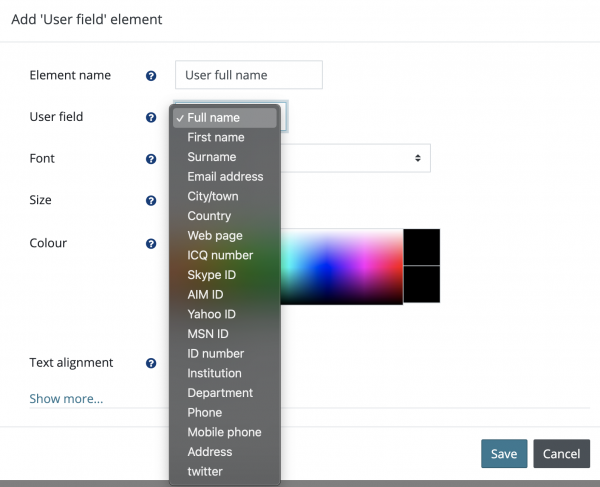
User field
The User field type supports all plain text fields (that is, no rich text/HTML text fields) in the user profile. This also includes custom profile fields (here the user’s Twitter handle).
If you want to select multiple user fields, for instance, name and country, you will need to add a separate element for each field.
User picture
The User picture element will dynamically print the user profile picture from the issued user in the certificate. User pictures are handled in the same way as elements of the Image type; the only difference is that the picture cannot be selected since it has already been set in the user profile.
Adding validation elements
Certificates are regularly issued in settings where their validity is critical. Examples include diplomas, compliance documents, and qualification credentials. To ensure that the certificates have been generated by the Moodle Workplace system, two validation mechanisms are offered:
- A unique Code
- Digital signatures, which are based on self-signed CRT certificates that follow the X.509 standard
Code
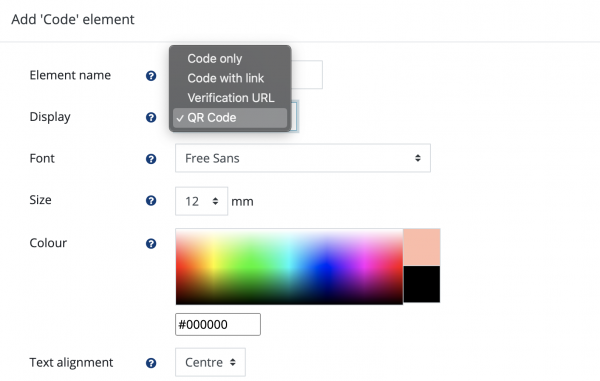
Every generated certificate has a unique Code that is recorded in the Moodle Workplace database. Each code is made up of 10 digits plus two uppercase letters, for instance, 0123456789AB. The last two letters are the initials of the certified user. This code can be displayed on the certificate in the following four different formats:
- Code only (default): The alphanumeric code is displayed as plain text
- Code with link: The alphanumeric code is displayed and links to the verification page
- Verification URL: The actual link to the verification page will be displayed, but it won't be clickable. This option should be used on printed certificates where it is not possible to click the link.
- QR Code: A QR code is displayed that redirects the user to the verification page when scanned by a QR reader
The verification of certificates takes place in Site administration > Certificates > Verify certificates.
Digital signature
When a certificate is issued, a PDF document is generated. Files in PDF format can be signed with a self-signed certificate in order to prevent forgery and falsification of certificates. To simplify this mechanism, a dedicated certificate element is provided for inclusion in certificate templates.
It is common to sign an image in a document using a logo, a signature, or a seal, although it is possible to create signed PDFs with no in-document visualization. The image parameters are identical to the Image element.
The only compulsory field is the Digital signature itself, which is a CRT file. You will either have to use an existing CRT file from your organization or generate a self-signed certificate. Follow these three steps via the Linux command line:
openssl req -x509 -nodes -days 365000 -newkey rsa:1024 -keyout workplace.crt -out workplace.crt
openssl pkcs12 -export -in workplace.crt -out workplace.p12
openssl pkcs12 -in workplace.p12 -out workplace.crt -nodes
The first command creates a self-signed signature that is valid for 10 years (365000 days) and is RSA-encrypted with 1024 bytes. It contains both the private key and the certificate part. The second step is to export the CRT file in P12 format before converting it into a PEM file. You will need to provide the CRT file (here, workplace.crt) to the digital signature on your certificate, which is using the standard key part to tag the certificate as being valid and verifiable. Internally, the PDF generator uses functionality available in the TCPDF library.
The other fields (Signature name, Signature password, Signature location, Signature reason, and Signature contact info) provide information about the CRT file. While they are all optional, it is recommended to provide these.
