Certificates: Difference between revisions
Helen Foster (talk | contribs) m (→Through the activity Course certificate: link edit) |
|||
| (6 intermediate revisions by 2 users not shown) | |||
| Line 1: | Line 1: | ||
{{ | {{WorkplaceNonExclusive}} | ||
= Overview = | = Overview = | ||
Certificates are diplomas that can be issued upon completion of programs and certifications. Site-wide certificates can be created in Moodle Workplace, and certificates can be shared among tenants. The certificate is based on the Moodle custom certificate plug-in, but with added capabilities relevant to workplace tenants, and a completely redesigned interface. | Certificates are diplomas that can be issued upon completion of programs and certifications. Site-wide certificates can be created in Moodle Workplace, and certificates can be shared among tenants. The certificate is based on the Moodle custom certificate plug-in, but with added capabilities relevant to workplace tenants, and a completely redesigned interface. | ||
| Line 18: | Line 18: | ||
We click on “Add elements” to choose which element you want to include on the certificate. By changing the order of the elements in the list it will change which element is displayed in front of another. | We click on “Add elements” to choose which element you want to include on the certificate. By changing the order of the elements in the list it will change which element is displayed in front of another. | ||
[[File:wp-ce-add-element.png]] | [[File:wp-ce-add-element.png]] | ||
== | [[File:wp-certificate-elements-list.png|thumb|Certificate elements available by default]] | ||
== Border == | |||
Add a border by setting its colour and width. | |||
== Code == | |||
Add different kinds of verification codes: | |||
* Code only: prints an alphanumeric code in the certificate. | |||
* Code with link: prints an alphanumeric code that will lead to the verification page when clicked. | |||
* Verification URL: prints the whole verification page URL in the certificate. | |||
* QR Code: prints a QR code that leads to the verification page when scanned by a QR reader. | |||
== Date == | |||
Add to the certificate the "Issued date" and/or the "Expiry date". | |||
== Digital signature == | |||
Add to the certificate either a image (.jpg, .png, .gif, etc.) or a digital signature file (.crt). | |||
[[File:cert-upload-image.png|thumb|Uploading a background image]] | |||
== Image == | |||
Click on “Image” to include images to the certificate template. To add background images select an image file and enable “Use as a background image”. | Click on “Image” to include images to the certificate template. To add background images select an image file and enable “Use as a background image”. | ||
[[ | == Dynamic fields == | ||
Other plugins can depend on the Certificate manager to issue certificates based on some criteria, for example, the [[Certificate course activity|Course certificate (mod_coursecertificate)]] is an activity module that will automatically issue certificates when the student satisfies the access restrictions. The mod_coursecertificate plugin will send the course name and completion information to the tool_certificate plugin, so if these fields are included in the template, they will be displayed on the certificate. | |||
In Moodle Workplace, this information can be sent to the certificate using Dynamic Rules as well. See [[Certificates#Using_Dynamic_rules|Using Dynamic rules]] section below for more information. | |||
== | == Text == | ||
Adds a customised text to the certificate with the selected font, colour and size. | |||
== | == User field == | ||
Add | Add a user field (Full name, Email address, Country, etc.) to the certificate. The certificate will dynamically print the data from the issued user in the certificate. | ||
== | == User picture == | ||
Add the user picture to the certificate. The certificate will dynamically print the data from the issued user in the certificate. | |||
== | == Formating elements == | ||
By clicking in the elements you will be able to edit its properties like colour or font size. You may also use drag and drop to place the elements wherever you want. | By clicking in the elements you will be able to edit its properties like colour or font size. You may also use drag and drop to place the elements wherever you want. | ||
| Line 54: | Line 76: | ||
== Through the activity Course certificate == | == Through the activity Course certificate == | ||
[[File:wp-course-certificate-activity.png]] | [[File:wp-course-certificate-activity.png]] | ||
You can also add the [[ | You can also add the [[Course certificate activity]] so students can issue themselves the certificate when the activity is unlocked. The activity can also be set to issue the certificate automatically to users that have access to it. | ||
Latest revision as of 13:49, 11 December 2020
![]() This feature is part of Moodle Workplace, which is available through Moodle Partners, but is also available for Moodle LMS.
This feature is part of Moodle Workplace, which is available through Moodle Partners, but is also available for Moodle LMS.
This documentation is valid for both Moodle Workplace and LMS, but some features could be available for Moodle Workplace only.
Overview
Certificates are diplomas that can be issued upon completion of programs and certifications. Site-wide certificates can be created in Moodle Workplace, and certificates can be shared among tenants. The certificate is based on the Moodle custom certificate plug-in, but with added capabilities relevant to workplace tenants, and a completely redesigned interface.
This Workplace feature is also available in Moodle LMS (see Course certificate and Certificate manager plugins) but some features such as the certificate issuing through Dynamic Rules are only available in Moodle Workplace.
Adding a new certificate template
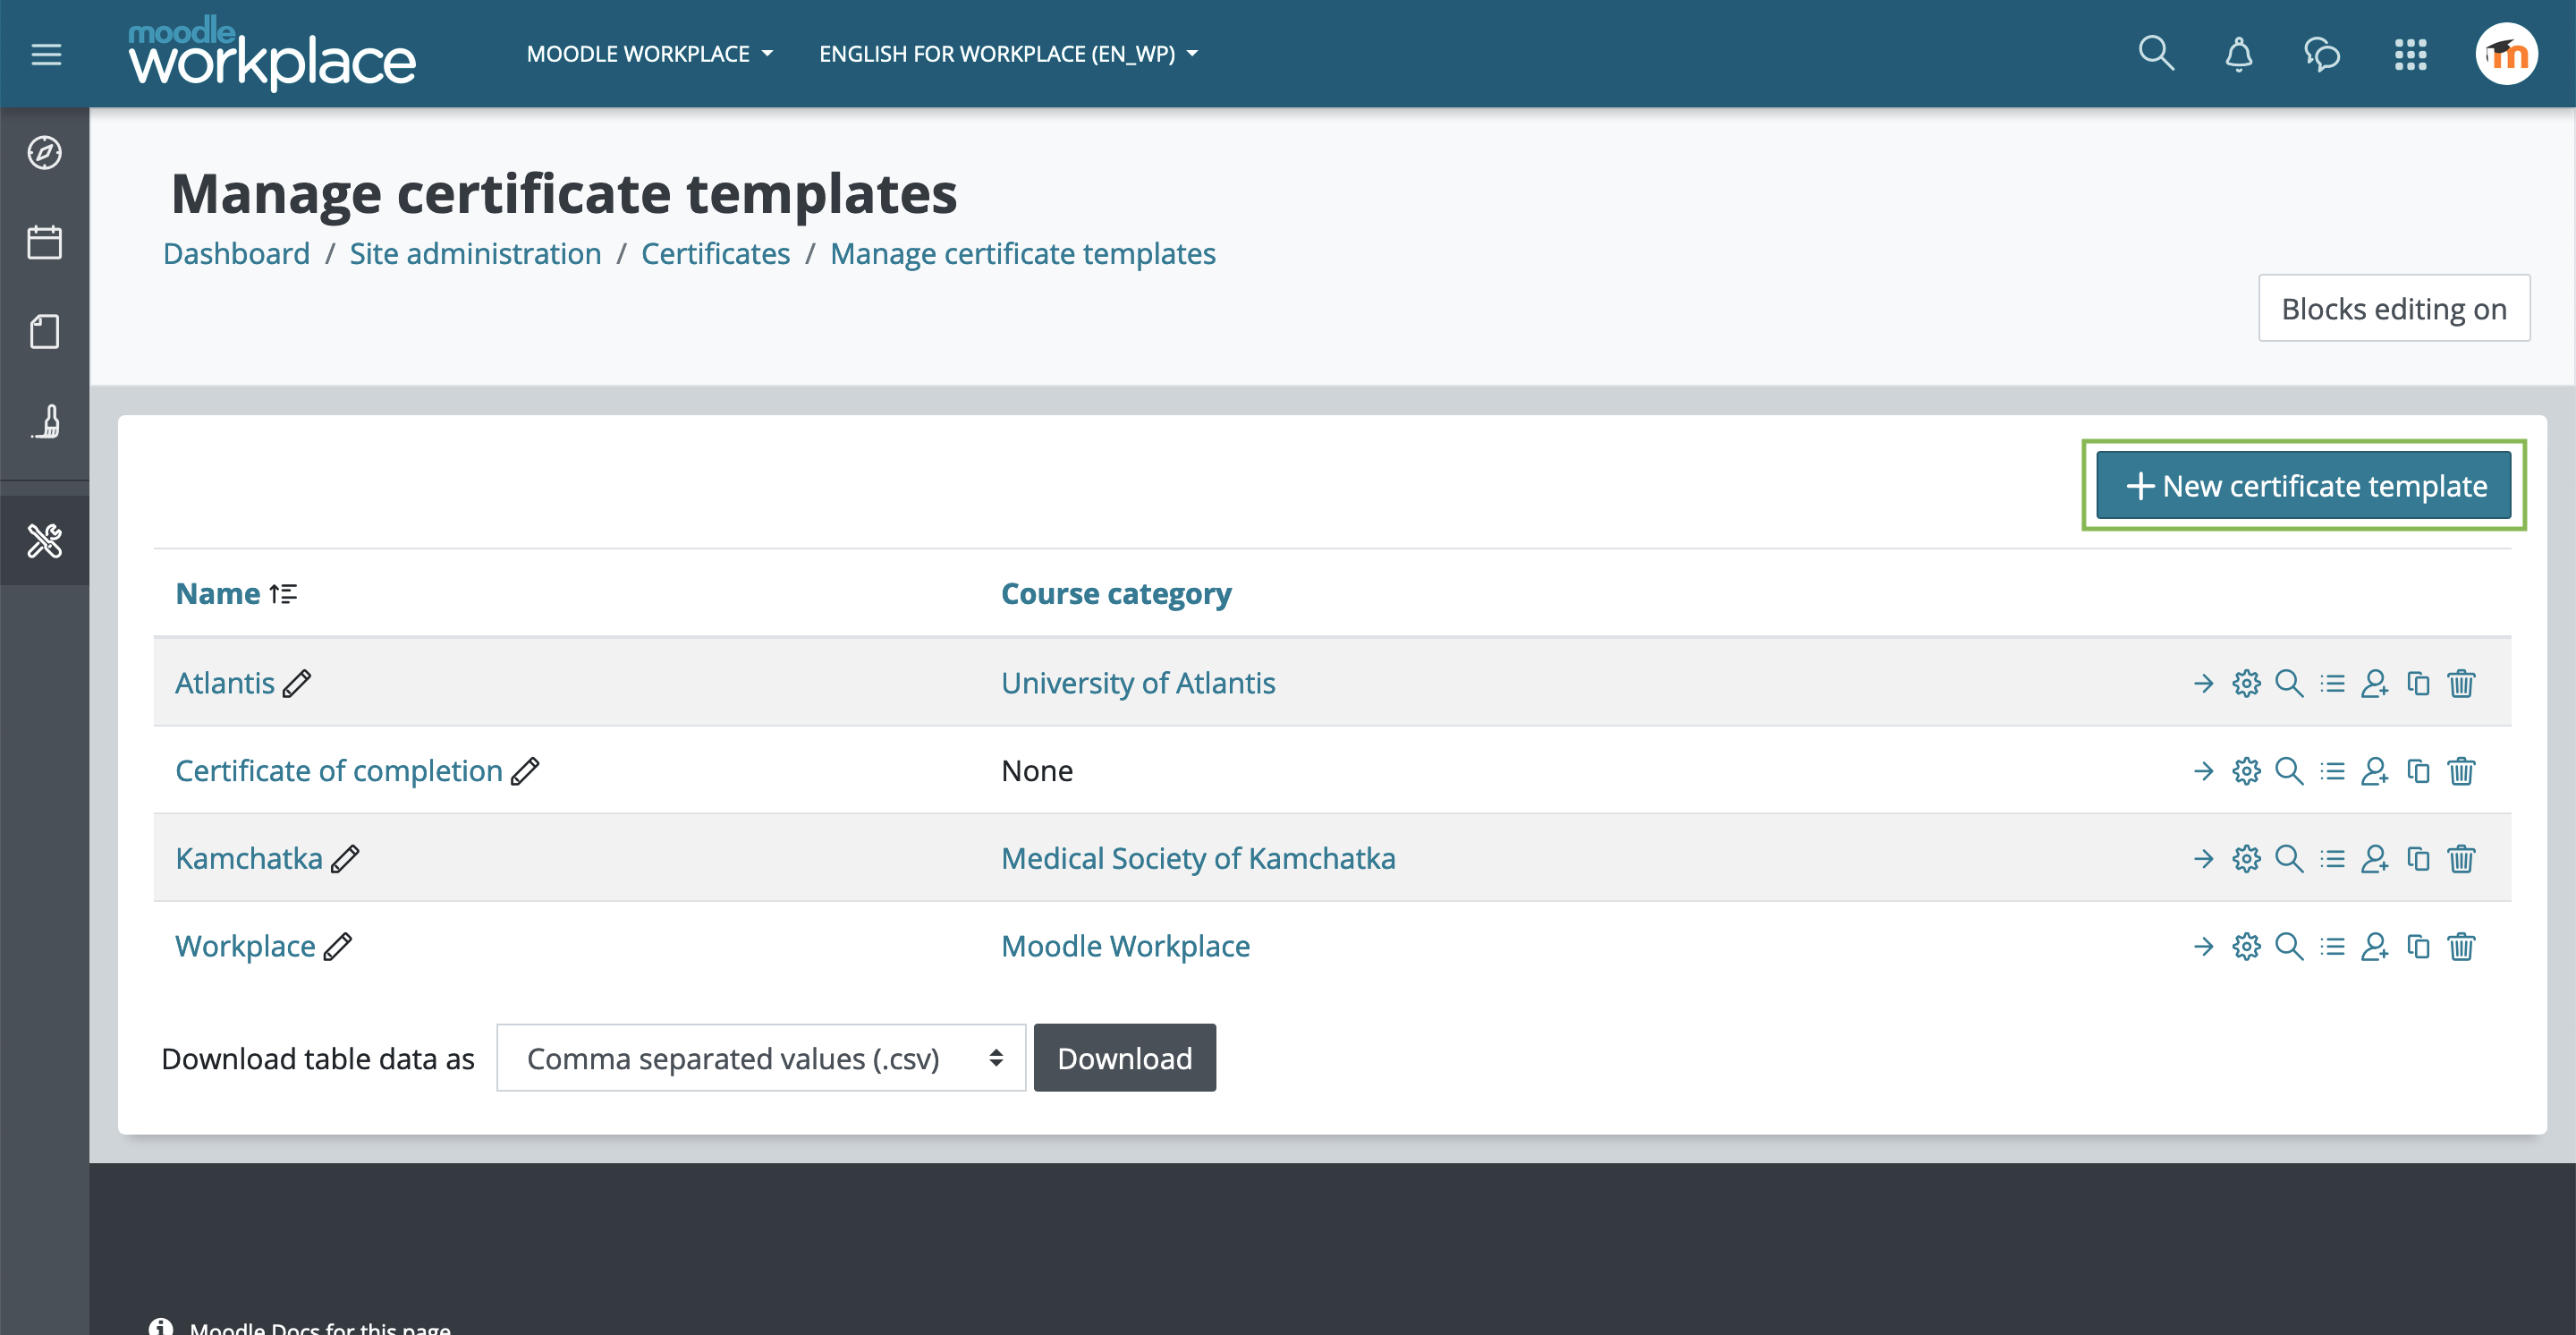
Certificates may be accessed instantly from the Workplace launcher. It can also be found in Site administration > Certificates > Manage certificate templates.
Click in the "New certificate template" button to add a new certificate template. Notice that it's called "template" because the actual certificates will be issued later by the Certificate course activity or Dynamic rules.
Add elements to a certificate template
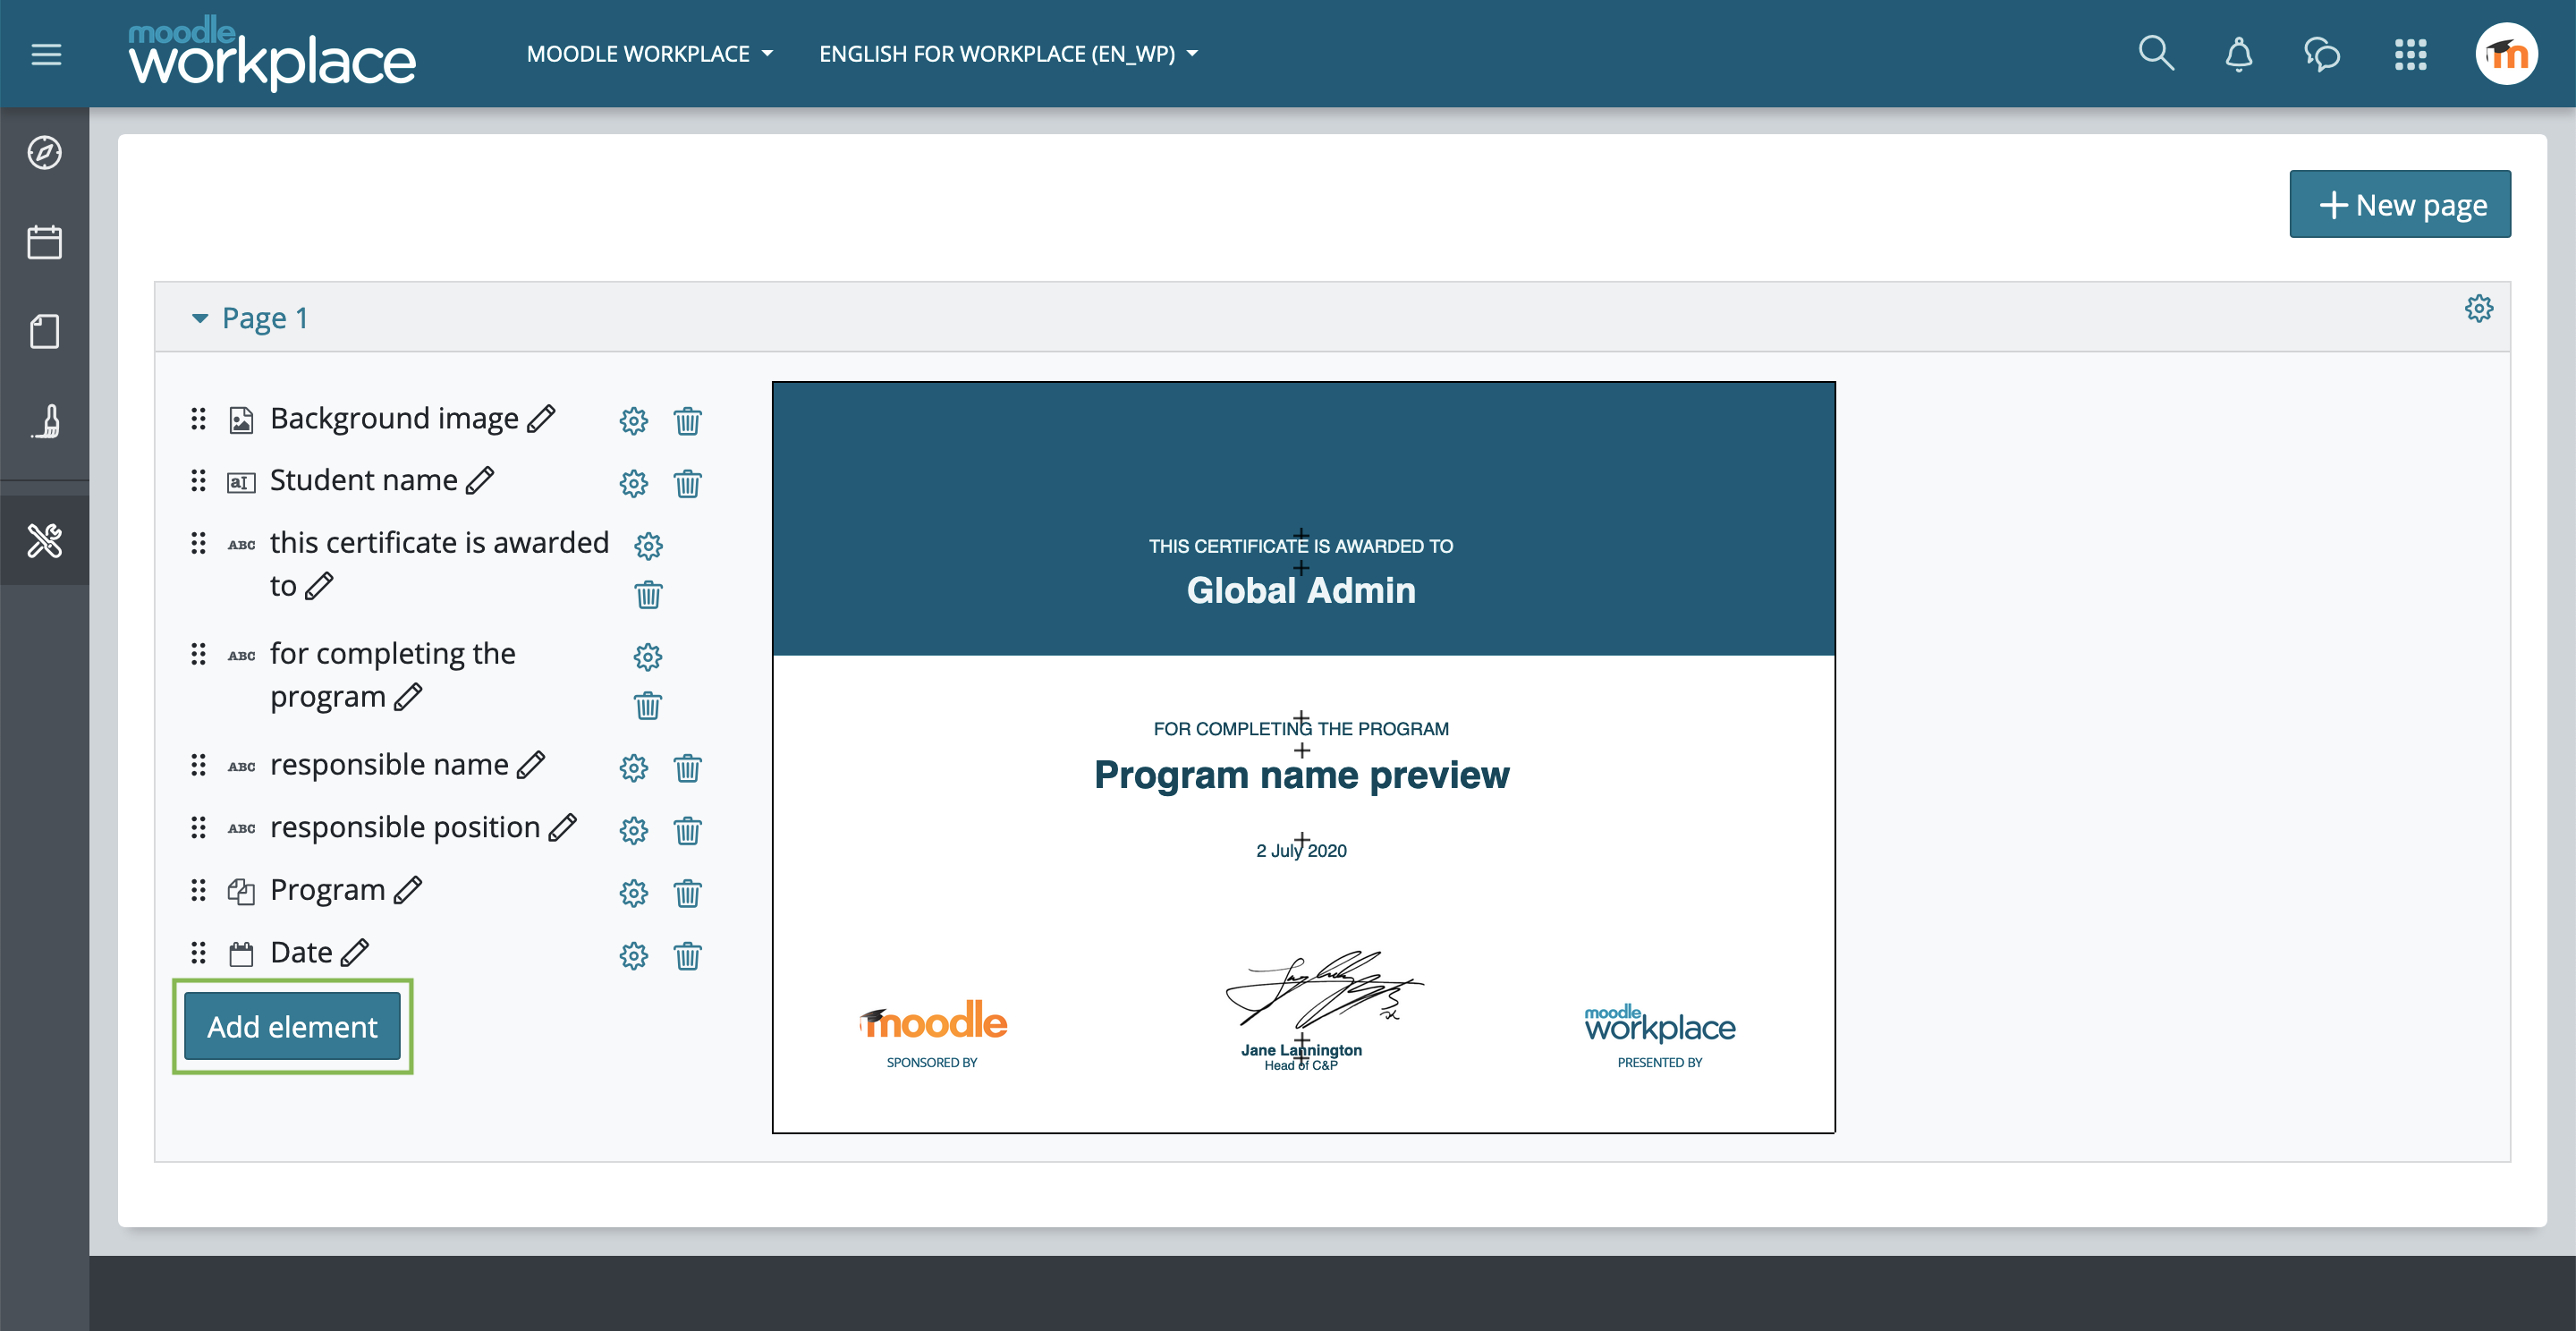
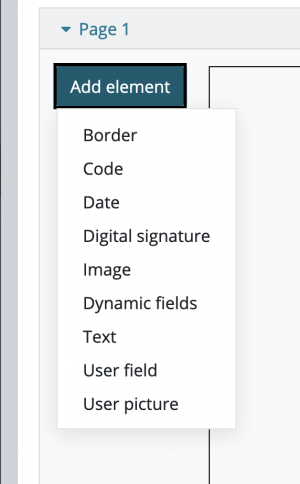
We click on “Add elements” to choose which element you want to include on the certificate. By changing the order of the elements in the list it will change which element is displayed in front of another.
Border
Add a border by setting its colour and width.
Code
Add different kinds of verification codes:
- Code only: prints an alphanumeric code in the certificate.
- Code with link: prints an alphanumeric code that will lead to the verification page when clicked.
- Verification URL: prints the whole verification page URL in the certificate.
- QR Code: prints a QR code that leads to the verification page when scanned by a QR reader.
Date
Add to the certificate the "Issued date" and/or the "Expiry date".
Digital signature
Add to the certificate either a image (.jpg, .png, .gif, etc.) or a digital signature file (.crt).
Image
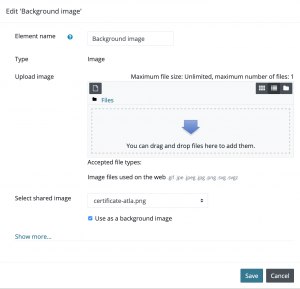
Click on “Image” to include images to the certificate template. To add background images select an image file and enable “Use as a background image”.
Dynamic fields
Other plugins can depend on the Certificate manager to issue certificates based on some criteria, for example, the Course certificate (mod_coursecertificate) is an activity module that will automatically issue certificates when the student satisfies the access restrictions. The mod_coursecertificate plugin will send the course name and completion information to the tool_certificate plugin, so if these fields are included in the template, they will be displayed on the certificate.
In Moodle Workplace, this information can be sent to the certificate using Dynamic Rules as well. See Using Dynamic rules section below for more information.
Text
Adds a customised text to the certificate with the selected font, colour and size.
User field
Add a user field (Full name, Email address, Country, etc.) to the certificate. The certificate will dynamically print the data from the issued user in the certificate.
User picture
Add the user picture to the certificate. The certificate will dynamically print the data from the issued user in the certificate.
Formating elements
By clicking in the elements you will be able to edit its properties like colour or font size. You may also use drag and drop to place the elements wherever you want.
Add a new page
Certificates can have more than one page. Just click on the "New page" button to add it.
Issue certificates
As mentioned above, the certificate templates may be issued to users through the following methods.
Manually
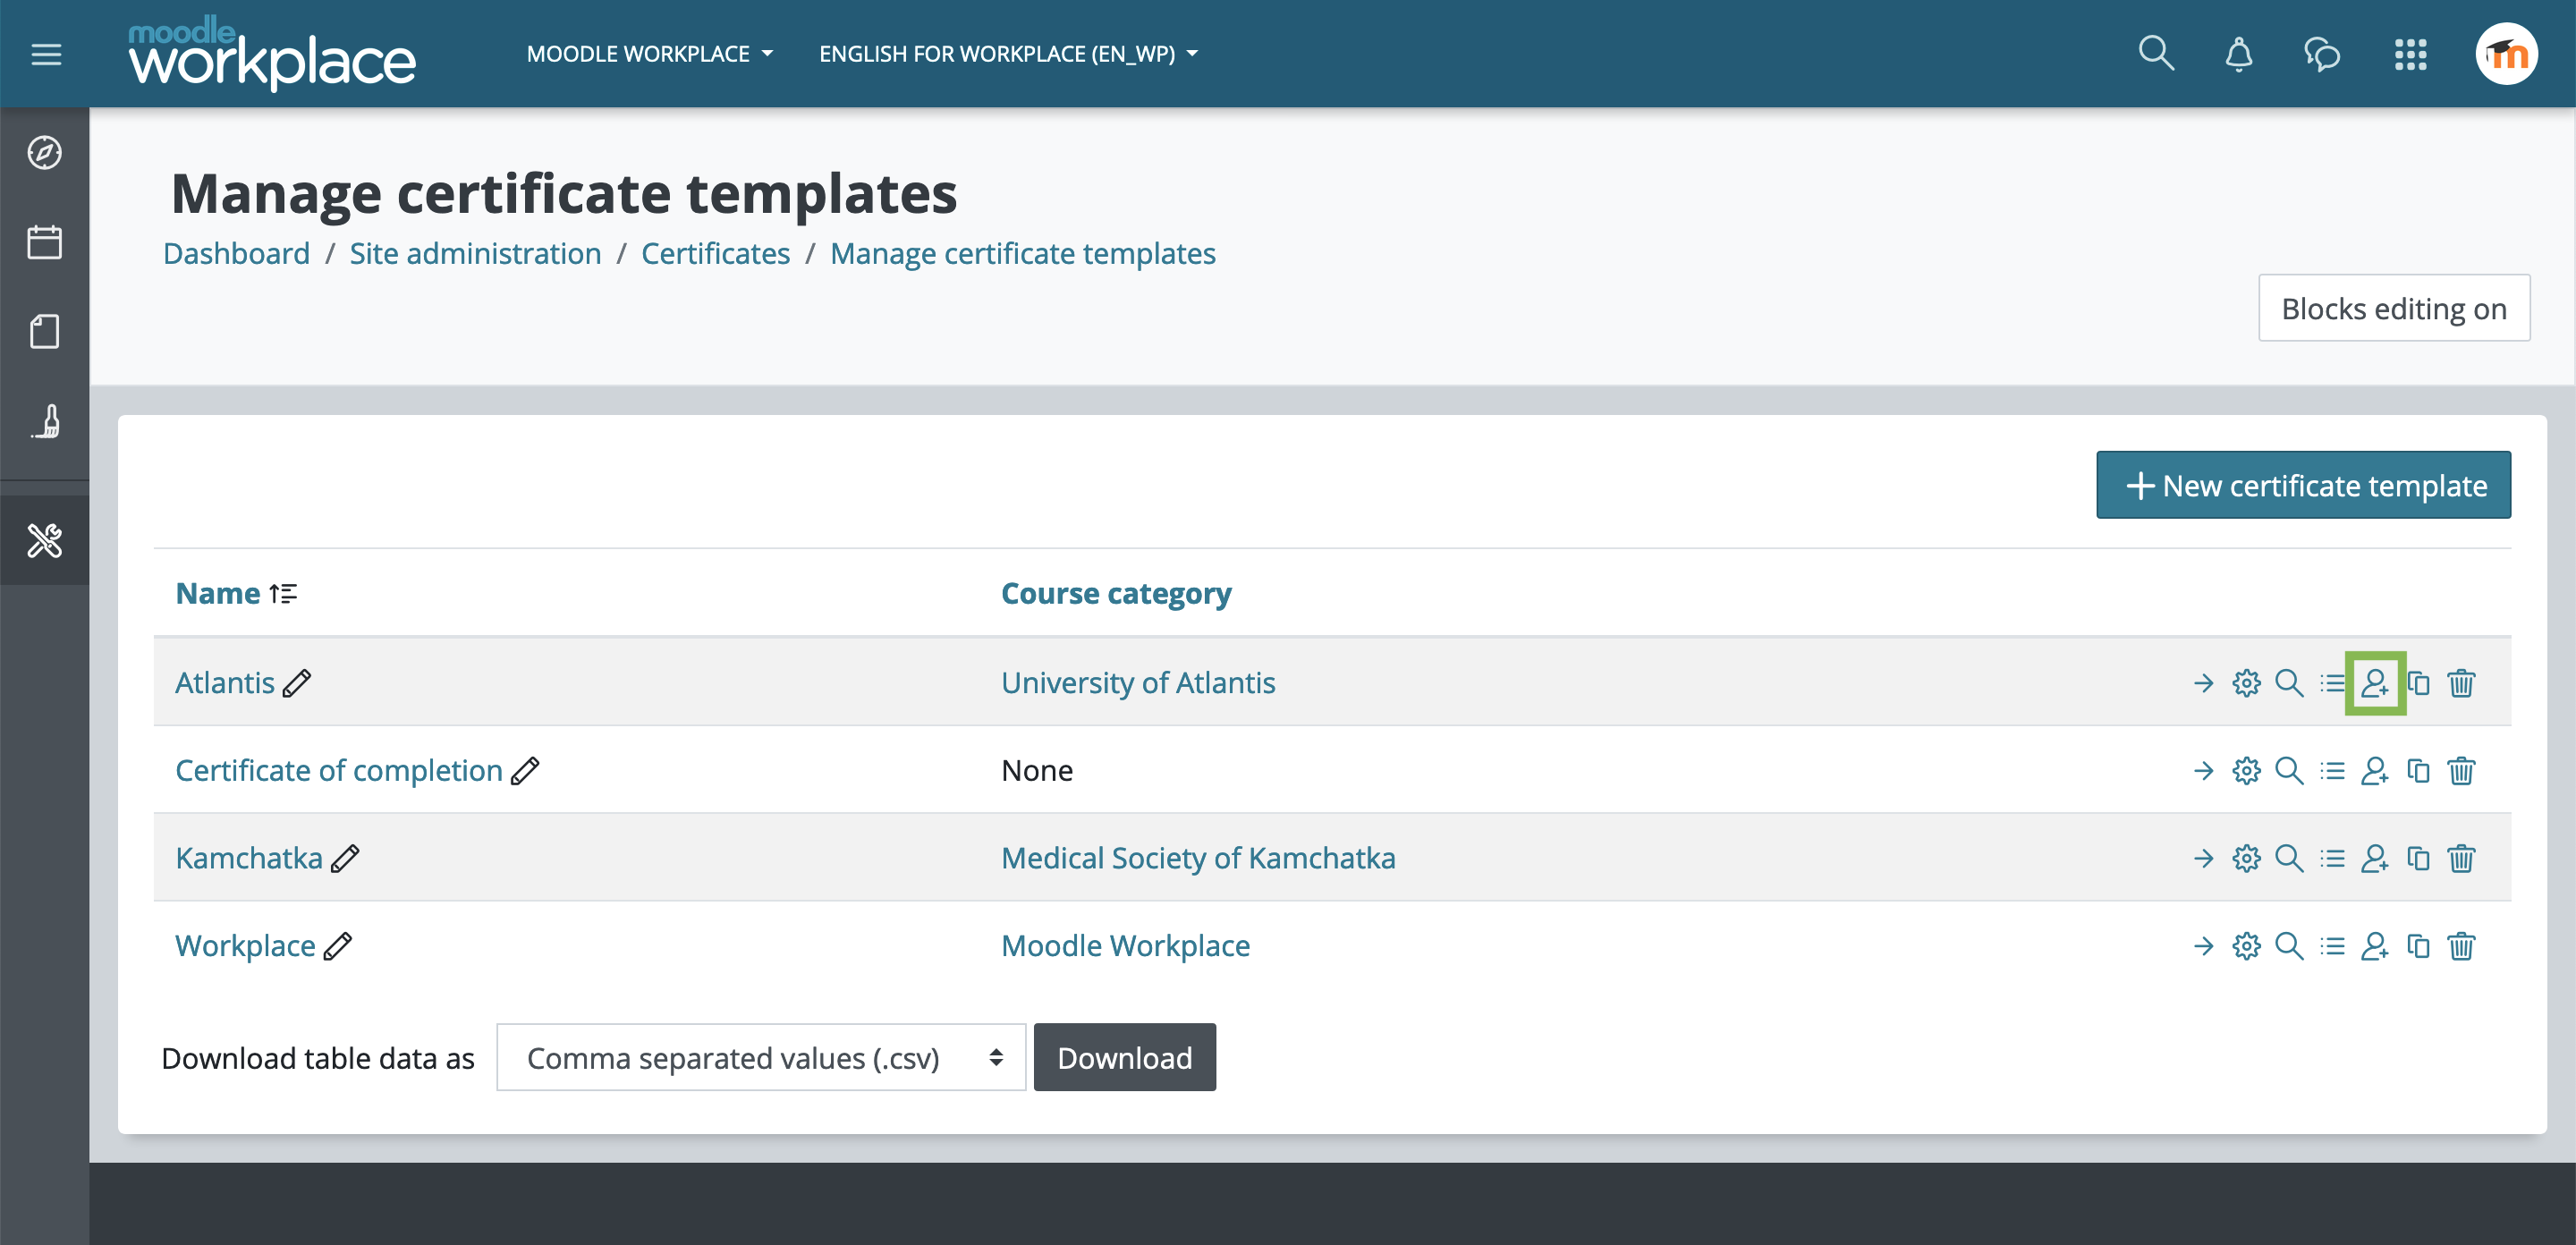 By clicking in the icon "Issue certificate from this template" (see image above) you will be able to issue manually this certificate to the selected users. You can set the expiring date for this certificate issue as well.
Using Dynamic rules
This functionality is only available in Moodle Workplace
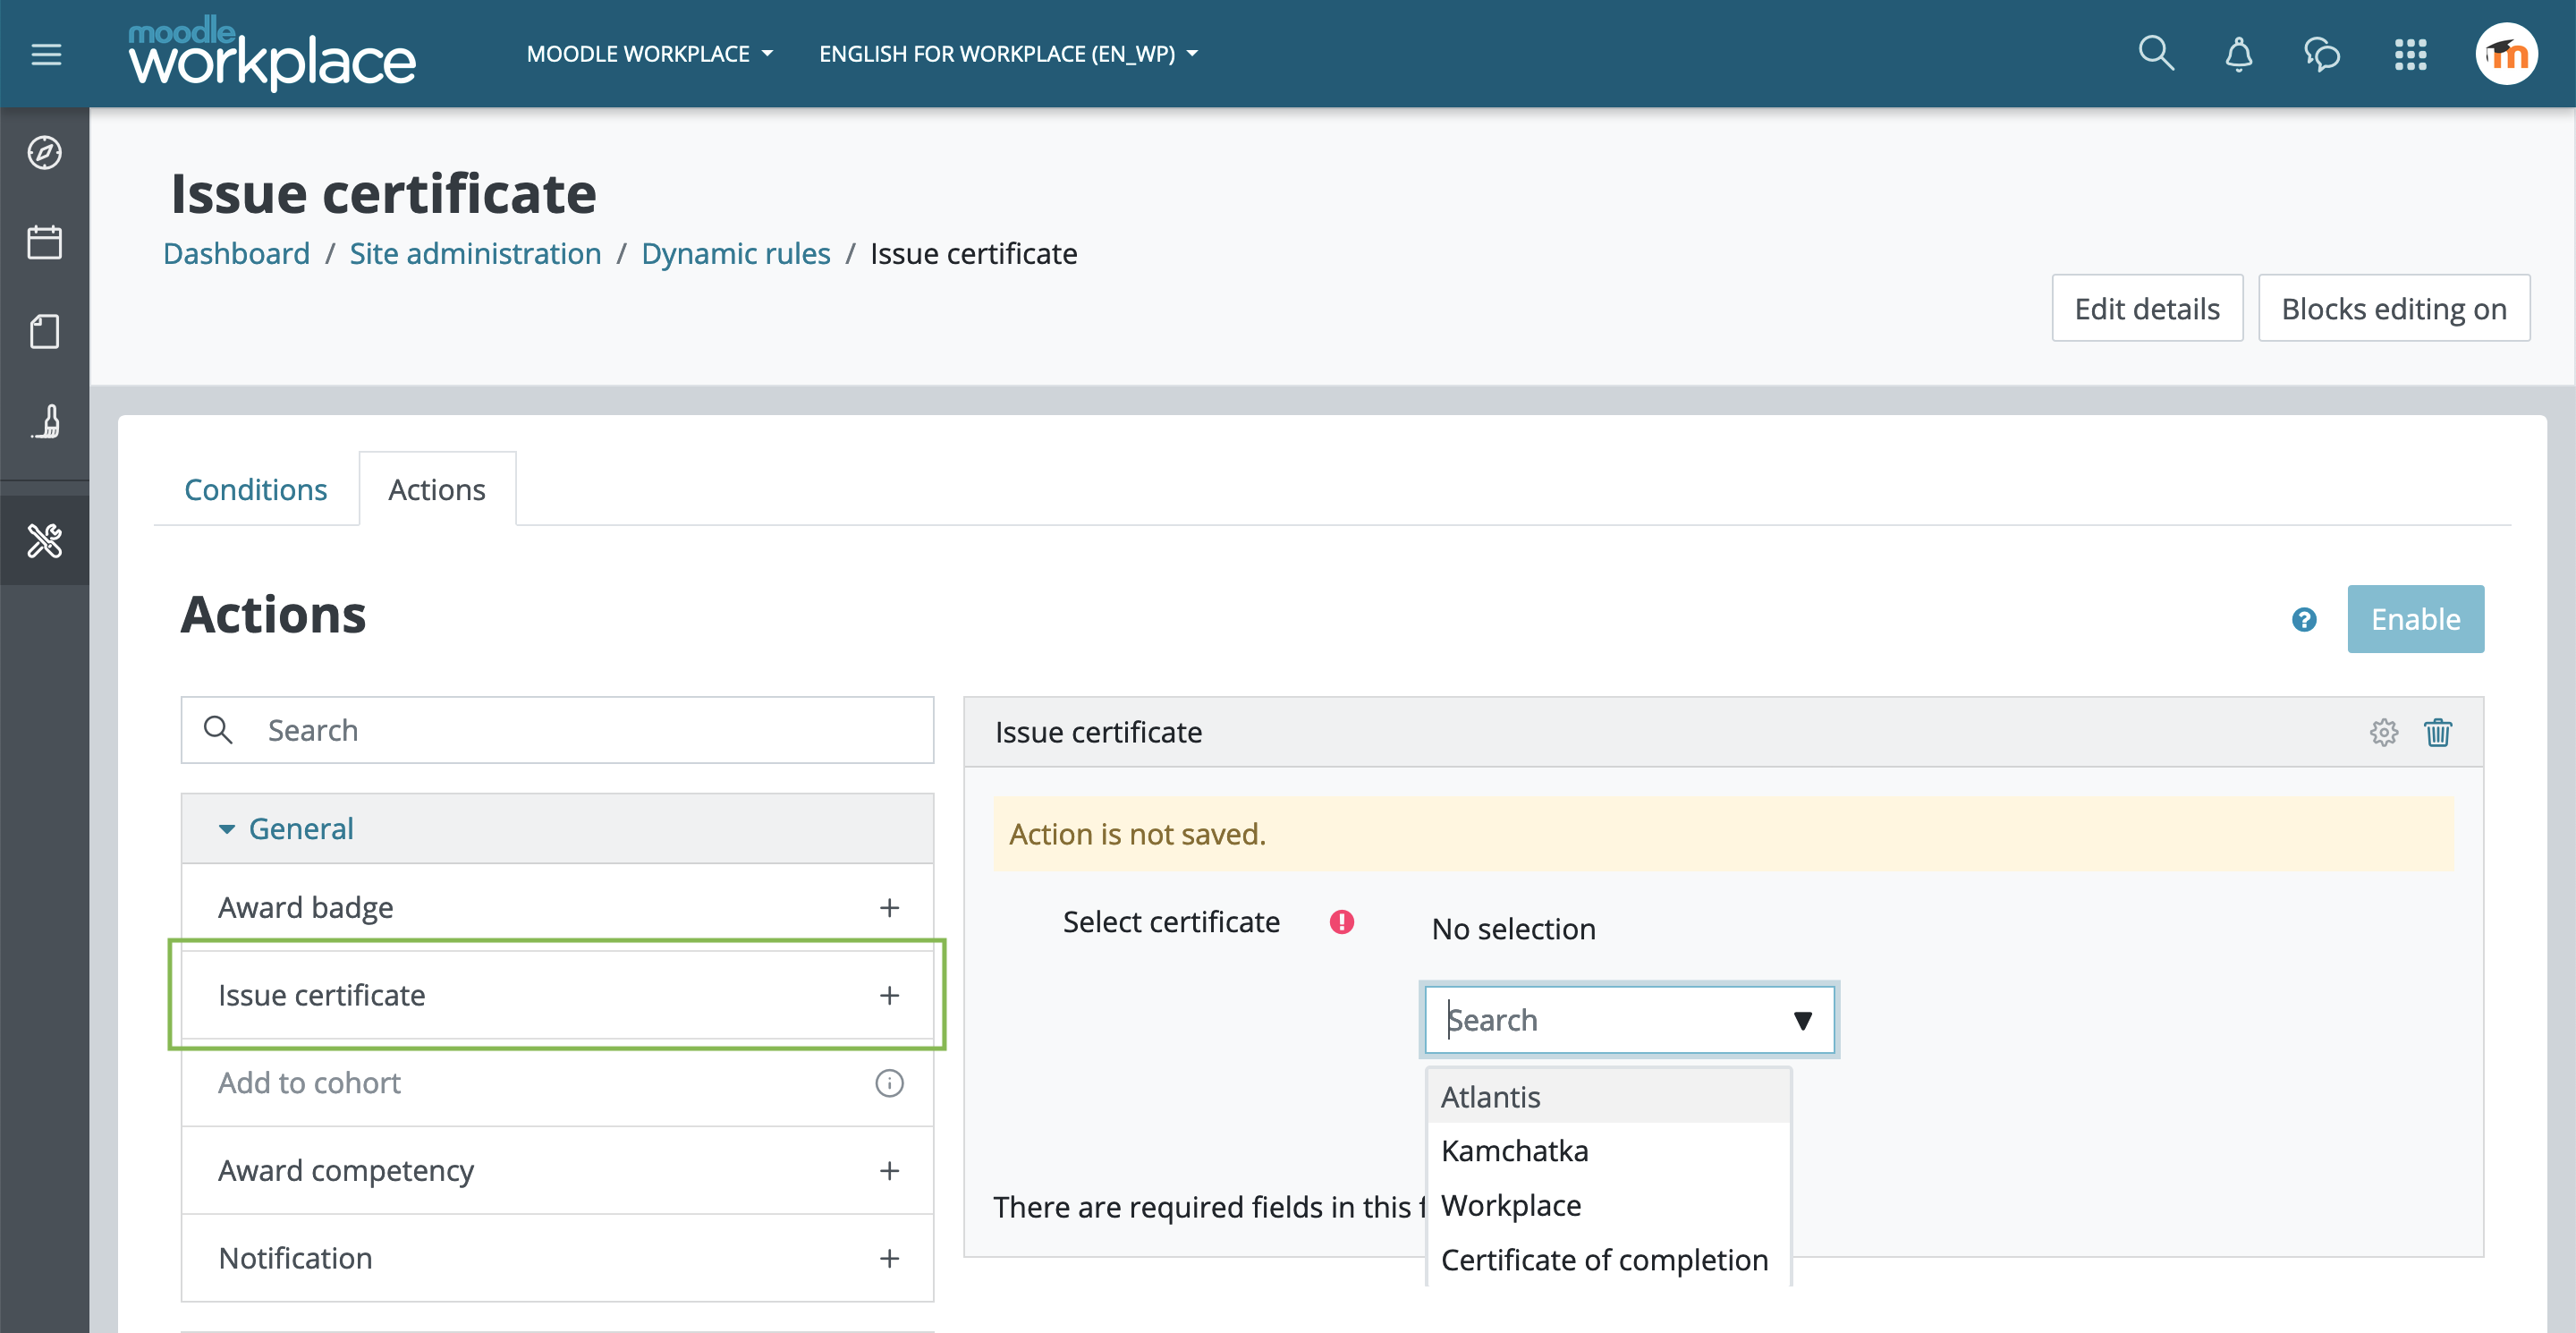 You can use Dynamic rules to issue the certificates. Create a new rule, add the action "Issue certificate" and select which certificate template will be used. When the rule conditions are matched, the certificate will be issued to the affected users.
Through the activity Course certificate
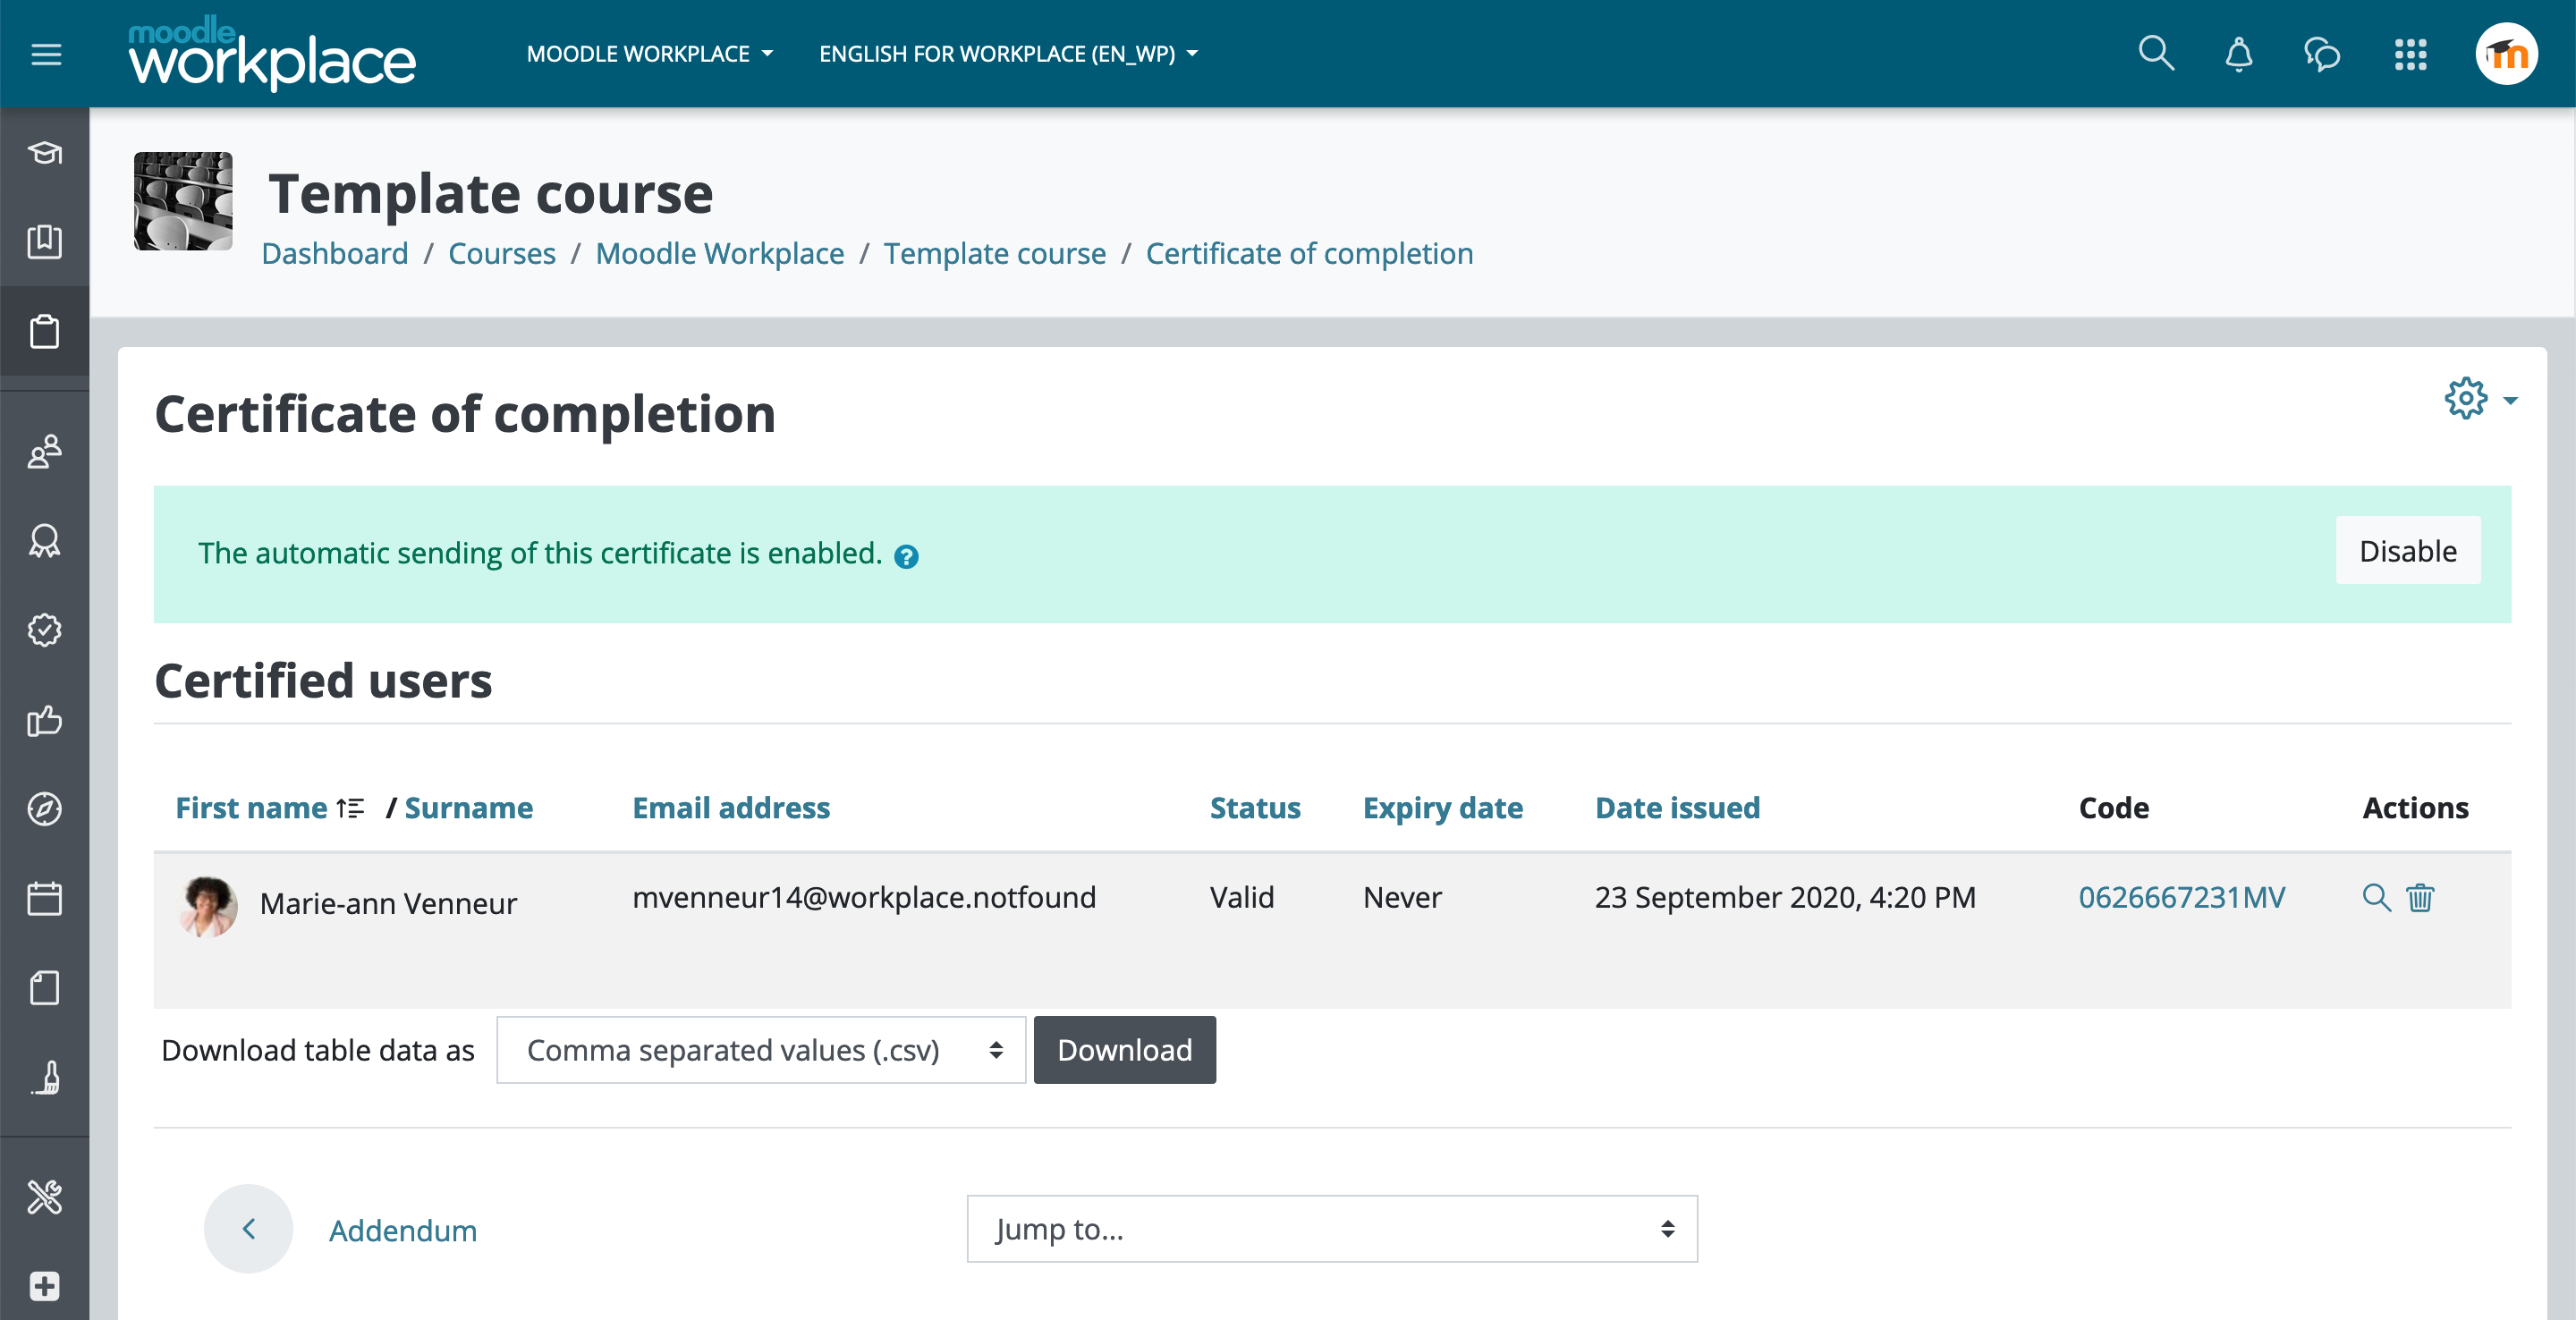 You can also add the Course certificate activity so students can issue themselves the certificate when the activity is unlocked. The activity can also be set to issue the certificate automatically to users that have access to it.
