Migrations
![]() This feature is part of Moodle Workplace, which is available through Moodle Partners.
This feature is part of Moodle Workplace, which is available through Moodle Partners.
Overview
This tool, through an intuitive step-by-step process, offers the capacity to export different parts of a Moodle Workplace instance and import them the same or a different site.
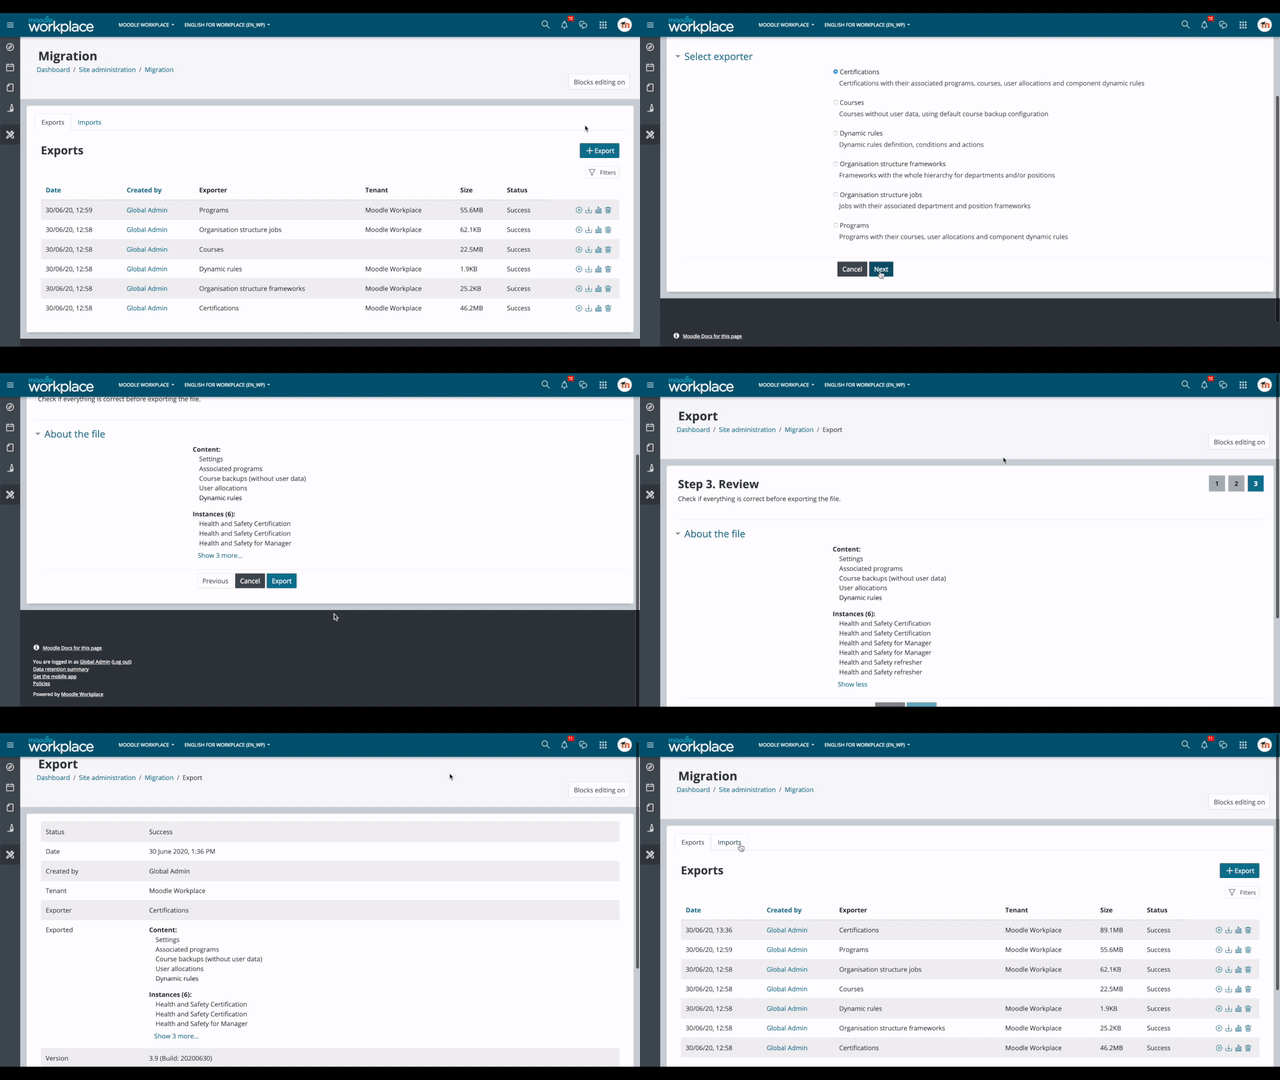
Export
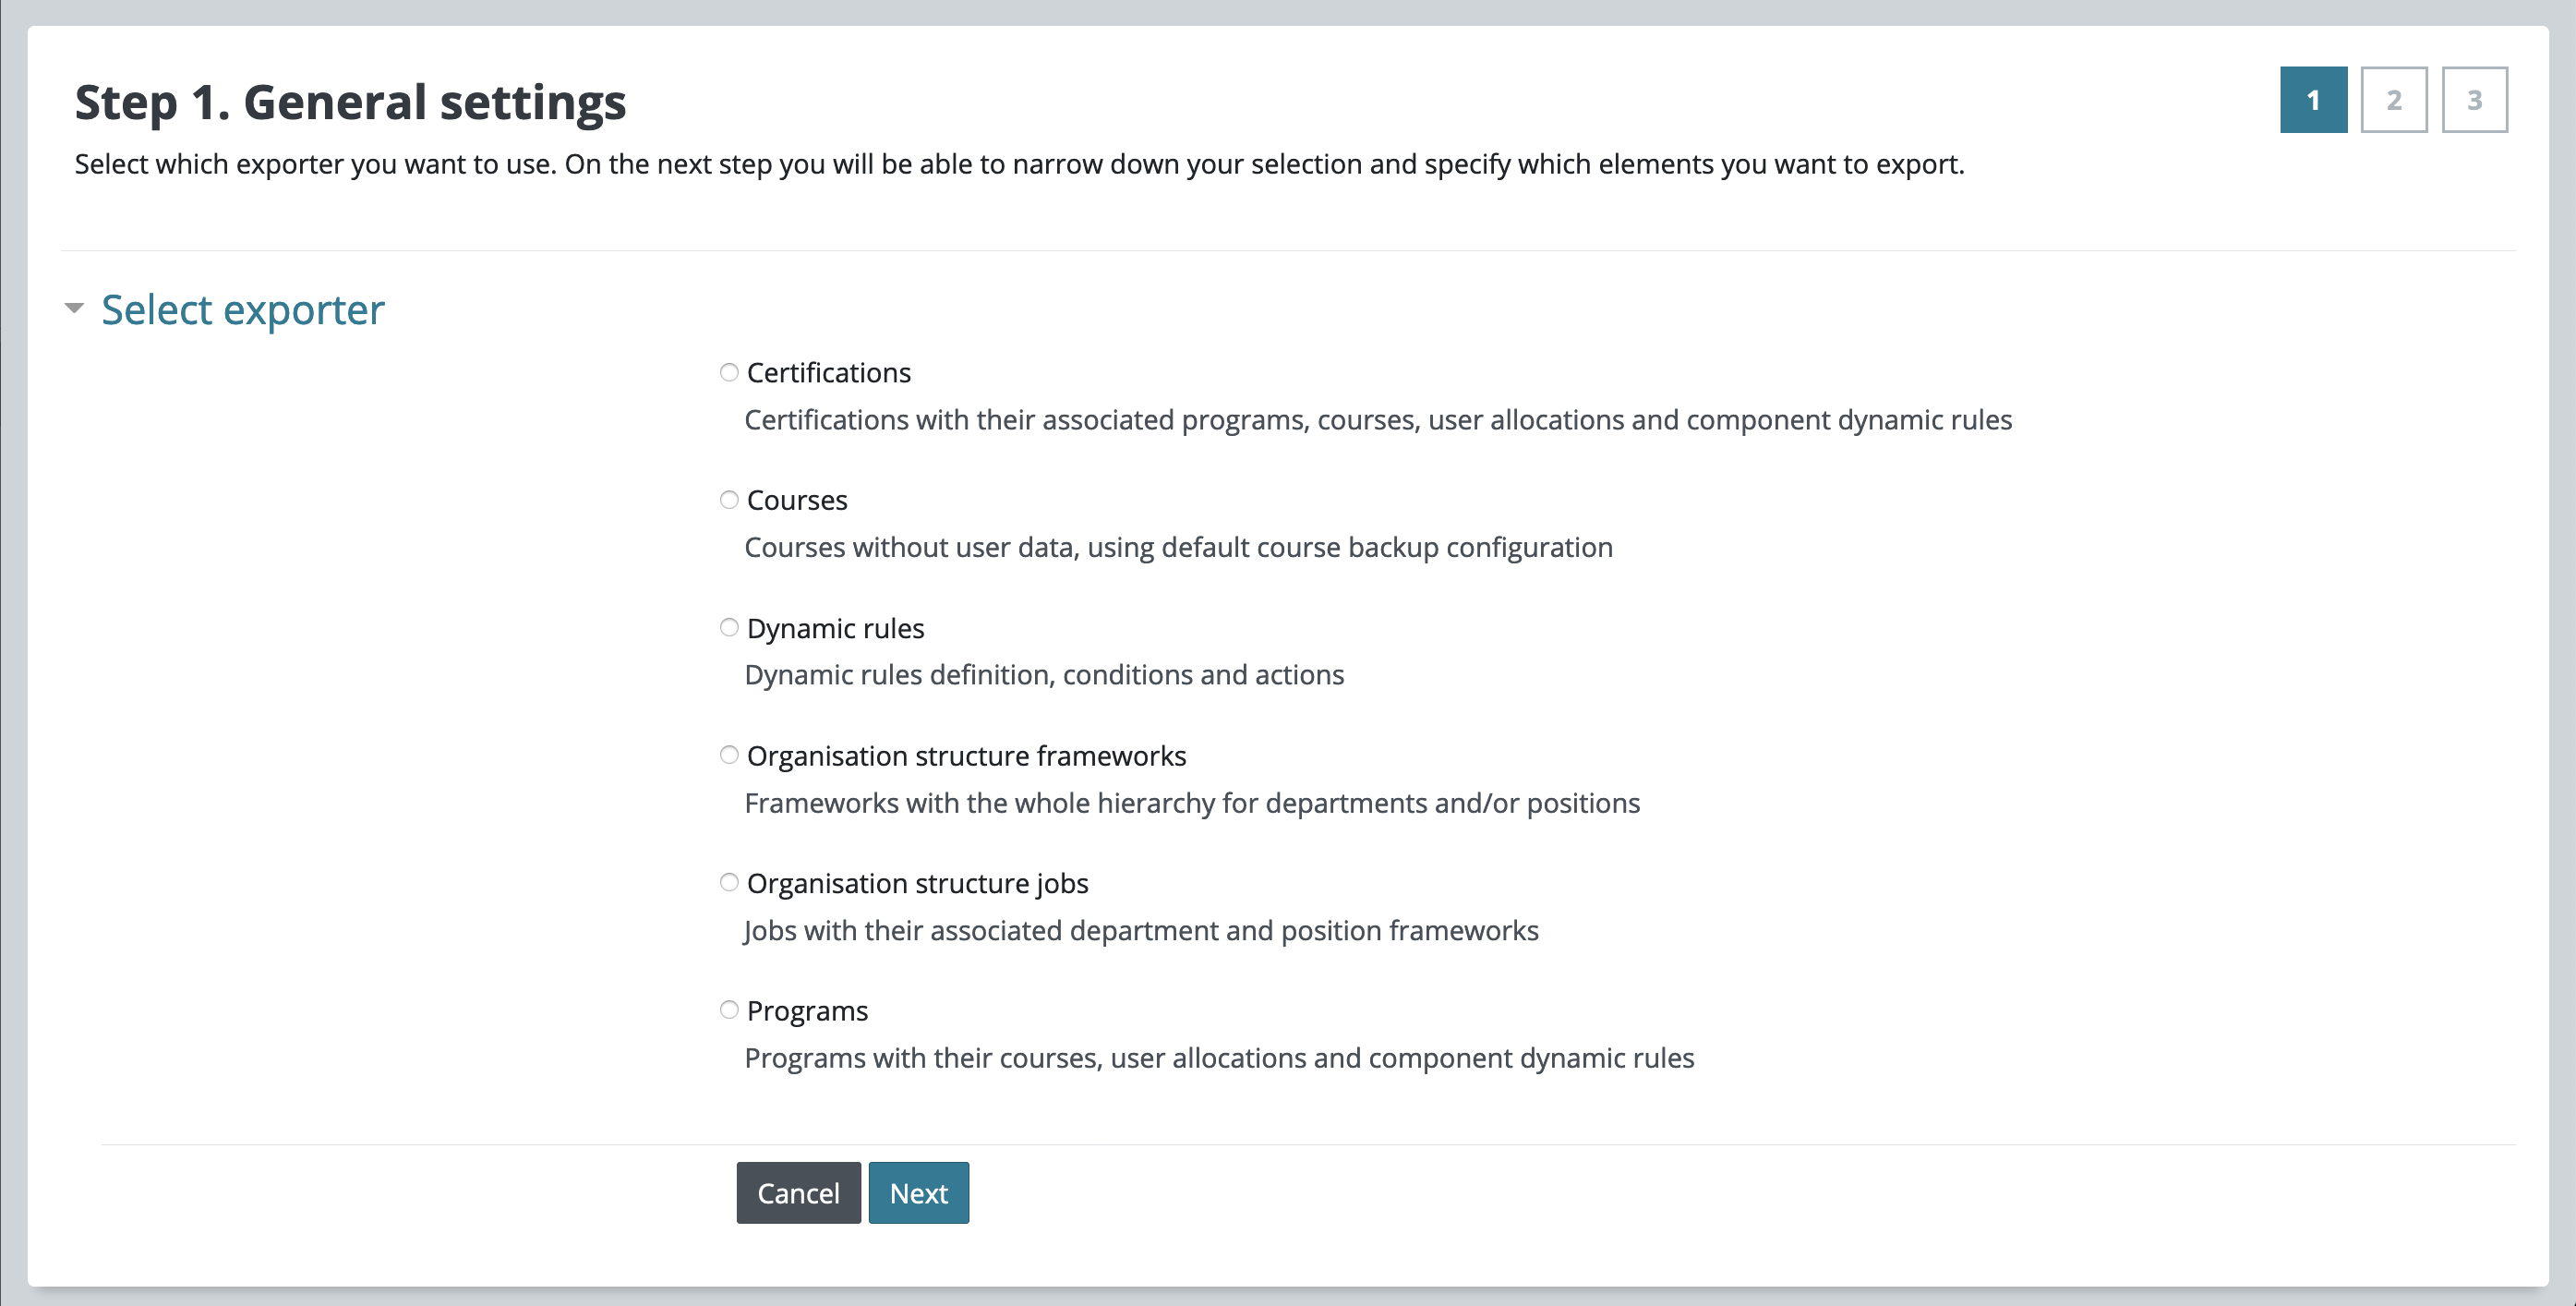
Step 1 - General settings
Select which exporter you want to use from the options displayed. On the following steps, you will be able to narrow down your selection and specify which elements you want to export.
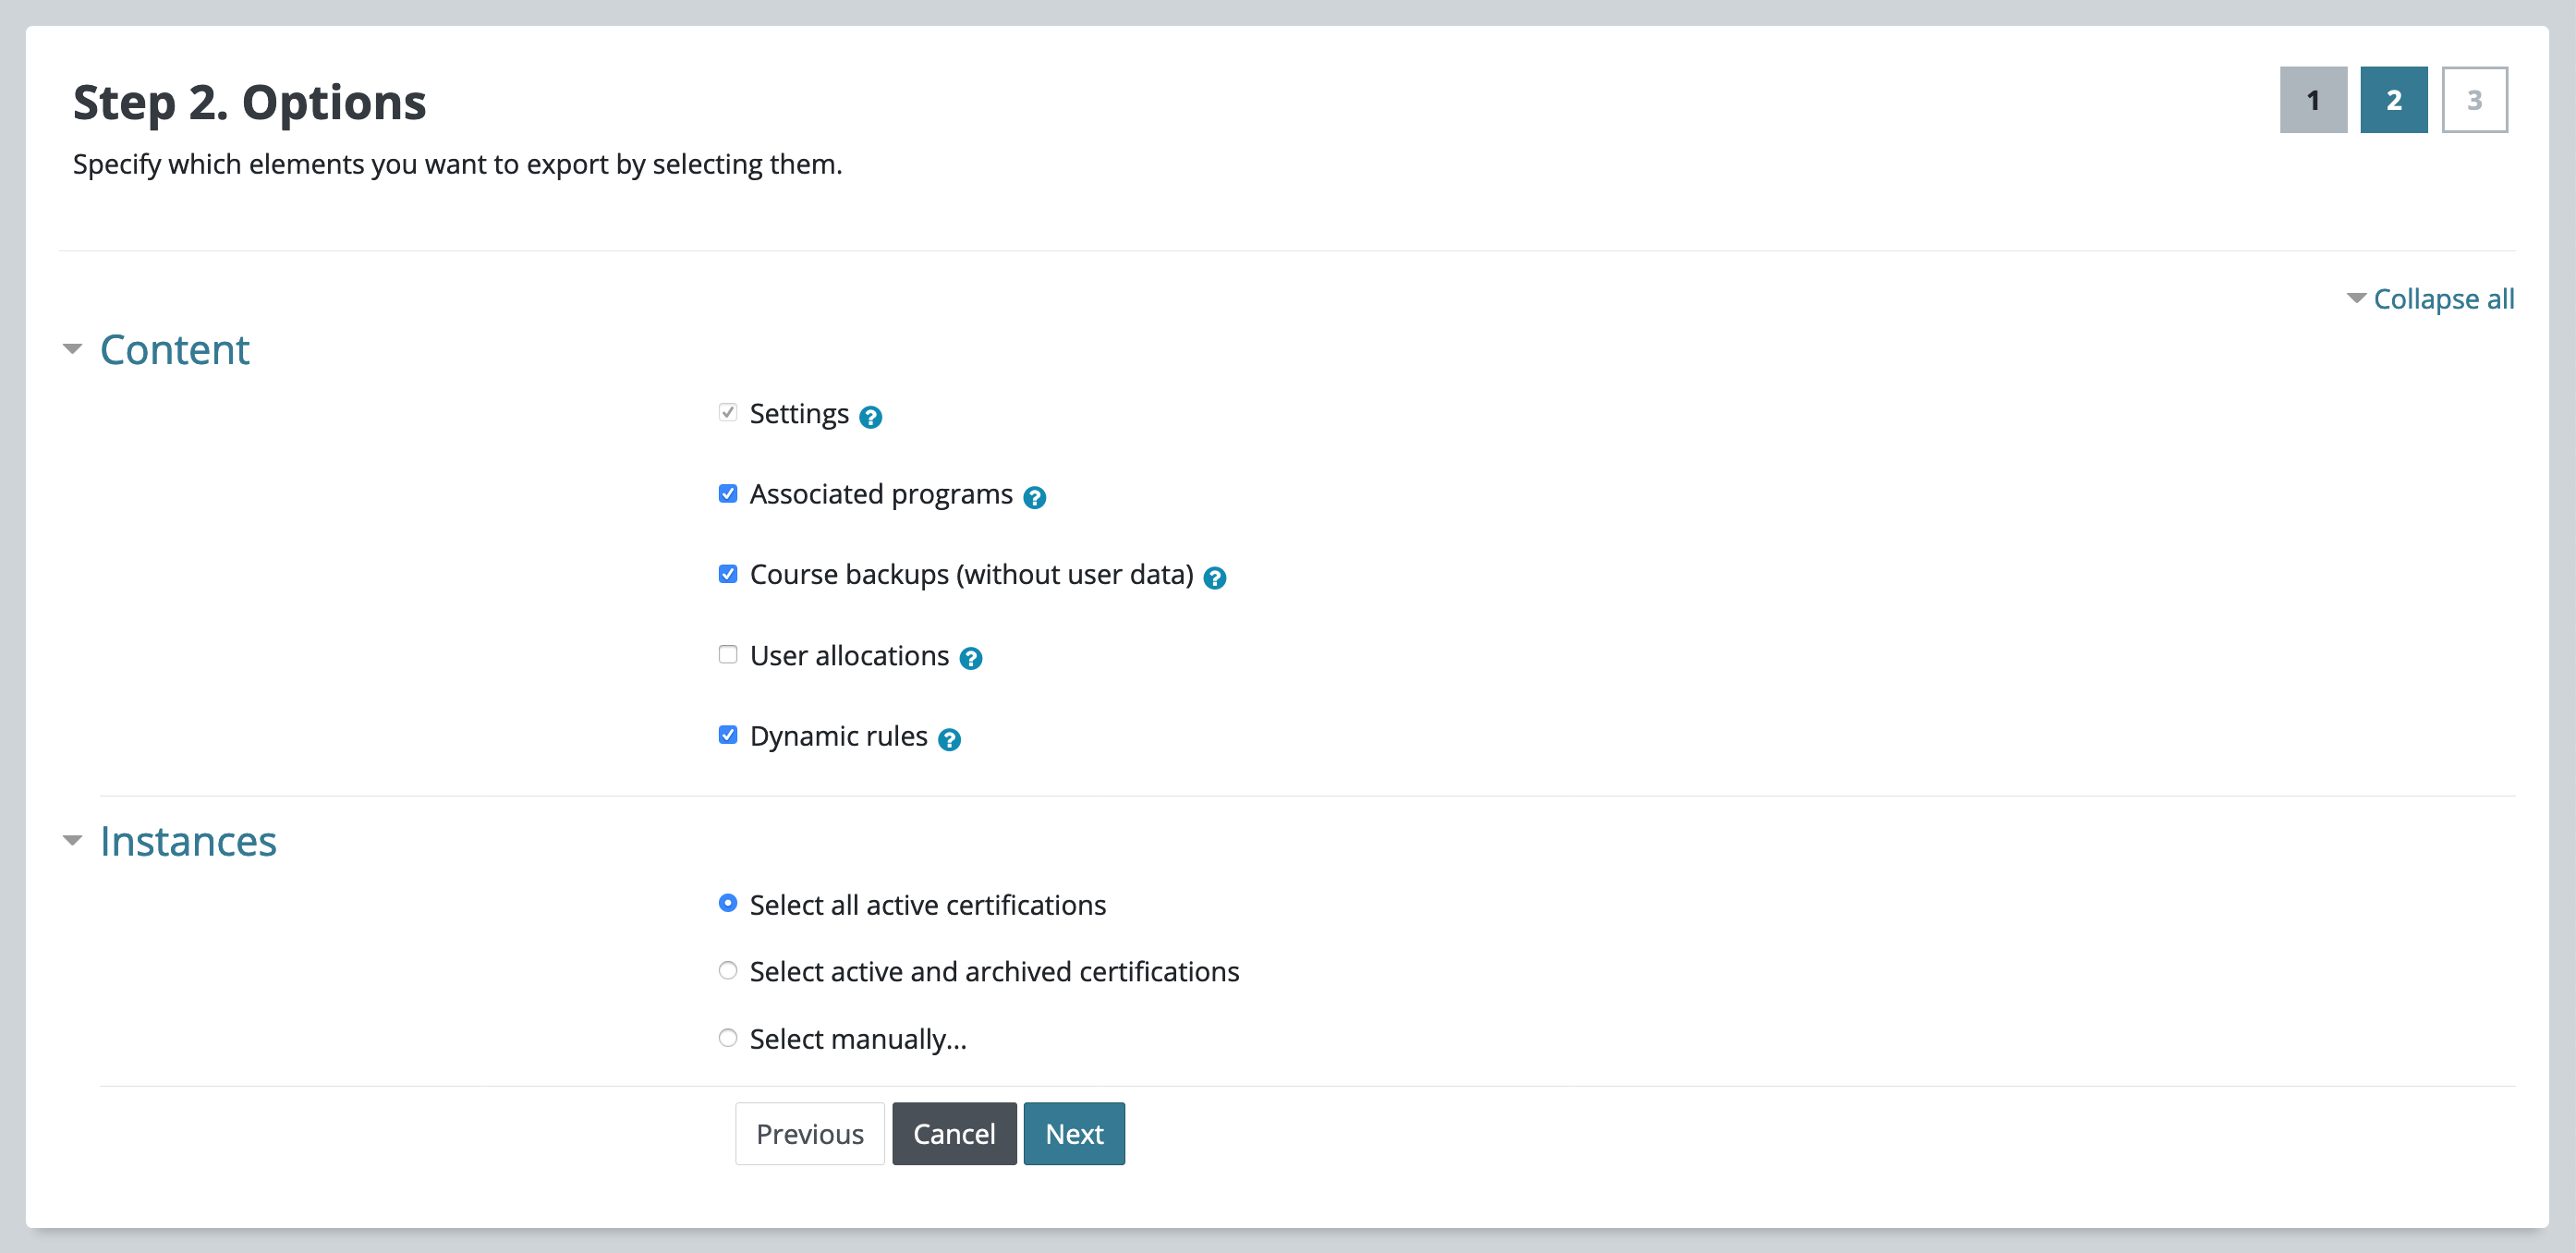
Step 2 - Options
Specify which elements you want to export by selecting them. Exporters can be slightly different from each other.
Content
Attributes and settings that may or not be included in the exported file.
Instances
Select which instances will be included in the exported file.
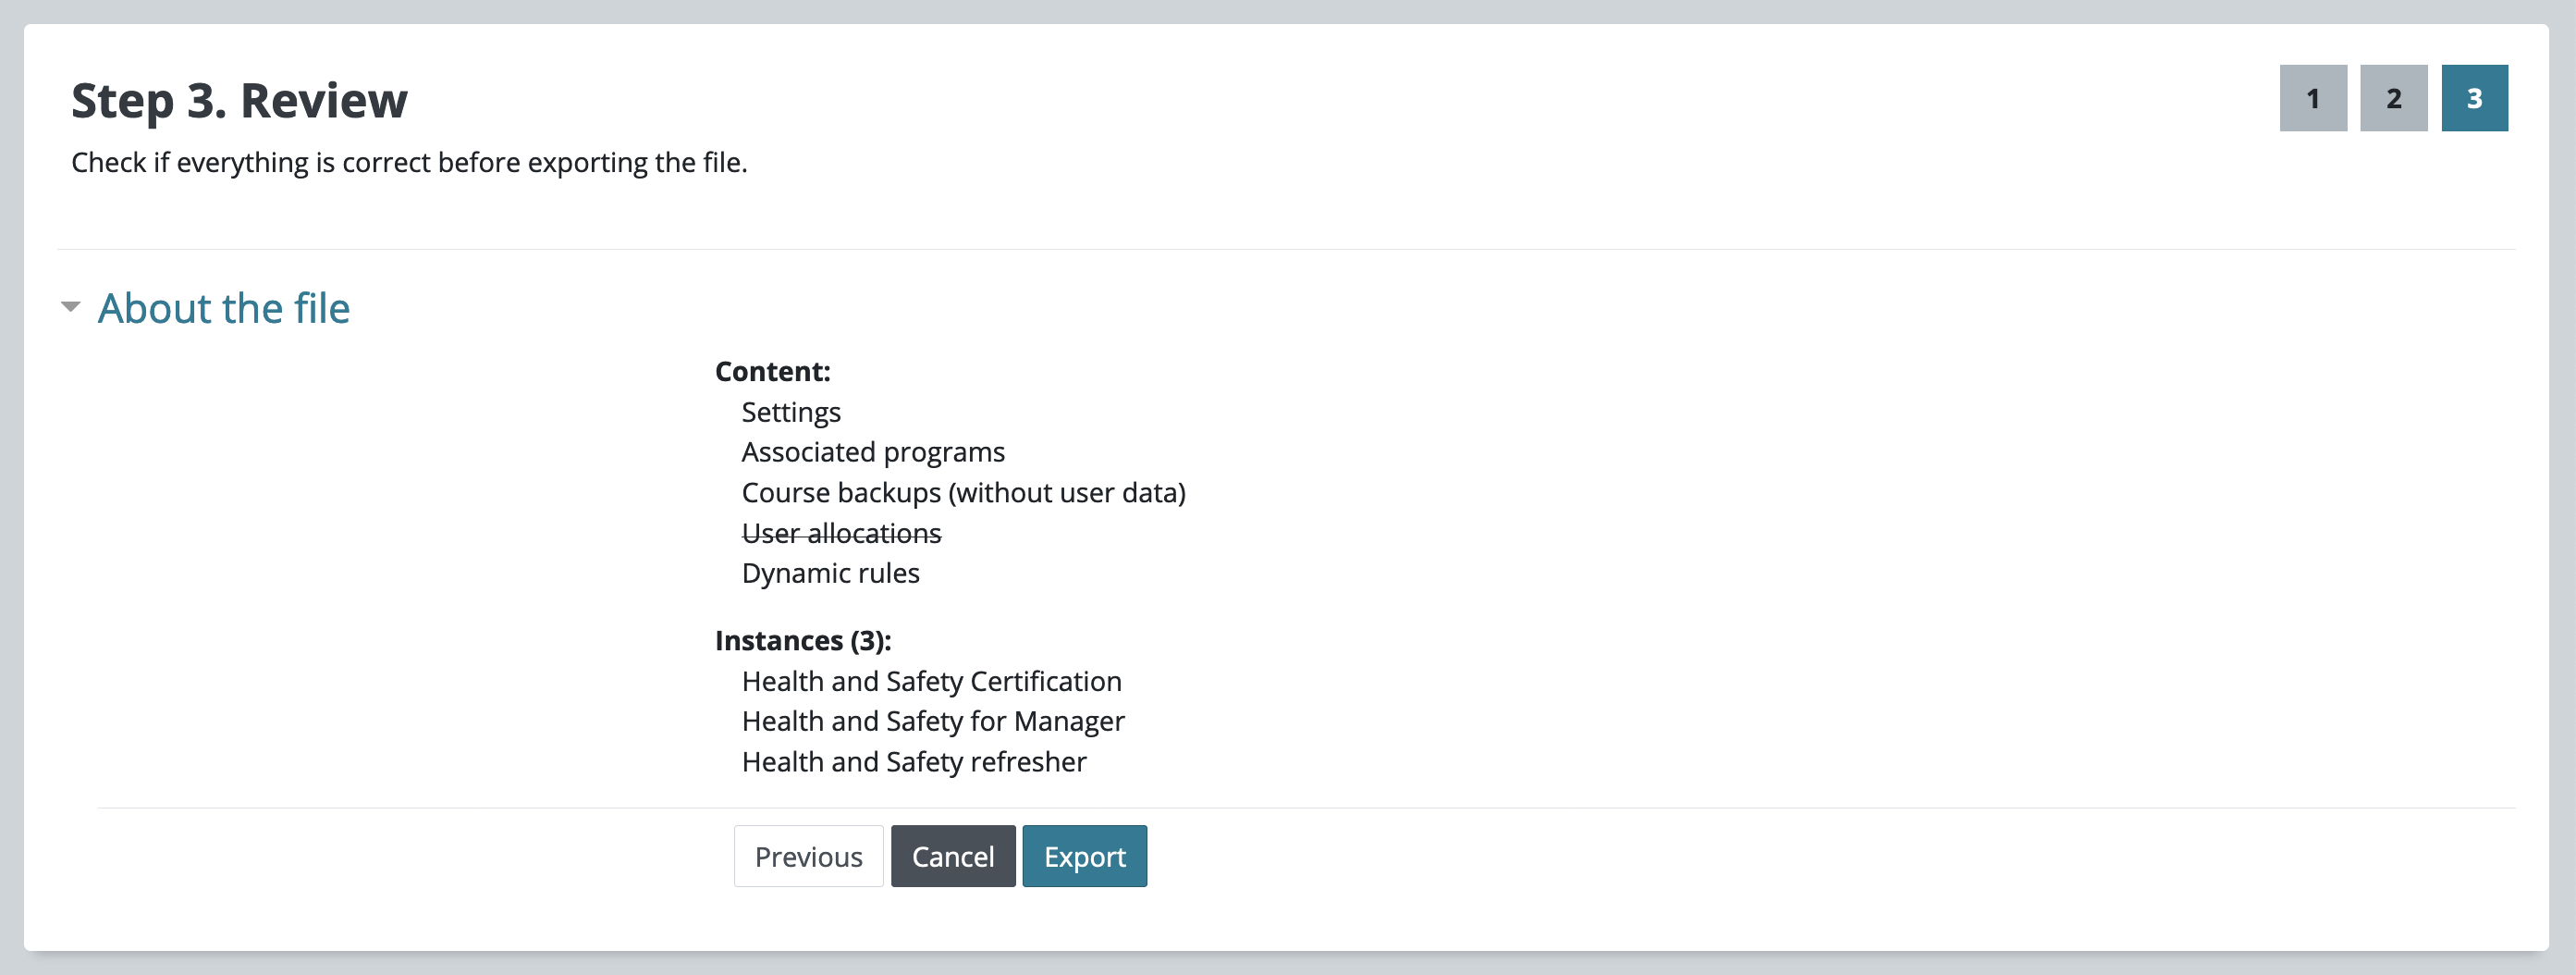
Step 3 - Review
In this page, you can check at a glance if everything is correct before exporting the file.
Exporting statuses
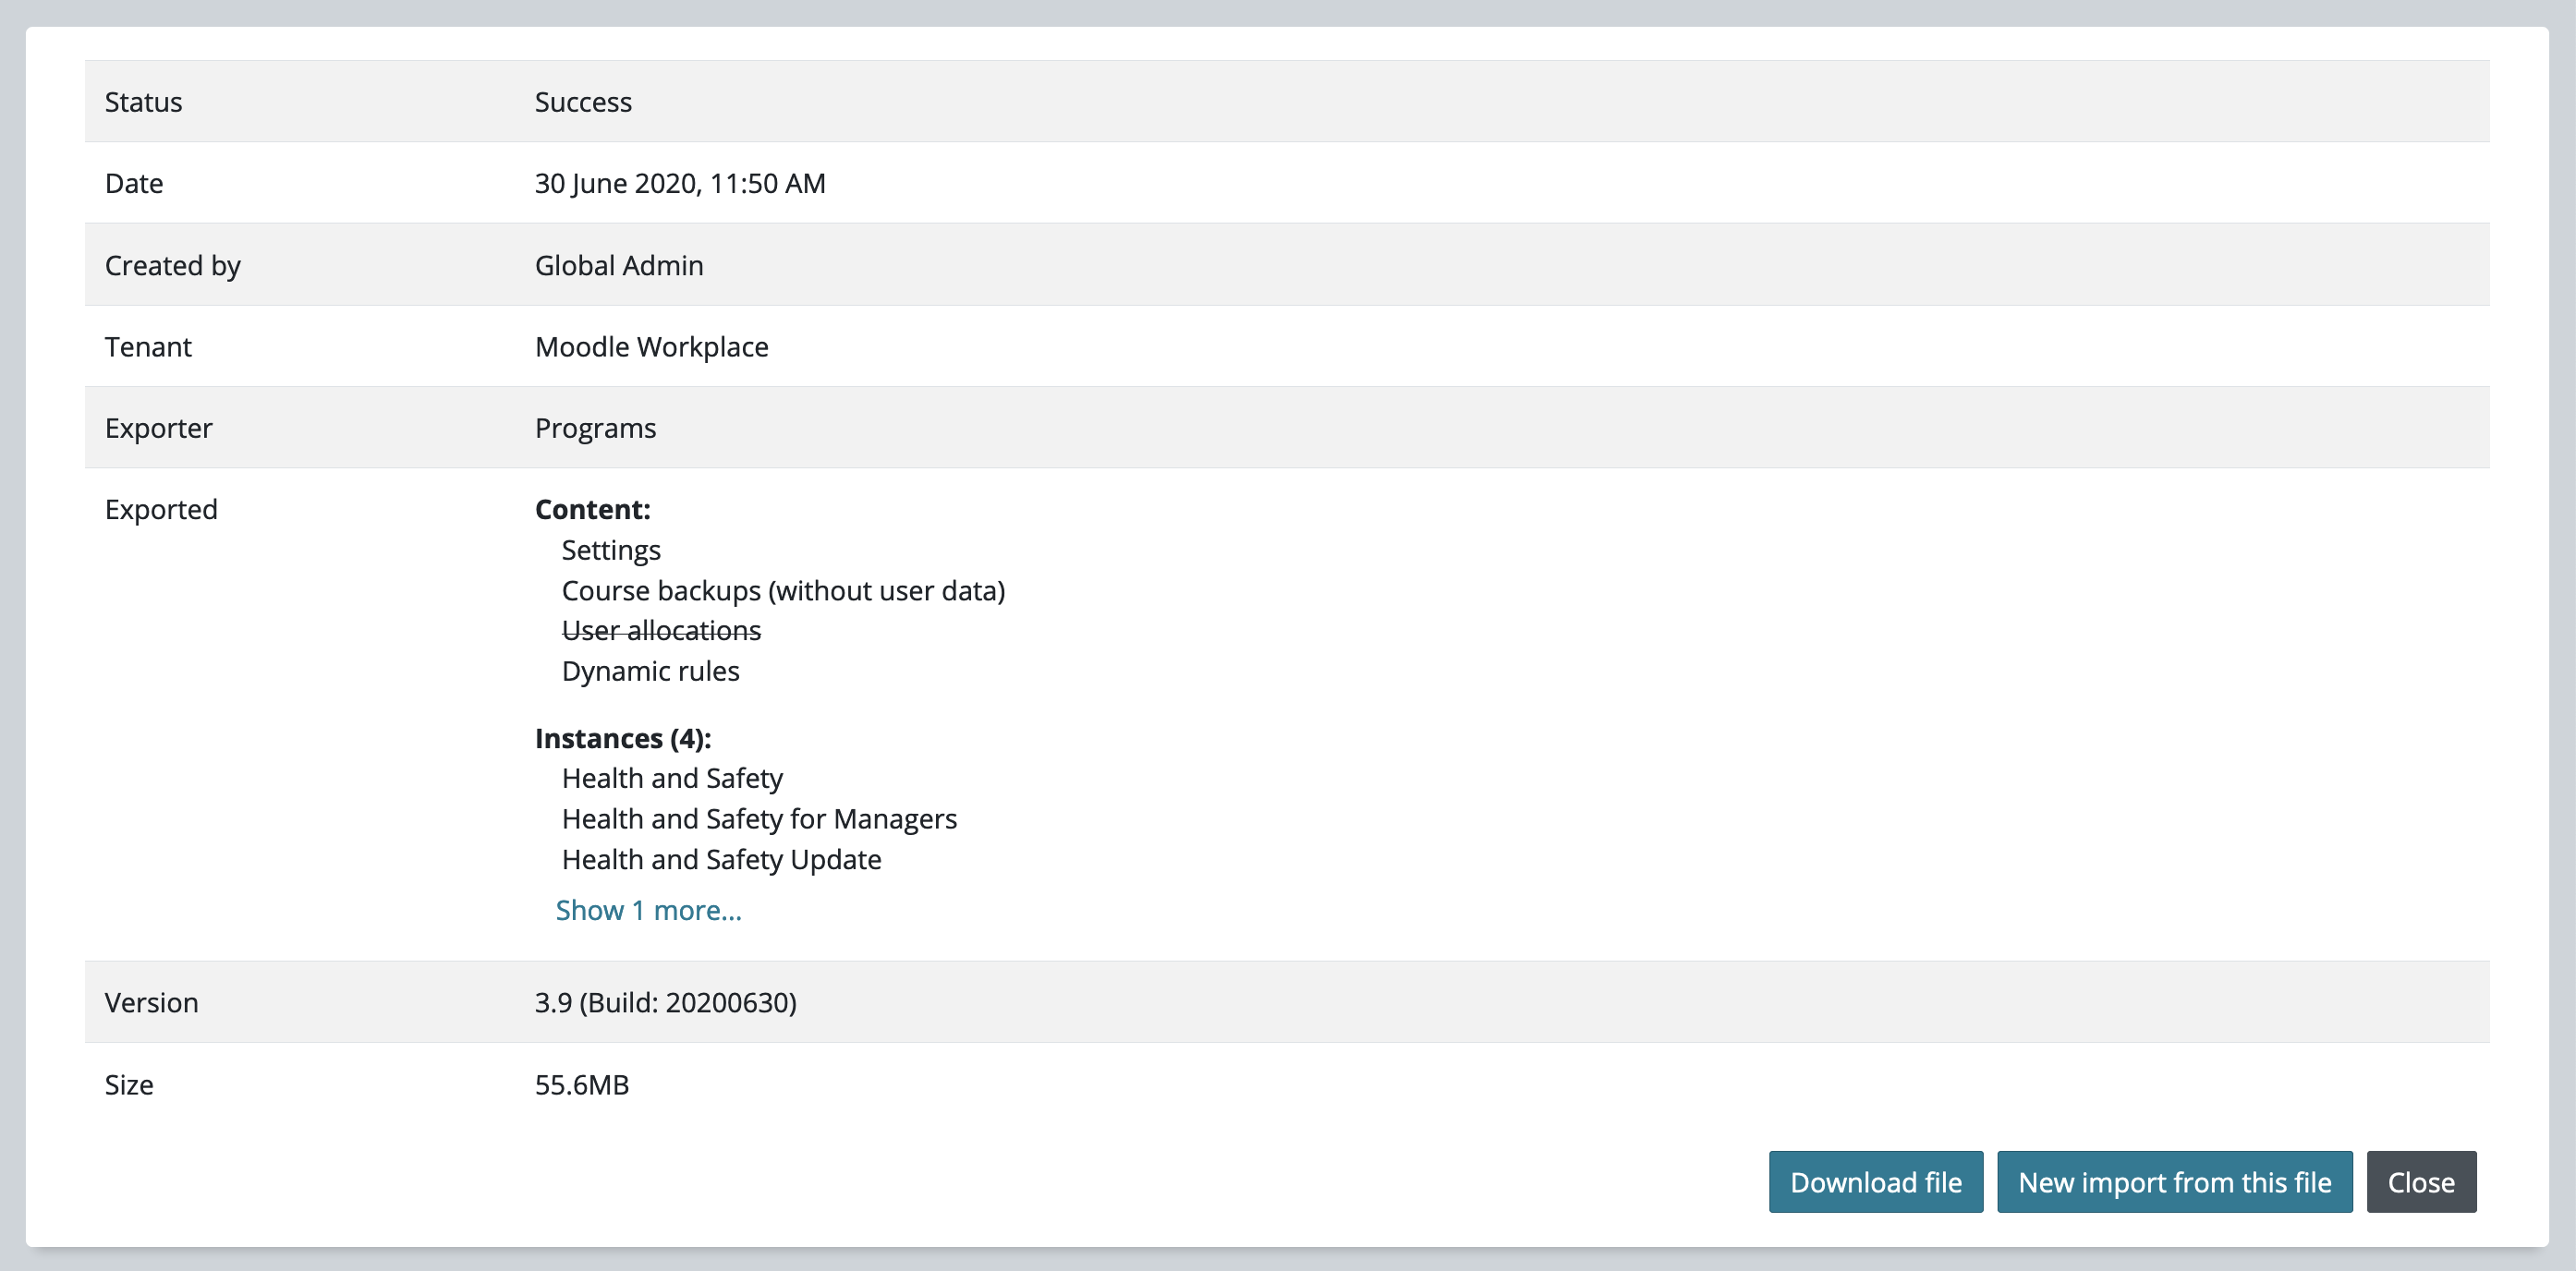
After going through the step-by-step process, you’ll be redirected to the export report page where you can check, among other attributes, its status, size and date of creation.
Scheduled
An export set as “scheduled” will run on the next cron execution. (How much it takes to start will depend on the cron settings for your site). It’s safe to continue navigating on the site.
In progress
The export file is being generated.
Completed
The file is ready to be downloaded or imported again. More information about the file should be displayed at this point, and the user will receive a notification about it.
Import
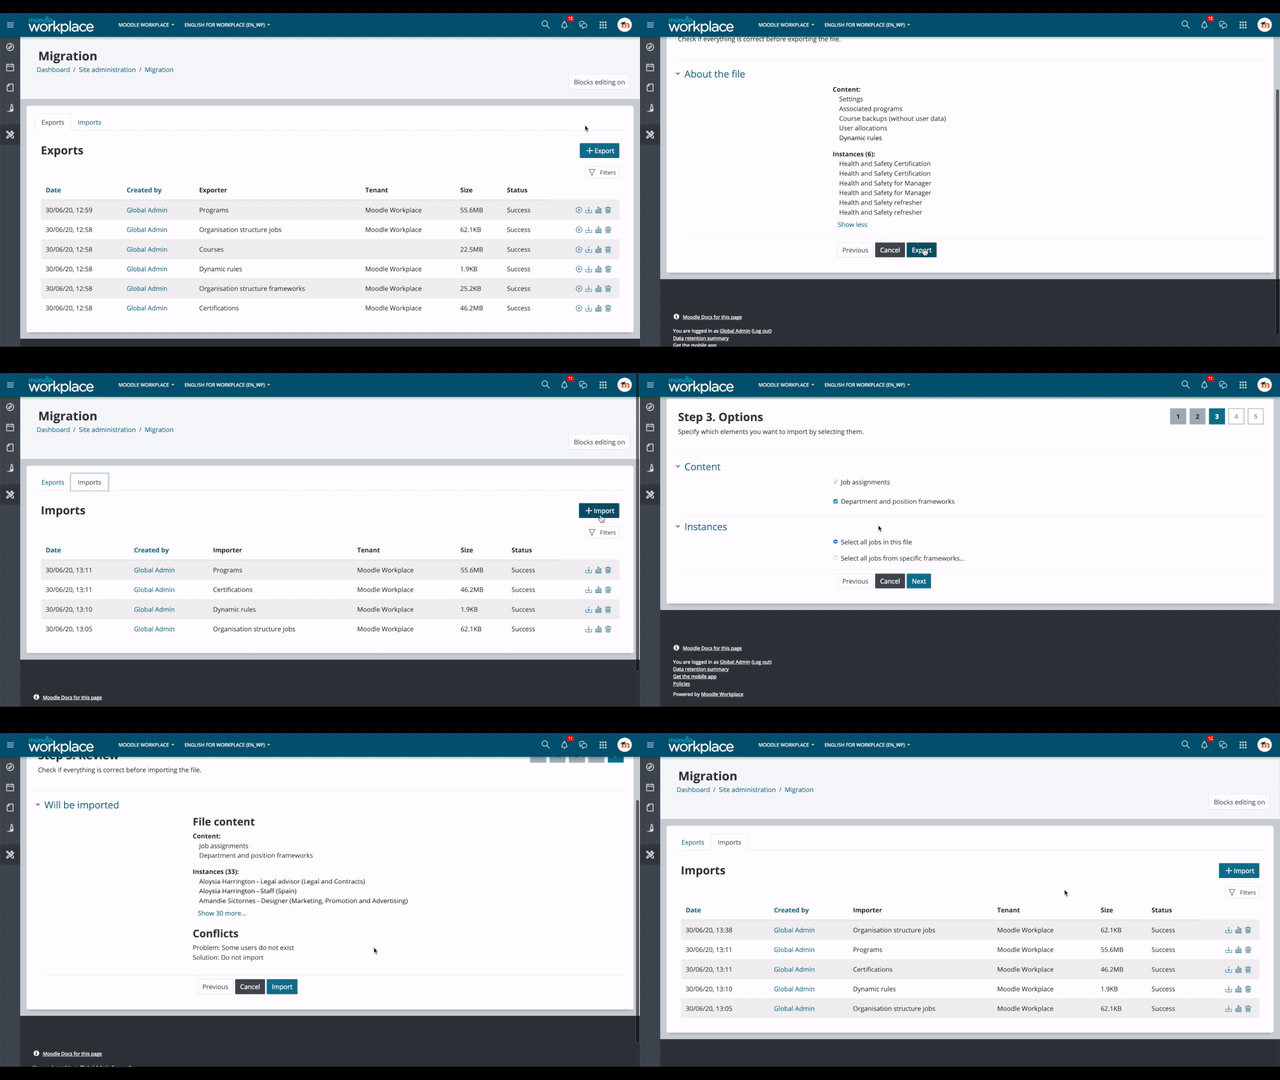
Step 1 - Select source
Upload a file containing either a Moodle Workplace export or a CSV file. You can skip this step if you are importing a Moodle Workplace export from your current site: in this case, click on the button “New import from this file” directly from the “Export” tab.
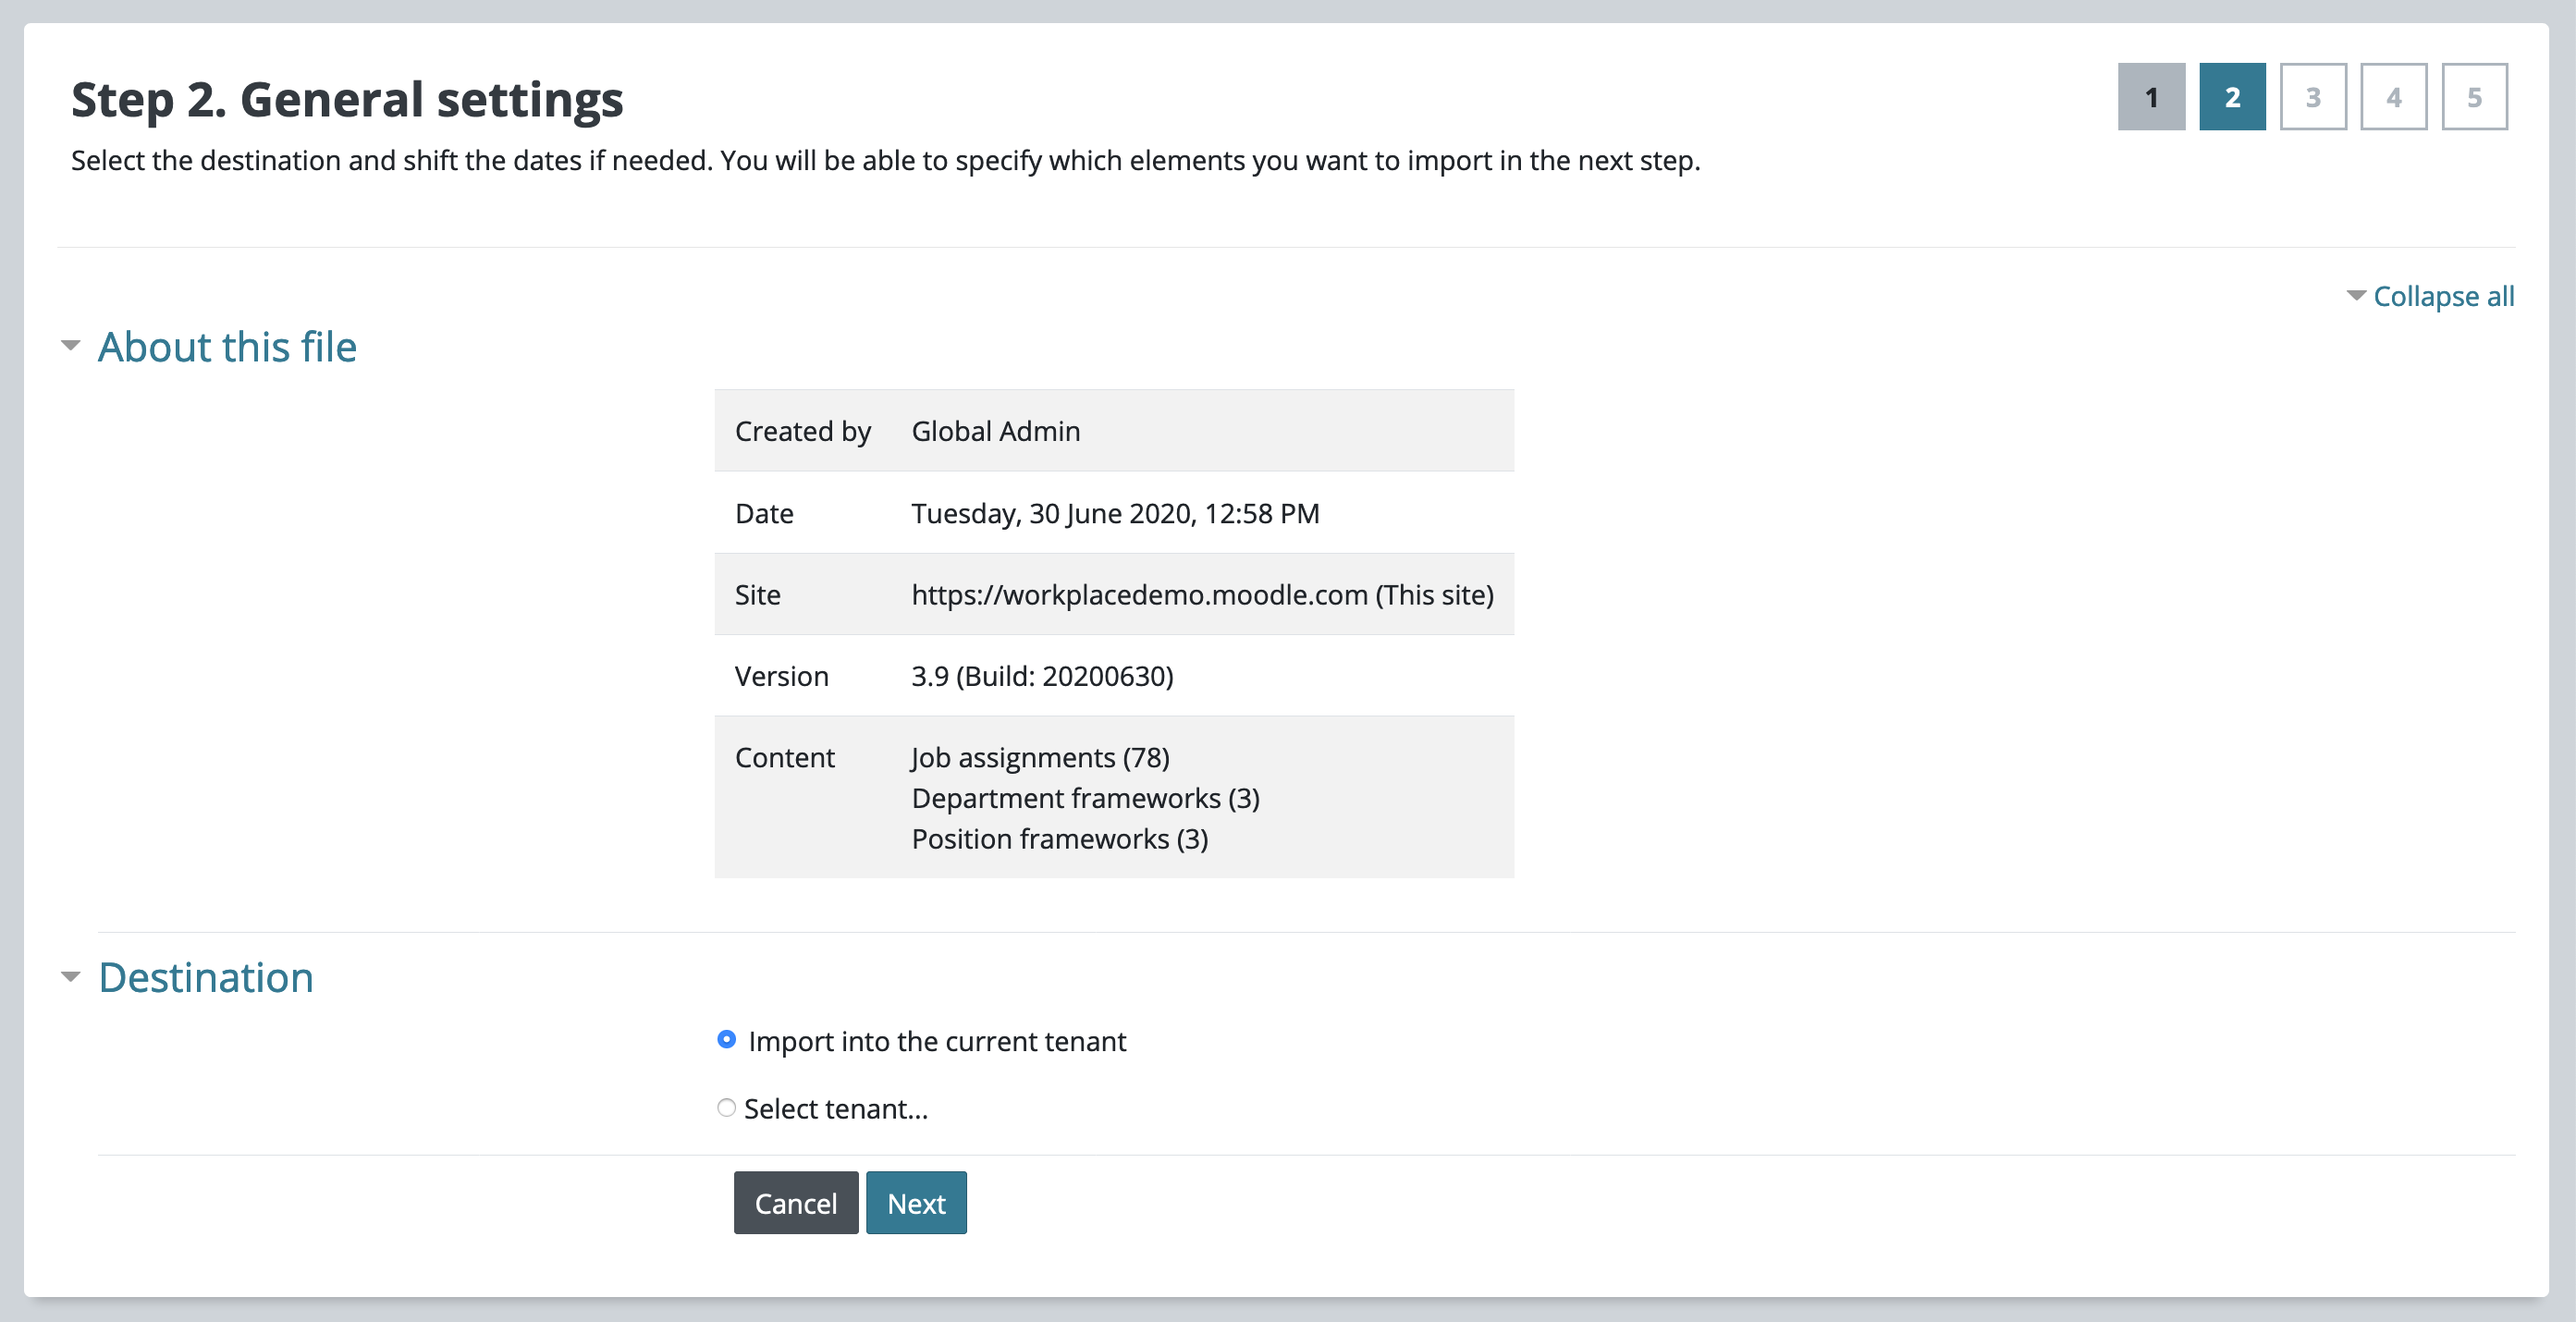
Step 2 - General settings
Check if the file being imported is the correct one. Importers can be slightly different from each other, but most of them will offer options regarding tenant destination and date shifting. You will be able to specify which elements you want to import in the next step.
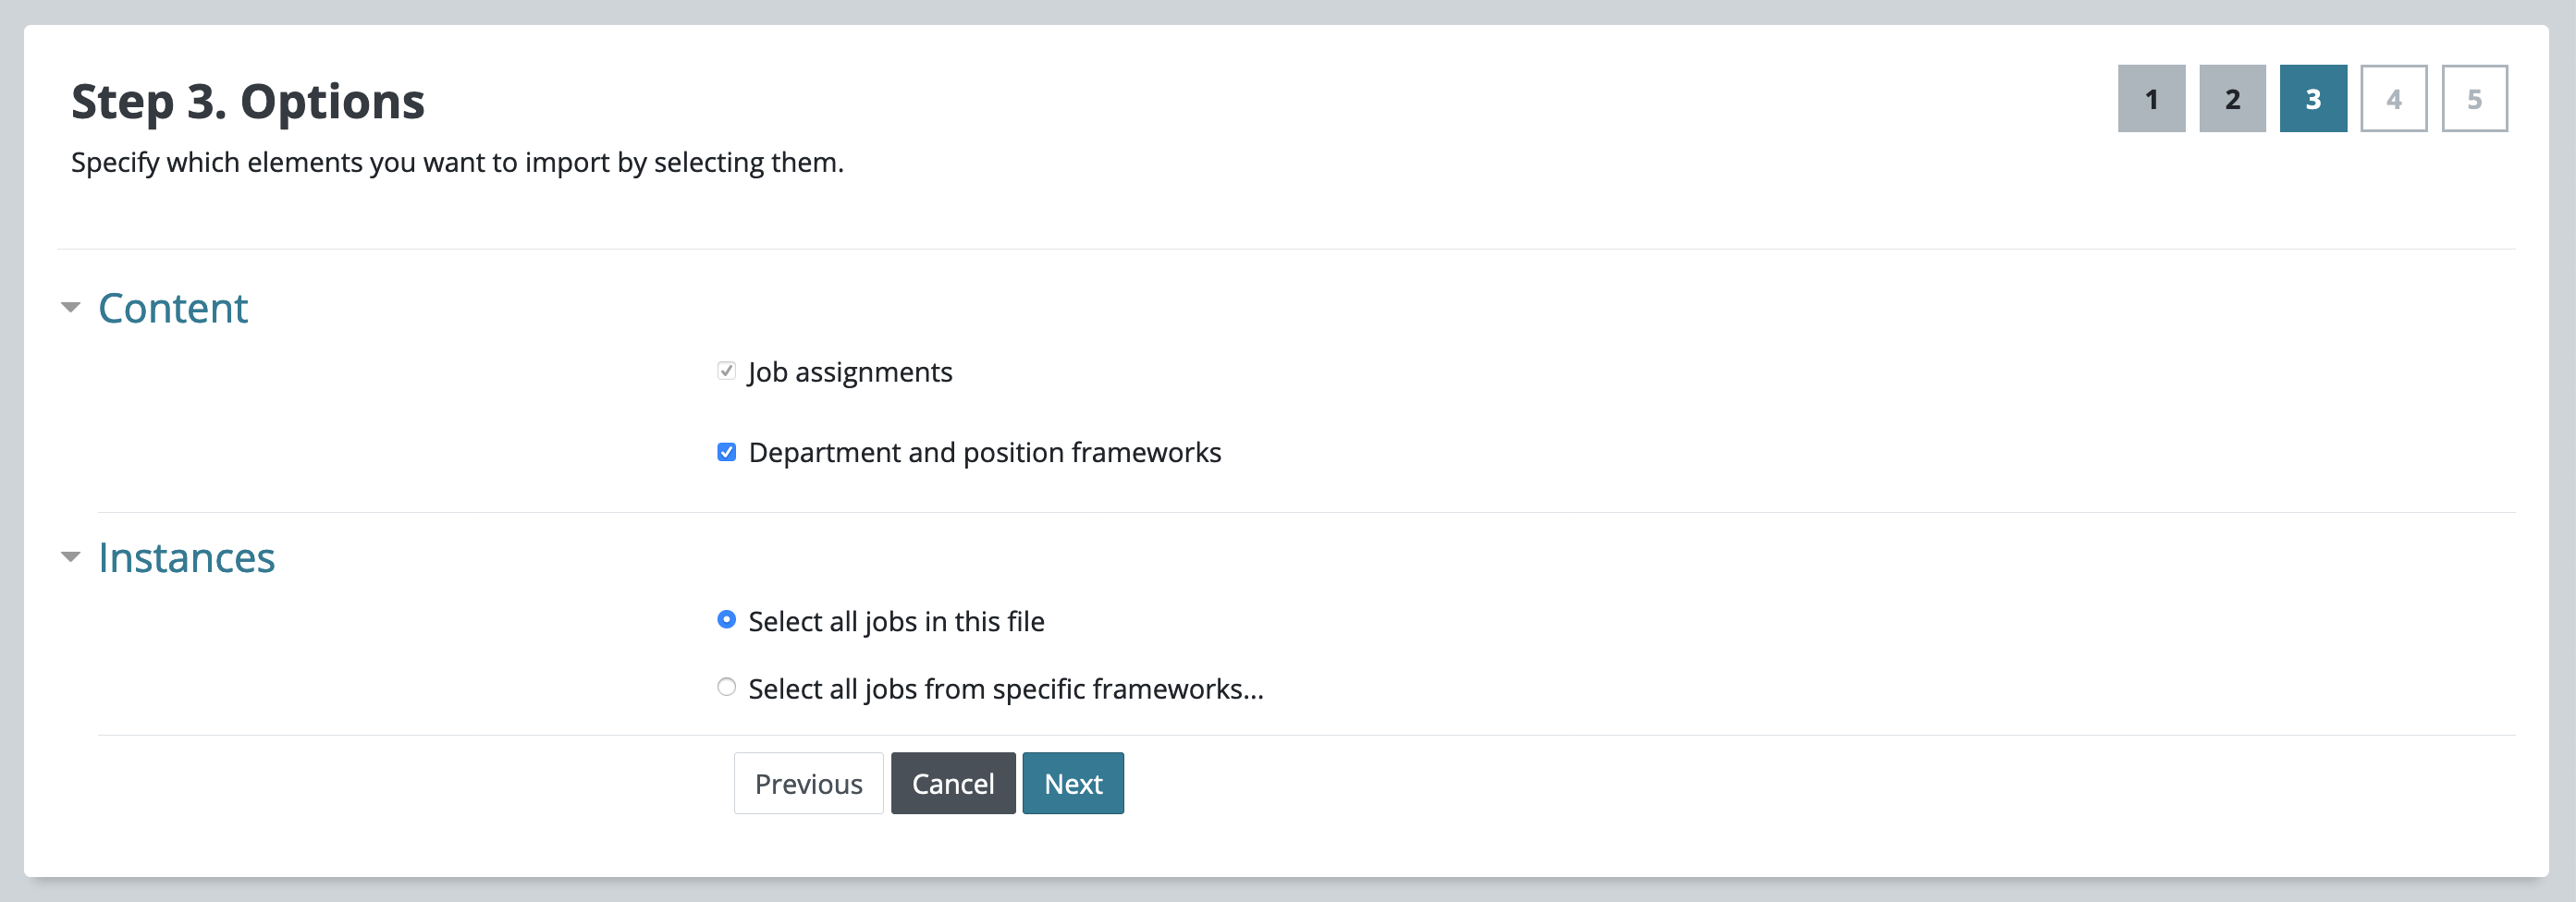
Step 3 - Options
Again, these can vary depending on the importer, but these are the most common ones:
Content
Select which attributes and settings available on the exported file will be imported.
Instances
Select which instances available on the exported file will be imported.
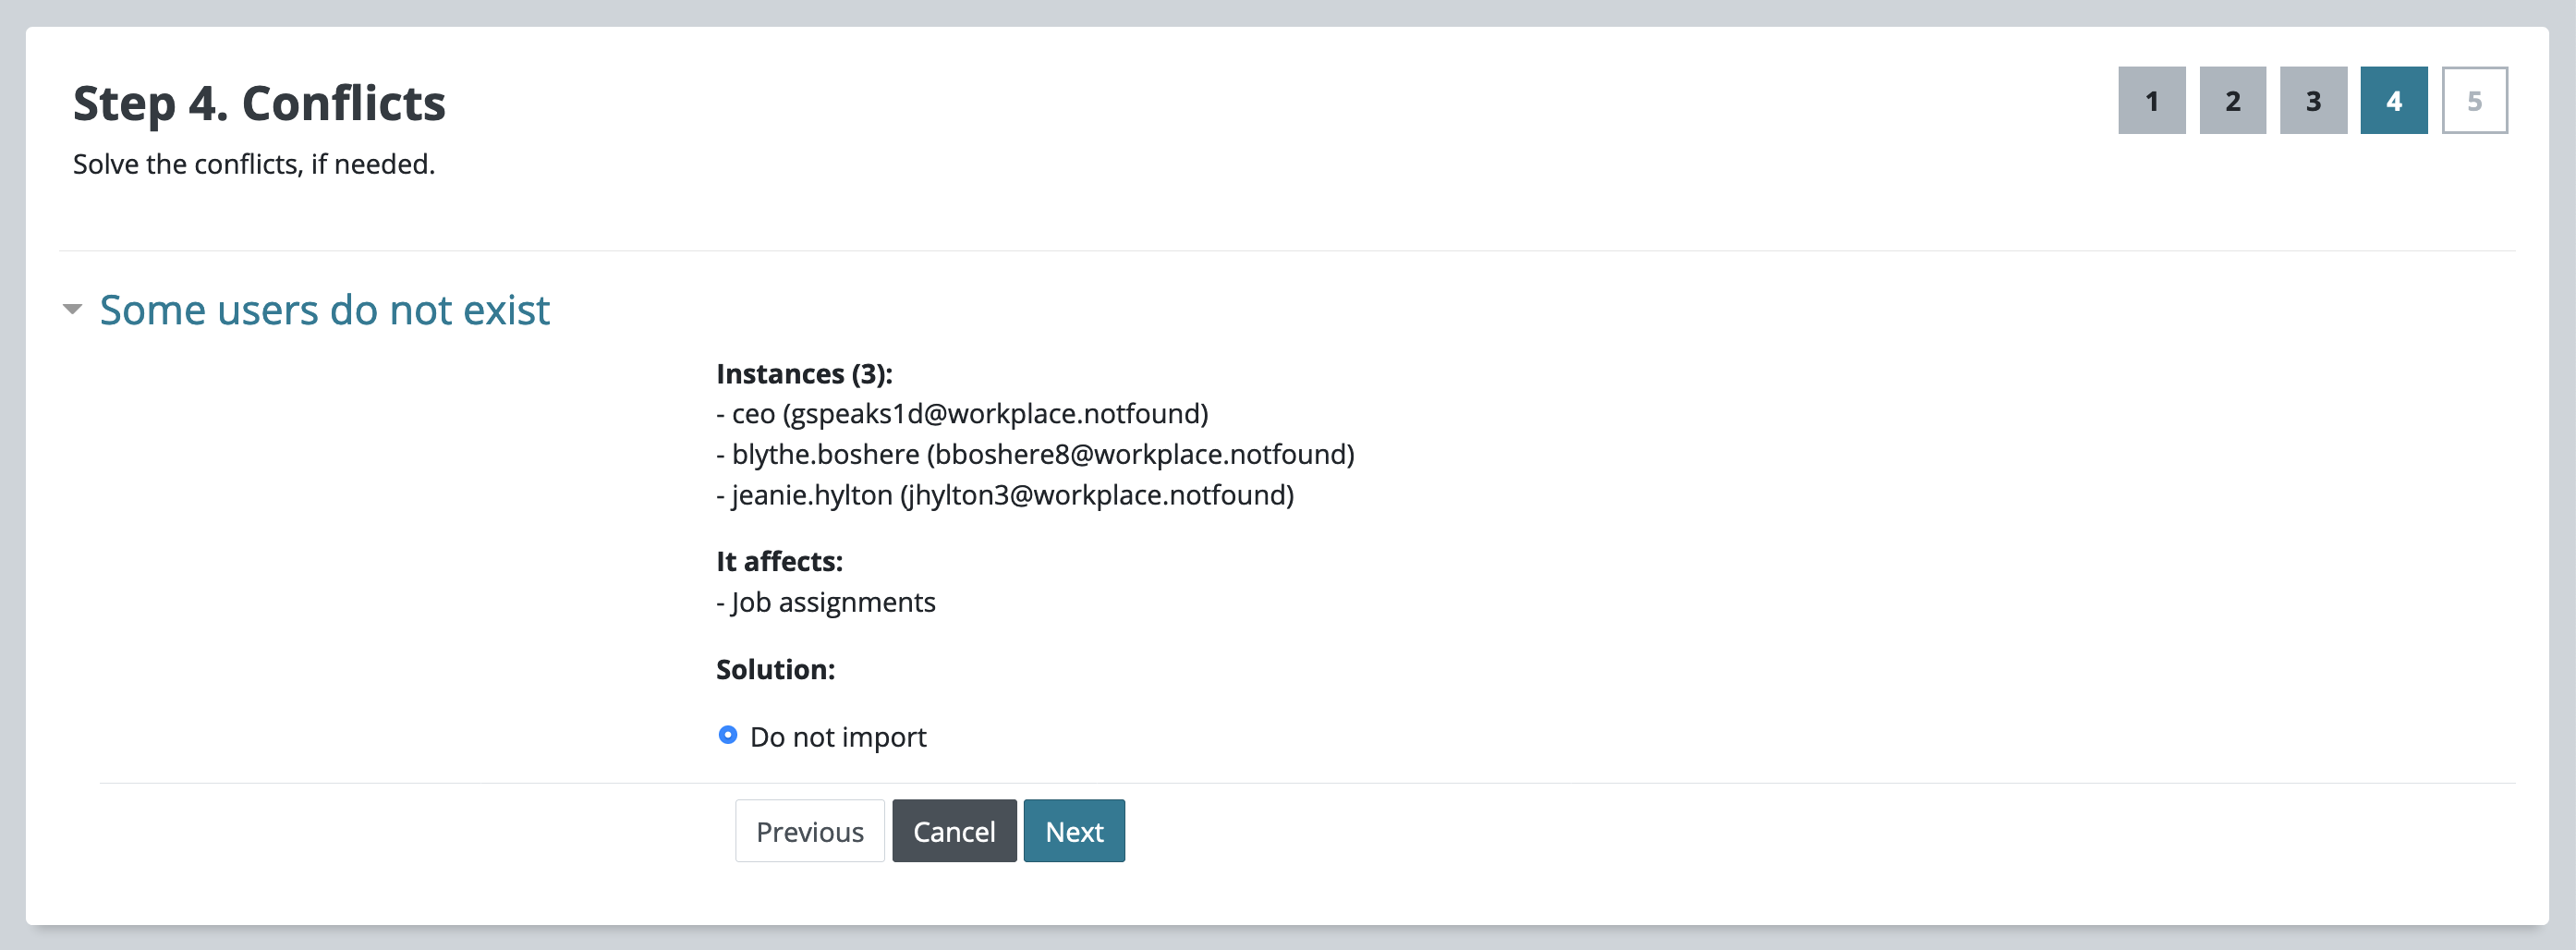
Step 4 - Conflicts
Many times the import process will generate conflicts that will require some manual handling. If no conflict is found, this step will be skipped automatically. For each conflict found, the following elements will be displayed:
Instances
It indicates which instances, from the file being imported, are generating the conflict.
If affects
It shows all components that are being affected by the conflict generated by these instances.
Solution
It offers a list of different available options that will solve the conflict.
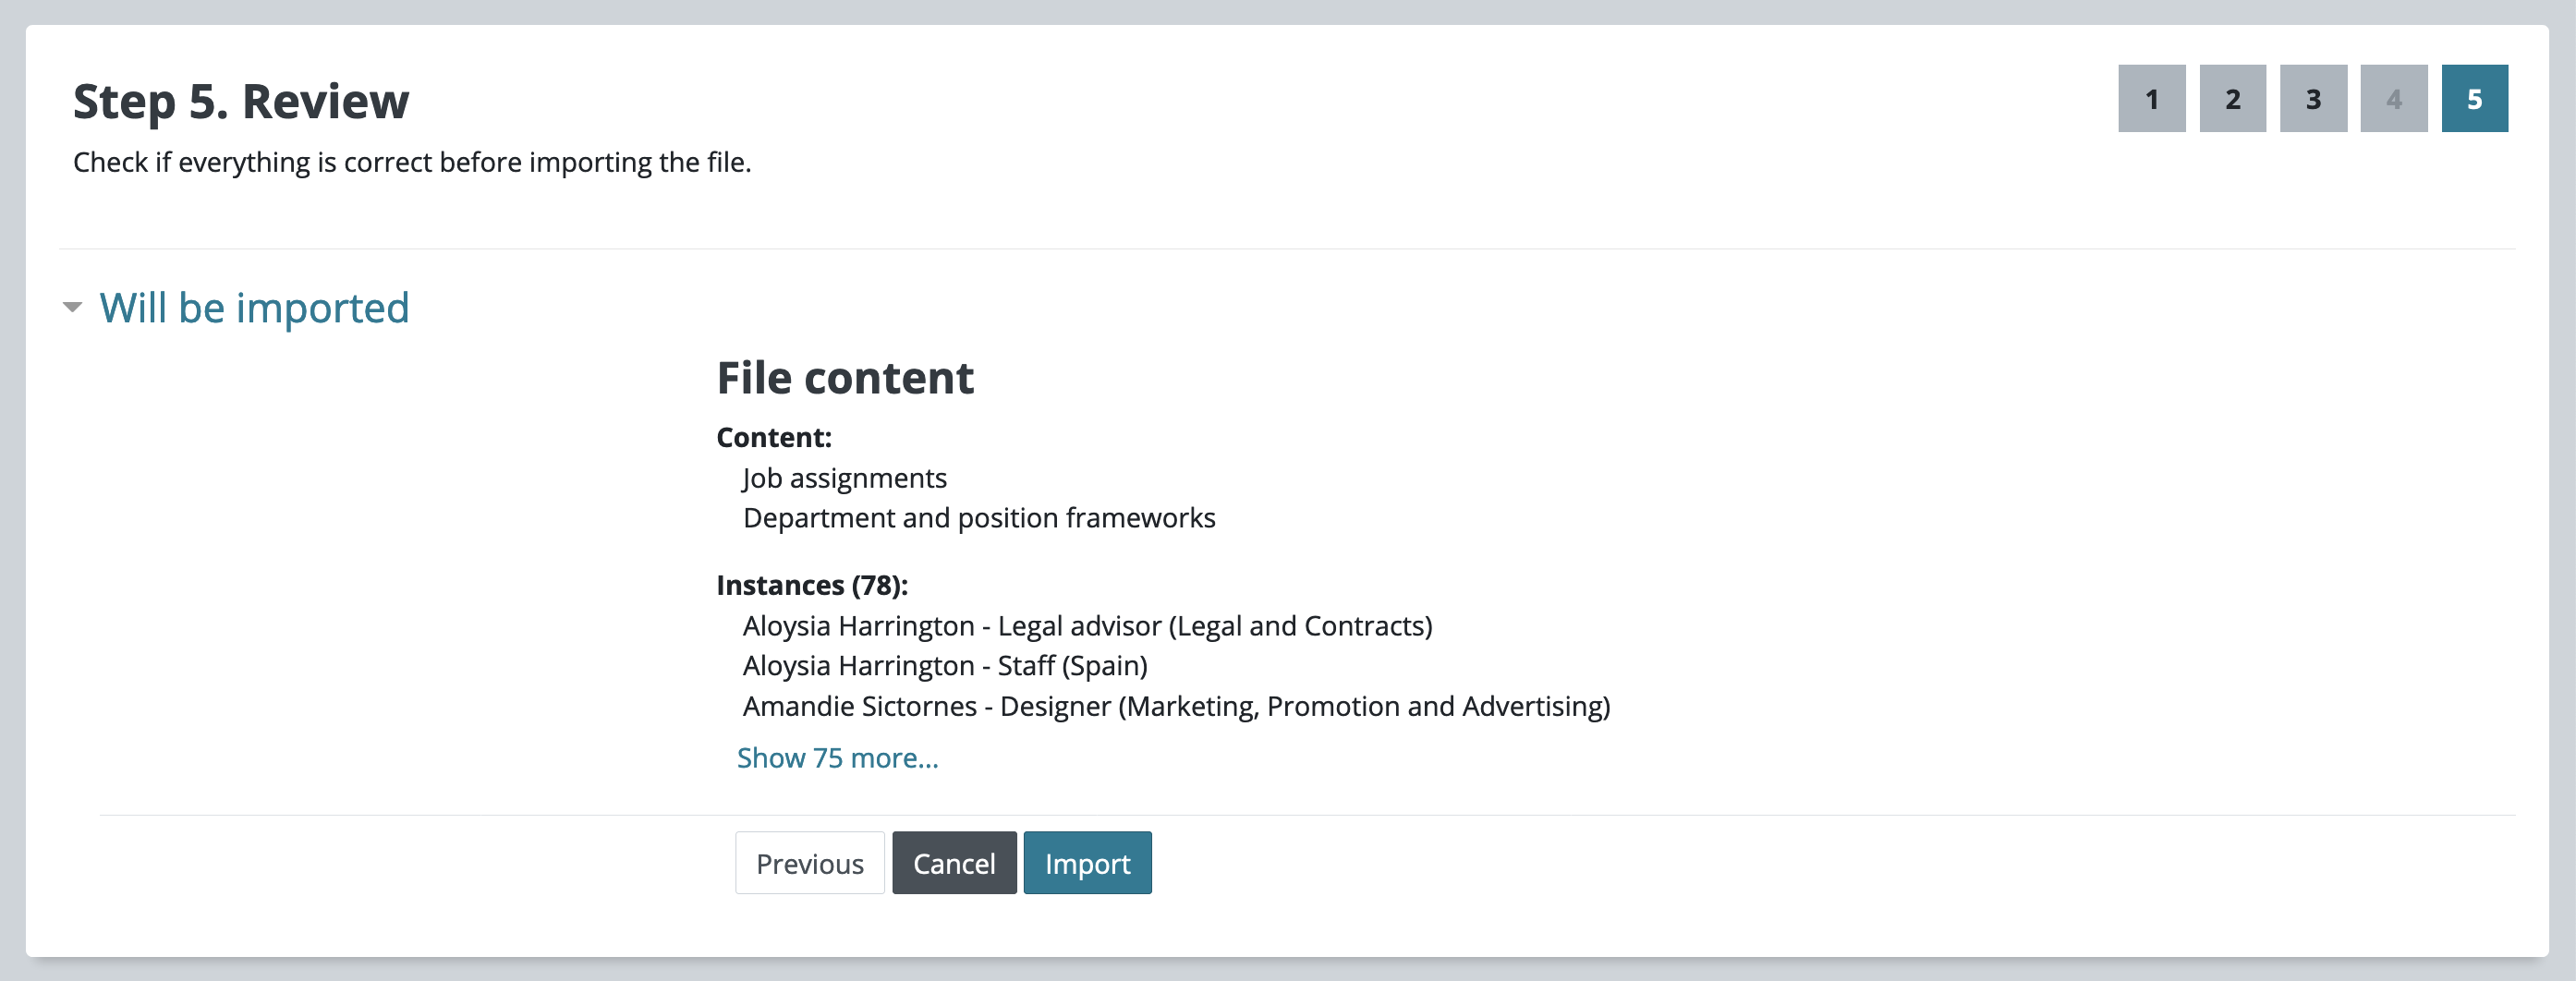
Step 5 - Review
Here, an overview of the import process is displayed. Check if everything is correct before importing the file.
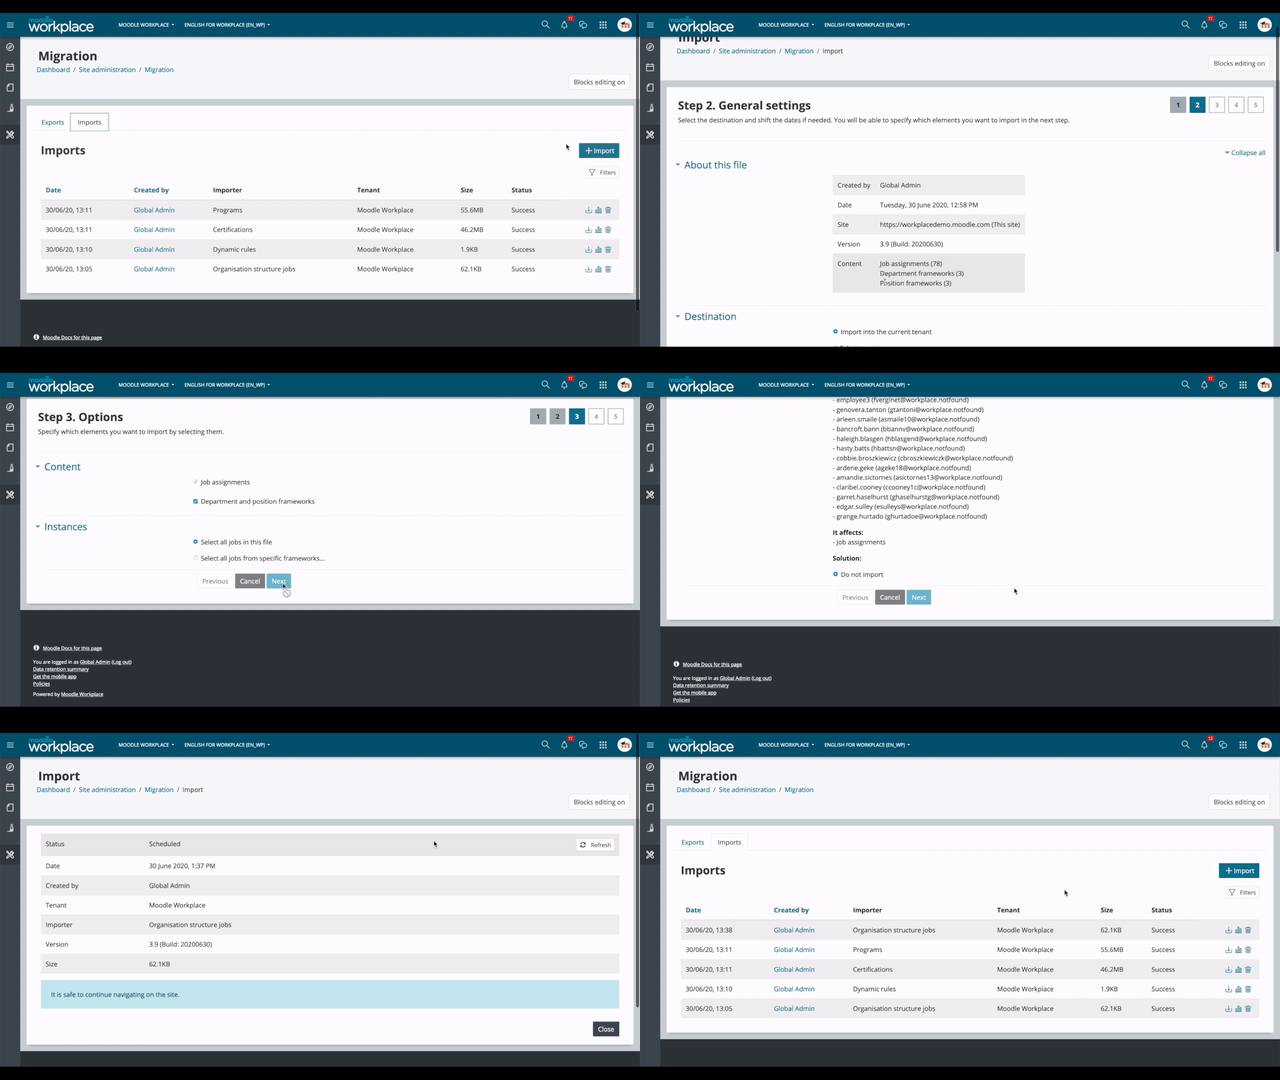
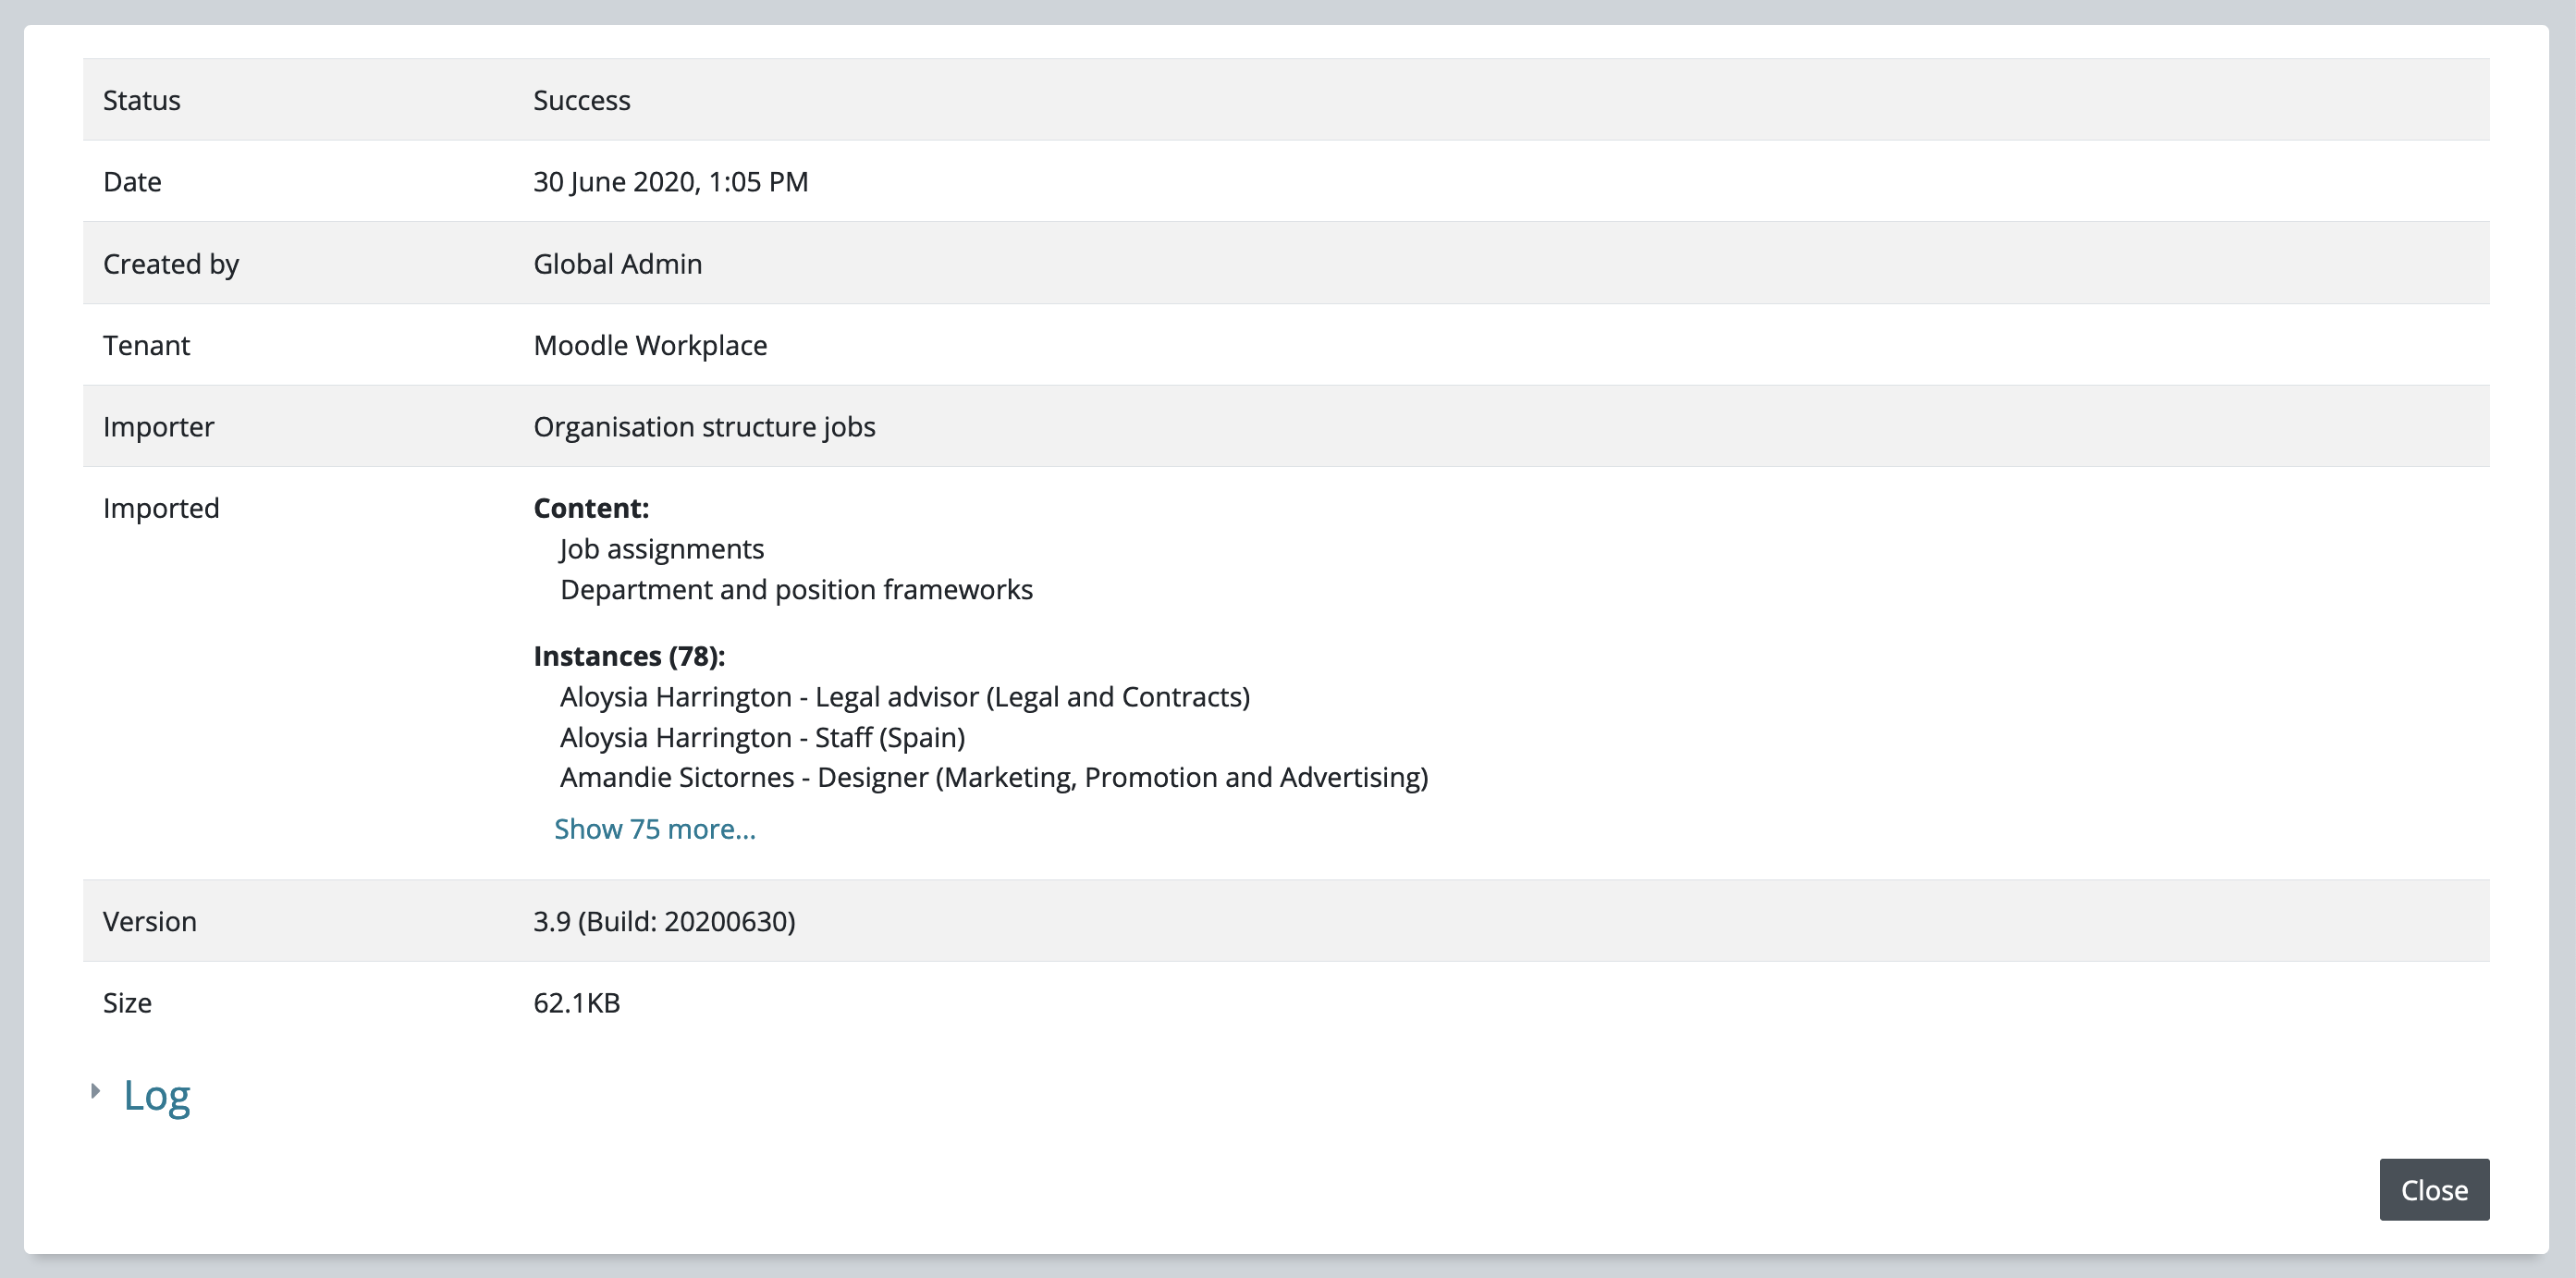
Importing statuses
After going through the step-by-step process, you’ll be redirected to the import report page where you can check, among other attributes, its status, size and date of creation.
Scheduled
An import set as “scheduled” will run on the next cron execution. (How much it takes to start will depend on the cron settings for your site). It’s safe to continue navigating on the site.
In progress
The content is being imported into its destination.
Completed
The import process is over, and its content should be available on its destination. More information about the file should be displayed at this point, and the user will receive a notification about it.
Command-line interface
The following commands will allow you to perform export and import from CLI:
php admin/tool/wp/cli/export.php
php admin/tool/wp/cli/import.php
Both commands have help that explains how to use them. They also have interactive mode that allows to choose some options and display available options for exporters and importer.
Exporter/importer-specific parameters are currently passed as JSON-encoded string. In the future versions we will be working on internationalisation of the CLI (translating dialogues) and more interactivity in the exporter/importer settings.
