Sandbox: Difference between revisions
m (Reverted edit of Neverhood, changed back to last version by UrsHunkler) |
|||
| (626 intermediate revisions by more than 100 users not shown) | |||
| Line 1: | Line 1: | ||
--[[User:Steven Malikowski|Steven Malikowski]] ([[User talk:Steven Malikowski|talk]]) 18:58, 1 September 2015 (AWST) Steven Malikowski 2015-09-01 | |||
== Steven's Second Comment == | |||
The text below comes from some instructions that a colleague wrote, for an app on a tablet. It was written in Word, so I used the Word plug-in for Media Wiki to create the formatting, or try to create the formatting. Next, I need to get the pictures fixed. I suspect that will involve uploading the images and changing in the links to images. | |||
=Completing an Assessment= | |||
To view and complete assessments, follow these steps. | |||
# Start Myprogress, open '''Assessments''' by tapping the Dashboard icon, in top-left corner. [[image:|63x36px]] | |||
# Select an assessment from the list that you need to complete. [[image:|153x52px]] | |||
# Tap the '''Pencil''' icon in top-right corner, to begin the assessment. [[image:|25x25px]] | |||
# Enter your name and email address, before you start filling in the form. [[image:Picture 9|90x36px|C:\Users\fhowat\Desktop\Android Screenprints for Student Guides\Step 7. Basic layout of an assessment form (with assessor email validation).jpg]] | |||
# Tap the '''Aa''' symbol in the top-right hand corner, if you want to change the viewing settings of an assessment. [[image:Step 8. Assessment Viewing Setting.jpg|25x19px]] | |||
# Tap the '''Circle''' next to the answer, to answer multiple choice questions. [[image:|22x42px]] | |||
# Tap on the '''Empty Field''' in the right hand corner next to the question to reveal a dropdown menu of options, to answer a question which uses a rating scale. | |||
[[image:|170x92px]] | |||
# Tap the '''Save''' icon in the top-right hand side. [[image:|20x22px]] | |||
# Select '''Send & share online as complete '''to save the assessment. [[image:|198x72px]] | |||
'''NOTE: '''If you fail to answer any question, a pop up box will appear to remind you that you must complete all questions. | |||
== My First Comment == | |||
This is my first comment in the sandbox, as I learn how to add comments to Moodle docs. I added a horizontal line at the end of this comment. | |||
It seems easy enough to make text '''bold''' or ''italic''. But I'm still figuring out how to add a [link], at least one that works. | |||
I'm going to try some other options later, but overall, I wish the formatting bar used here had similar features to the formatting bar in Moodle. | |||
---- | ---- | ||
Test page for docs | |||
Testing email notification | |||
-Testing- | |||
-Testing- | |||
* hi* | |||
-Testing- | |||
{| cellpadding="2" cellspacing="0" border="1" | |||
!Col1 | |||
!Col2 | |||
|- | |||
|Test1 | |||
|Test2 | |||
|- | |||
|Test1 | |||
|Test2 | |||
|- | |||
|Test1 | |||
|Test2 | |||
|} | |||
==Functions and Examples== | |||
Following are the functions that constitute the basic log API for Moodle. | |||
<code> | |||
add_to_log($courseid, $module, $action, $url='', $info='', $cm=0, $user=0) | |||
user_accesstime_log($courseid=0) | |||
get_logs($select, array $params=null, $order='l.time DESC', $limitfrom='', $limitnum='', &$totalcount) | |||
get_logs_usercourse($userid, $courseid, $coursestart) | |||
get_logs_userday($userid, $courseid, $daystart) | |||
</code> | |||
The basic working of these functions can be categorized into two categories:- | |||
# Adding data to logs | |||
# Fetching data from logs | |||
Let us take a deeper look into both of these:- | |||
<pre>something in pre tags</pre> | |||
<code>and something in code tags</code> | |||
==First edit in sandbox== | |||
An additional edit to sandbox | |||
This is where you can edit the content | |||
==Testing gallery== | |||
<gallery mode="packed-hover"> | |||
File:Atto_27.jpg|Atto | |||
File:Clean27.jpg|Clean | |||
File:MathJax.jpg|MathJax | |||
</gallery> | |||
more testing... | |||
[[de:Hauptseite]] | |||
[[es:Zona de Pruebas]] | |||
[[pt_br:Main_Page]] | |||
Latest revision as of 13:40, 1 September 2015
--Steven Malikowski (talk) 18:58, 1 September 2015 (AWST) Steven Malikowski 2015-09-01
Steven's Second Comment
The text below comes from some instructions that a colleague wrote, for an app on a tablet. It was written in Word, so I used the Word plug-in for Media Wiki to create the formatting, or try to create the formatting. Next, I need to get the pictures fixed. I suspect that will involve uploading the images and changing in the links to images.
Completing an Assessment
To view and complete assessments, follow these steps.
- Start Myprogress, open Assessments by tapping the Dashboard icon, in top-left corner. [[image:|63x36px]]
- Select an assessment from the list that you need to complete. [[image:|153x52px]]
- Tap the Pencil icon in top-right corner, to begin the assessment. [[image:|25x25px]]
- Enter your name and email address, before you start filling in the form. C:\Users\fhowat\Desktop\Android Screenprints for Student Guides\Step 7. Basic layout of an assessment form (with assessor email validation).jpg
- Tap the Aa symbol in the top-right hand corner, if you want to change the viewing settings of an assessment. File:Step 8. Assessment Viewing Setting.jpg
- Tap the Circle next to the answer, to answer multiple choice questions. [[image:|22x42px]]
- Tap on the Empty Field in the right hand corner next to the question to reveal a dropdown menu of options, to answer a question which uses a rating scale.
[[image:|170x92px]]
- Tap the Save icon in the top-right hand side. [[image:|20x22px]]
- Select Send & share online as complete to save the assessment. [[image:|198x72px]]
NOTE: If you fail to answer any question, a pop up box will appear to remind you that you must complete all questions.
My First Comment
This is my first comment in the sandbox, as I learn how to add comments to Moodle docs. I added a horizontal line at the end of this comment.
It seems easy enough to make text bold or italic. But I'm still figuring out how to add a [link], at least one that works.
I'm going to try some other options later, but overall, I wish the formatting bar used here had similar features to the formatting bar in Moodle.
Test page for docs
Testing email notification
-Testing-
-Testing-
- hi*
-Testing-
| Col1 | Col2 |
|---|---|
| Test1 | Test2 |
| Test1 | Test2 |
| Test1 | Test2 |
Functions and Examples
Following are the functions that constitute the basic log API for Moodle.
add_to_log($courseid, $module, $action, $url=, $info=, $cm=0, $user=0)
user_accesstime_log($courseid=0)
get_logs($select, array $params=null, $order='l.time DESC', $limitfrom=, $limitnum=, &$totalcount)
get_logs_usercourse($userid, $courseid, $coursestart)
get_logs_userday($userid, $courseid, $daystart)
The basic working of these functions can be categorized into two categories:-
- Adding data to logs
- Fetching data from logs
Let us take a deeper look into both of these:-
something in pre tags
and something in code tags
First edit in sandbox
An additional edit to sandbox This is where you can edit the content
Testing gallery
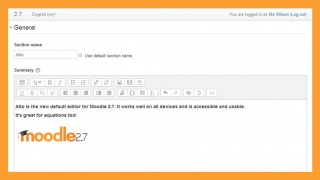
Atto
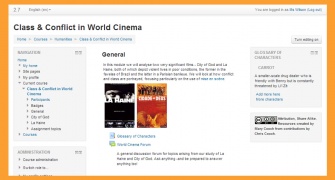
Clean
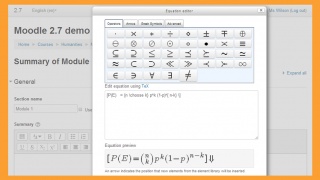
MathJax


more testing...
pt_br:Main_Page