30/Página principal del curso
Vista estándar de un curso vacío
Nuestros ejemplos serán para una página principal de curso (homepage) que es el diseño estándar para una nueva instalación en un sitio. Hay muchas opciones de curso que determinarán la apariencia del curso y lo harán verse muy diferente de nuestros ejemplos. El curso de ejemplo tiene un encabezado, un pie de página (ambos contenidos determinados primordialmente por el tema gráfico) y 3 columnas al centro.
Partes de una página principal de curso
Usando la imagen superior, aquí están las partes de una página principal típica de curso. Es posible mover y ocultar partes de la página; y temas gráficos diferentes mostrarán los bloques en diferentes regiones, por lo que no todos los cursos se verán así.
| Columna izquierda | Secciones del curso - Centro | Columna derecha |
| *1 Nombre completo del curso | *6 encabezado de sección y Foro de novedades | *9 Información sobre ingreso |
| *2 Barra de navegación | *7 Semana actual - Primera sección | *10 Botón para activar edición |
| *4 Bloque de navegación | *8 Semana futura - Segunda sección | *11 Bloque de últimas noticias |
| *5 Bloque de administración | *14 "Mostrar solo esta sección" | *12 Bloque de eventos próximos |
| *15 "Cambiar rol a" | *13 Bloque de actividad reciente | |
| *16 Configuraciones perfil usuario | ||
| *17 Administración del sitio |
Secciones del curso
Las secciones del curso se muestran en el centro de la página del curso.
Para editar una sección de curso
- Elija Activar la edición
- Elija el ícono para editar que está después del título de la sección
Si están habilitadas las Actividades condicionales en el sitio, el acceso a la sección (incluyendo a todas las actividades y recursos en su interior) pueden estar restringidas.
El número de secciones de curso en la columna central puede cambiarse en Configuraciones > Administración del curso > Editar configuraciones o al elegir los íconos de más y menos al fondo de la página del curso cuando está activada la edición.


Para mover una sección de curso
- Active la edición
- Elija el ícono con las flechas hacia arriba/abajo o el ícono con retícula de mira (crosshairs) para mover la sección
- Arrastre la sección al sitio deseado y colóquela allí
Nota: La habilidad para mover secciones de curso está controlada por la capacidad moodle/course:movesections, que está permitida para el rol por defecto de profesor.
Para eliminar una sección del curso
No hay forma de elimnar una sección del curso como tal.
- Tres maners de darle la vuelta y conseguirlo se describen en : https://moodle.org/mod/forum/discuss.php?d=243077
- Aquí hay un plugin: https://moodle.org/plugins/view.php?plugin=block_quickset
Bloques
Los bloque sse muestran en las columnas izquierda o derecha de lapágina del curso.
Para añadir un bloque a la página del curso
- Active la edición empleando el botón en la parte superior derecha o el enlace en Configuraciones > Administración del curso
- Seleccione un bloque del menú desplegable de "Añadir bloque" (que usualmente está situado a la derecha en el fondo de la página)
Para mover un bloque
- Ensure editing is turned on then click onto the block title until the crosshair icon appears
- While keeping the block selected, drag it to where you want to position it and let go.
Alternatively
- Click on the up/down arrow
- Click on the place holder (a zone with a dashed border) where you want the block to appear.


Activities and resources
To add an activity or resource to the course
- Turn on the editing by clicking the button top right or the link in Administration > Course administration.
- Click 'Add an activity or resource' to open the new activity chooser. Select an activity or resource then click the Add button, or simply double-click on the activity or resource name.
If desired, the activity chooser can be switched off via Administration > Course administration > Activity chooser off. Activities and resources can then be added using dropdown menus. (The setting appears only when editing is turned on.)
Note: The Moodle admin can switch this off by default in Administration > Site administration > Appearance > AJAX and Javascript.

Alternatively, certain resources and activities may be added using drag and drop:
- To add a archivo, simply drag and drop it onto the course section where you'd like it to appear
- To add a Carpeta con archivos, simply zip the folder then drag and drop it onto the course section where you'd like it to appear, answer 'Unzip files and create folder' to the popup dialogue, then click the upload button
- To add a paquete SCORM, simply drag and drop it onto the course section where you'd like it to appear, answer 'Add a SCORM package' to the popup dialogue, then click the upload button
Editing elements on your course homepage
With the editing turned on, each item on your course homepage and each section/block will have icons next to it which all perform different functions such as edit/move/copy/delete/hide. Note: Your theme may have icons different from these below:
 - the open-eye icon means an item is visible to students. It will close when you click on it

 - the eye with a strike through icon means an item is hidden from students. It will open when you click on it

 - the move icon allows you to move items or sections by dragging and dropping.

 - this move icon appears if you don't have Ajax enabled.

 - the groups icon allows you to change between no groups or separate/visible groups

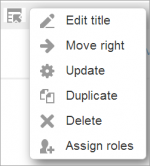 - this icon groups actions together for easier editing on smaller screens. Click to reveal the options. "Moodle 2.6"

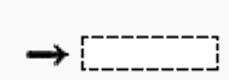 - the move here icon appears when moving a course element without Ajax. Click into the box to re-locate your item.

 - the up/down arrows allow you to move course sections up or down and appear if you do not have Ajax enabled.

 - the delete icon will permanently delete something from the course

- - the groups icon allows you to change between no groups or separate/visible groups
 - the roles icon allows you to assign roles locally in the item.

The following icon only applies to sections
 - the highlight icon allows you to highlight a section as current.

Tips and tricks
- Make your course home page look more like a webpage - see Curso FAQ
- Activity and resource descriptions can be displayed on the course page just below the link to the activity or resource by clicking the 'Display description on course page' checkbox in the activity or resource settings.