Diferencia entre revisiones de «Recurso archivo»
- Libro
- Archivo
- Carpeta
- Paquete de contenido IMS
- Página
- Área de texto y medios (Moodle 4.1)
- Etiqueta (Moodle 4.0 y anteriores)
- URL
- Recursos FAQ
(tidy up) |
(tidy up) |
||
| Línea 18: | Línea 18: | ||
#Alternatively, with the editing turned on in a course, choose 'File from the activity chooser. | #Alternatively, with the editing turned on in a course, choose 'File from the activity chooser. | ||
#Give it a name and, if required, a description, checking the box if you want the description displayed on the course page | #Give it a name and, if required, a description, checking the box if you want the description displayed on the course page | ||
#Expand the other settings to select, for example, whether to show students its size, type and date uploaded and how you want the file to display. Find out more about display settings in the documentation [[ | #Expand the other settings to select, for example, whether to show students its size, type and date uploaded and how you want the file to display. Find out more about display settings in the documentation [[Configuraciones del recurso archivo]]. (Note for example that an uploaded slideshow presentation will not play as it would on a whiteboard, even if saved as a 'show'. Students will be prompted to download it. A workaround is to upload the presentation to a slidesharing site and embed it.) | ||
#Save the file. | #Save the file. | ||
Revisión del 22:09 17 oct 2022
¿Qué es un recurso Archivo?
Files are not just materials such as word-processed documents or slideshow presentations. All types of files can be uploaded and accessed through Moodle, but the student needs to have the correct software to be able to open them.Different file types are shown with different icons. Files may be added in two ways: They may dragged and dropped directly onto the course page:
Alternatively they may be added by clicking File from the activity chooser.
¿Cómo se configura?
To drag and drop a file, with the editing turned on in a course, click and hold the file (1 below), drag it to your chosen section (2), and release. The file will upload and display (3):
- Alternatively, with the editing turned on in a course, choose 'File from the activity chooser.
- Give it a name and, if required, a description, checking the box if you want the description displayed on the course page
- Expand the other settings to select, for example, whether to show students its size, type and date uploaded and how you want the file to display. Find out more about display settings in the documentation Configuraciones del recurso archivo. (Note for example that an uploaded slideshow presentation will not play as it would on a whiteboard, even if saved as a 'show'. Students will be prompted to download it. A workaround is to upload the presentation to a slidesharing site and embed it.)
- Save the file.
Archivos de Google Drive y OneDrive
Archivos desde Google Drive y OneDrive
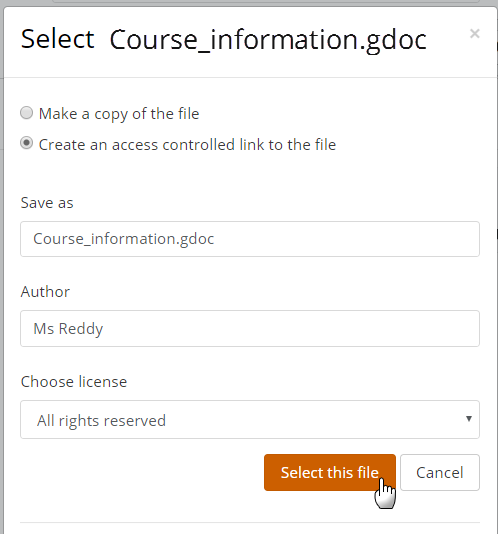
Si el administrador ha habilitado eta característica en el Repositorio Google Drive o el Repositorio OneDrive entonces los profesores pueden seleccionar un archivo desde sus Google Drive o OneDrive y mostrarlo como un 'enlace de acceso controlado'. Los estudiantes solamente pueden ver el archivo, pero los profesores pueden editar el archivo si lo requieren. Este método es una forma útil para mostrar archivos que necesitan actualización frecuentemente. Sin embargo, tome nota de que los archivos de OneDrive no se mostrarán correctamente si están incrustado
¿Cómo funciona?
Vista del estudiante
How students access the file depends on the display settiings and the type of file, and also often the browser the student is using.
Vista del profesor
Teachers view the files in a similar way to students. They can edit the file settings by clicking the Edit drop down to the right of the file when the editing is turned on.
Más información
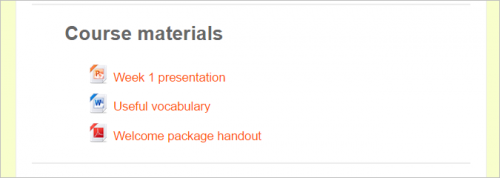
Moodle proporciona una forma fácil para que un profesor les presente materiales a sus estudiantes, como por ejemplo documentos de procesador de texto o presentaciones de diapositivas. Pueden subirse y accesarse en Moodle todos los tipos de archivos, pero los estudiantes necesitan tener el programa (software) correcto para poder abrirlos. Los tipos de archivos difernetes se muestran con íconos diferentes como se observa debajo:
Los archivos pueden añadirse al subirlos desde una fuente externa como una computadora o un dispositivo de memoria USB, o al arrastralos y soltarlos directamente por sobre de la página del curso. En ambas opciones se necesita Activar la edición.
Los screencasts Arrastrar y soltar archivos y Subir archivos proporcionan introducciones breves (en idioma inglés) sobre el como añadir archivos, y la documentación Configuraciones del recurso archivo proporciona información detallada si Usted la necesitara. Vea también la documentación Recurso archivo FAQ si su pregunta no hubiera tenido respuesta en otro lado.
Para arrastrar y soltar un archivo, haga click y mantenga presionado el botón del ratón sobre del archivo (1 inferior), arrastrándolo a su sección elegida (2), y allí libérelo. El archivoserá subido y mostrado (3):
| Nota: El cómo vean los estudiantes su archivo dependerá del tipo del archivo y sus configuraciones para mostrarse. Encuanter más información acerca de las configuraciones para mostrarse en la documentación Configuraciones del recurso archivo. |
Como un ejemplo, una presentación con paso de diapositivas no funcionará como un PowerPoint en un pizarrón, aun y cuando la hubiera guardado como una 'presentación'. Los estudiantes recibirán una instrucción para que descarguen este archivo. (Una solución útil es subir esta presentación en un sitio para compartir presentaciones e incrustarla.)


