Moodle 2.x
Nota: Pendiente de Traducir. ¡Anímese a traducir esta página!. ( y otras páginas pendientes)
Certificado es un complemento y puede personalizarse por el administrador más allá de la descarga estándar. En general.
- Esto puede hacerse al subir tipos de imágenes adicionales mediante el menú de administración del sitio, o al subir imágenes hacia una de las carpetas de certificate/pix.
- El texto mostrado puede cambiarse al Personalizar el idioma en la administración del sitio, o editando directamente el archivo /certificate/lang file.
- La localización de las imágenes y texto del certificado puede cambiarse al crear/editar el código para un tipo de certificado.
Ejemplos de certificados
- Ejemplos de Certificados - haga click en una imagen para agrandarla
-
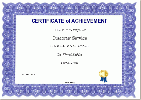
 Se muestra sin opciones seleccionadas, título estándar, nombre del curso, nombre_del_usuario y palabras.
 -
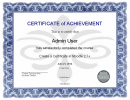
 Borde sofisticado, línea de Firma, sello y código
 -
 Muestra muchos textos e imágenes seleccionadas, firma, sello, sello-de-agua, código, calificación, nombre del profesor, calificación, Competencias, texto personalizado
 -
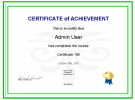 Líneas, firma, sello, sello-de-agua, código, calificación, Competencias, texto personalizado
 -
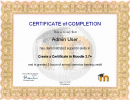
 Borde subido, firma, sello-de-agua y sello
 -
 Todo personalizado, nuevo tipo de certificado, con nuevas cadenas de texto, nuevas posiciones para texto y para imágenes, más sello-de-agua, fima y borde subidos.


Personalización
El código del certificado está localizado en la carpeta /mod/certificate. Existen subcarpetas para backup (respaldo), db (base_de_datos), lang (contiene sub-.carpetas para los diferentes Idiomas), type (contiene los tipos estándar de certificados, cad uno en su propia sub-carpeta) y pix (imágenes). La carpeta pix contiene las sub-carpetas para los borde (orillas) por defecto, los sellos, las firmas y los sellos-de-agua. Estos se usarán al momento de la instalación y se volverán las opciones estándar, pero después ya no se usarán más.
Añadir imágenes

La forma más fácil para personalizar su certificado es que el adminitrador del sitio añada sus propias imágenes JPG o PNG para las orillas (bordes), sellos, firmas y sellos-de-agua a las imágenes por defecto al momento de la instalación. El administrador del sistema debe de ir al bloque de Administración del sitio > Plugins > Actividades > Certificado > Subir imágenes.
Asegúrese de que sus nuevos archivos sean del mismo tamaño que las imágenes estándar. Por ejemplo, la firma estándar es de 150 pixeles por 31 pixeles. Si el archivo de su firma es de tamaño diferente, Usted puede necesitar modificar la línea del código que lo describe. Lo mismo aplica para los bordes (orillas), sellos y sellos-de-agua. Los sellos de ejemplo miden 80x80 pixeles, los bordes (orillas) de ejemplo miden 800x604 o 1024x831 pixeles y los sellos-de-agua de ejemplo miden 386x468 o 380x380 pixeles.
En el ejemplo creativo, se subieron un borde personalizado, sello-de agua personalizado, firma y sello personalizados. Todos eran del mismo tamaño y en el mismo formato de archivo del que venía en la instalación inicial del certificado.
Personalización del formato

Usted necesitará poder editar su código Moodle para crear un formato personalizado. Es una buena idea el crear su propio tipo de certificado personalizado, el cual aparecerá en una lista junto con los tipos estándar de certificados. Usted sabrá fácilmente cual es su tipo de certificado personalizado y sobrevivirá cuando Usted haga una Actualización de plugins. Aquí se describe como hacerlo:
1. Elija una de las carpetas de certificate/type; cópiela y péguela en la carpeta de certificate/type, pero dándole un nombre diferente. Por ejemplo, copie la carpeta /type/letter_non_embedded y renómbrela a 'micertificado'.
2. Abra el archivo certificate/lang/en/certificate.php y añádale el nombre de su nuevo tipo de carpeta. Siguiendo el ejemplo de arriba, Usted añadiría:
- $string['typemicertificado'] = 'Mi Nuevo Certificado';
Ahora, cuando Usted añada un certificado a un curso, aparecerá su nuevo tipo en la lista del menú desplegable como "Mi Nuevo Certificado".
- Sugerencia: Usted debe de añadir la cadena de texto apropiada como se muestar en el paso 2 superior, o Usted recibirá un mensaje de error y aparecerá como si el código del programa estuviera roto. Y recuerde que si actualiza su módulo de certificado, este archivo puede borrarse por una nueva versión.
- Sugerencia: Las secciones inferiores dan ejemplos de como cambiar las posiciones de imágenes y el texto en un archivo de tipo de certificado. Tambien cubren el como crear una nueva cadena de caracteres de texto dentro del archivo certificate lang.
Ejemplos de código para modificación del texto y la posición del texto
El cambiar la localización del texto se hace al usar el código para configurar la posición x,y sobre la página. La "x" es la distancia desde el margen izquierdo y la "y" es la distancia desde la parte superior. Todos los archivos de código de certificados comienzan por definir los puntos x,y para varias cadenas de texto o imágenes.
Aquí hay algnos ejemplos que configuran la posición en el mismo lugar:
- certificate_print_text($pdf, 28, 183, 'C', 'Times', 'B', 20, get_string('certifymoodle', 'certificate')); //Esto fija el inicio del texto en 28,183.
- certificate_print_text($pdf, $x, $y + 55, 'C', 'Times', 'I', 20, get_string('certifymoodle', 'certificate')); // Esto usa la cadena de caracteres x (la cual es $x= 28) y le añade 55 a la cadena de texto y (la cual era $y=128).
- certificate_print_text($pdf, $certx, $certy, 'C', 'Times', ' ', 20, get_string('certifymoodle', 'certificate')); /Esto usa nuevas definiciones de cadenas de texto que fueron añadidas a la parte superior de las secciones para ambos estilos Landscape (Paisaje) y Portrait (Retrato).
En los ejemplos de arriba, centramos el texto, se uso el tipo de letra (font) Times, negritas, cursivas y nada y se mantuvo el tamaño del tipo de letra en 20.
Tambien creamos una nueva cadena de caracteres llamada certifymoodle. En el archivo /certifcate/lang/en/certificate.php copiamos la línea de la cadena de texto $string['certify'] = 'Esto es para certificar que (This is to certify that)';, la pegamos debajo de la línea original y la cambiamos para que se leyera $string['certifymoodle'] = 'Esto hace constar que (This is to say that)'; Vea la sección inferior para más ejemplos acerca de como cambiar el texto.
- Sugerencia: ¿No cambia el texto? Usted tendrá que ir a las configuraciones del Idioma en la administración del sitio y desactivar la caché. Recuerde que esto alentará los tiempos de carga de páginas para todos los usuarios, así que deberá regresarlo a como estaba en cuanto acabe y funcione.
Ejemplos de código para modificar la posición de la imagen
We will change the signature position that is found in the type/letter_non_embedded/certificate.php file when we generate a pdf in landscape mode. There are at least 2 ways to change the code. Say we want to move it to the left to the 100 position from 130 and up to the 435 line from the 440 line.
- Near the top of the file, you should notice there are a set of variables for "Landscape" which are followed by another set for "Portrait". We can overrule some of the landscape and portrait codes the $sigx and $sigy position variables, so they read $sigx = 100 and $sigy = 435 .
- Alternatively, we can overrule some of the landscape and portrait codes, in this case the signature block. In the "// Add images and lines" section we see the code that actually prints in the position by using the landscape and portrait variables:
- print_signature($pdf, $certificate, $sigx, $sigy, , );
By changing the variables to fix numbers it will not matter if the teacher selects landscape or portrait mode for this custom type. For example:
- print_signature($pdf, $certificate, 100, 435, , );
If others have not added a standard signature line, you might want to fix it to a certain size. For example, you want the image to print 150px by 75px.
- print_signature($pdf, $certificate, $sigx, $sigy, '150', '75');
This should give you a good idea about how to change the position of other images.
Ajustar la transparencia de una imagen
It is possible to put in a strong image as a watermark and adjust the transparency setting when the PDF is created. Look for the SetAlpha code in front of a print element. For example infront of the "print_watermark.." line, you will see $pdf_SetAlpha(0.1); It is currently set to .1, the .3 in our example is less transparent.
- Tip: In older version of certificate, the watermark image itself was dimmed before it was placed in the folder. If you had a custom watermark, this is the way it was done. You can change the SetAlpha in the code to 1 and it should appear as it did in previous version of certificate.
Cambiar el texto impreso
There are two ways to change the language strings. A best practice is to customize your language pack via site administration. You will find the certificate.php in the mod group. If you use the method below, when you update all your certificate files, then your changes will not be saved.
You can edit the language file found in the certificate folder, such as certificate/lang/en/certificate.php if you are not worried about losing you changes. Lets say you want to change the words at the top of all certificates on your site.
Find the default strings:
- $string['title'] = 'CERTIFICATE OF ACHIEVEMENT';
- $string['intro'] = 'This is to certify that';
- $string['statement'] = 'has completed the course';
Change them to read (for example):
- $string['title'] = 'DIP0LOMA';
- $string['intro'] = 'I am proud to state that';
- $string['statement'] = 'has successfully passed the final exam';
Añadir una nueva línea de texto
You have created a couple of custom certificate types. In these certificates you want some new words to appear. There are basically 2 choices, you can have it look up a new string, or hard code the words in the certificate type instead of looking for a string.
- Add new string method.
- Open the certificate/lang/en/certificate.php file and add your new string giving it a unique name.
- $string['mynewtext'] = 'This is what I want to print on the certificate';
- Open the file for your certificate type and change the string reference. For example, go to certificate/type/mycertificate/certificate.php. Near the end of the file find "// Add Text". This is the area that prints--you guessed it--text on the certificate. Find the current line below which you would like your new text to be printed. For example, if you want your text to print below the course name, find the line:
- cert_printtext($pdf, $x, $y, 'C', 'Helvetica', , 30, get_string('title', 'certificate'));
3. Add a new line below that to print your new text using the name you gave your new lang string like this:
- cert_printtext($pdf, $x, $y+25, 'C', 'Helvetica', 'B', 10, get_string('mynewtext', 'certificate'));
Quick review. We want the string mynewtext to start on the $x position from the left, on the $y+25 line, and the line should be center aligned (C, L, R or ' '), in Helvetica type, in bold, with a font size of 10.
5. You can add a hard coded line of text. For example, add signature title block line under the signature image:
- cert_printtext($pdf, $sigx, $sigy+30,, 'Helvetica', 'B', 10, 'Martin Dougiamas, Lead Developer');
Añadir una segunda página
After you have created your first page (or copied an existing page), add this bit of code:
$pdf->AddPage();
Then you in the code for the second page. You can create a certificate with as many pages as you want.
Cambios en Noviembre 2011
PukunuiAustralia / moodle-mod_certificate version 2011110107 is the basis for these comments. There maybe earlier versions which are different.
- Standard types of certificates. There are 4 standard certificate types based upon paper size and if the fonts are embedded or non-embedded in the pdf documents. The orientation of landscape or portrait is located within each of these types. This is different from the 1.9.x versions.
- The code for printing strings has changed. While similar to the pre 2.0, be careful.
Sugerencias y Trucos
- Comience con uno de los tipos de certificados existentes, cópielo y modifíquelo.
- Pruebe su código personalizado en un sitio que no sea de producción real, como por ejemplo en una PC local.
- En Administración >> Servidor configure depuración (debugging) al máximo (para mostrar cualquier mensaje de error del código).
- While you can leave a php file open in edit mode, you must save the file before your changes become active.
- Make code changes one at a time, test and then backup after each successful change. For example,after adding a new string to the certificate lang file), go to your course page and click on a certificate to see if it appears on the list.
- If you broke the code you may get a blank screen for a certificate.
- So it might be a good idea to make a backup of each successful change before starting the next change. For example, after the 3rd code change, save certificate.php as certificate3.txt.
- Certificate icon location-If you are using your own theme you have to put the icon.gif inside a folder called certificate and put in your mod folder image. For example, if your theme uses custom icons, you must put a certificate folder with the certificate icon.gif in it under your theme/pix/mod folder.
- Consider editing you language pack rather than the /certificate/lang/en/certificate.php file. You can do this through the Settings > Site administration >Language > Language customization menu. Look for mod/certificate.php. Then when you update your certificate and it's language,it will keep your changes for the standard strings.
- You can use a graphics program to edit the empty center space in a 'border' image to create a certificate 'background' that contains larger images, more images and multiple signature lines - without having to edit code. This is useful if a series of courses are all going to need the same basic certificate layout - just select the correct 'border image' under Design options and be done.
- Use a topic section heading as the certificate title. See in the certificate forum for a code tweak.
- Your image is stretching? Add some white space to either side of your canvas. For example add white space to create the same width/height ratio as defined by the wmarkw and wmarkh code variables.
Vea también
- Add/Edit Certificate
- Viewing a Certificate
- Moodle 2.x and later versions of certificate can be found at PukunuiAustralia / moodle-mod_certificate.