MoodleNet: Difference between revisions
No edit summary |
No edit summary |
||
| (One intermediate revision by one other user not shown) | |||
| Line 18: | Line 18: | ||
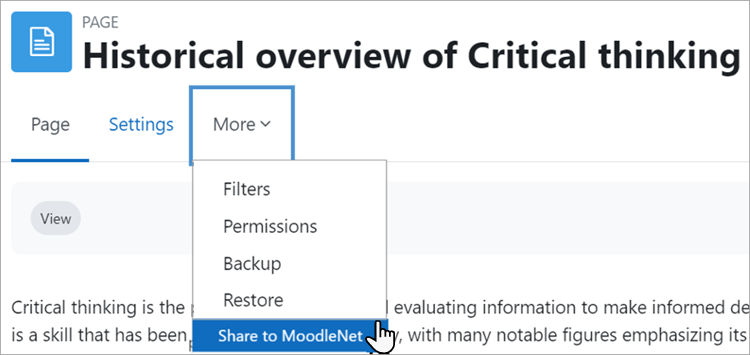
[[File:ShareMoodleNet.png|More link to share to MoodleNet]] | [[File:ShareMoodleNet.png|More link to share to MoodleNet]] | ||
[[Es:MoodleNet]] | |||
[[de:MoodleNet]] | |||
Latest revision as of 06:41, 17 July 2023
MoodleNet is an open, social, media platform for educators, initially focused on sharing and curating collections of open content. It is a central place from where educators can easily detect quality content to meet the needs of their learners and courses. You can either use MoodleNet Central, the global public MoodleNet, or install your own instance of MoodleNet. Read the MoodleNet documentation for more information about MoodleNet.
MoodleNet inbound settings
As an administrator you can connect to an instance of MoodleNet so course teachers can browse for and import content.
- From Site administration > Advanced features, make sure Enable MoodleNet integration (inbound) is checked. (It is enabled by default.)
- From Site administration > General > MoodleNet settings, check the settings in the link MoodleNet inbound settings.
- Optionally, from Site administration > Courses > Activity chooser > Activity chooser settings, select MoodleNet from the footer dropdown. This will then display a link in the Activity chooser.
MoodleNet outbound settings
As an administrator you can connect to an instance of MoodleNet so that course teachers or others with the capability moodlenet:shareactivity can send course content to the selected MoodleNet site. (Note that the feature does not currently support sharing whole courses.)
- From Site administration > Development > Experimental settings, check the box Enable sharing to MoodleNet (outbound)
- You will then have an extra setting (Enable sharing to MoodleNet (outbound)) from Site administration > General > MoodleNet settings, prompting you to set up a MoodleNet OAuth 2 service.
- From Site administration > Server > OAuth2 services, click the MoodleNet button and set up your service. See OAuth 2 MoodleNet service.
- Once the service is created, go to Site administration > General > MoodleNet outbound settings and set the OAuth 2 service to the service you just created.
- When everything is configured correctly, users with the Capabilities/moodle/moodlenet:shareactivity will see a link "Share to MoodleNet" from the More tab of an item they want to share.
