Grading quick guide: Difference between revisions
No edit summary |
|||
| Line 22: | Line 22: | ||
[[File:grade.png]] | [[File:grade.png]] | ||
On the following page, you can enter a grade, enter feedback, and select whether to notify the student or not. When finished, | On the following page, you can enter a grade, enter feedback, and select whether to notify the student or not. When finished, be sure to click on Save. The Save and Show Next button will save the grade for this student and move to the grading page for the next student. | ||
[[File:entergrade.png]] | [[File:entergrade.png]] | ||
Revision as of 15:54, 2 November 2015
This guide is designed for teachers or non-editing teachers that will be entering grades for students. Grades can be entered in multiple locations in Moodle. It will depend on what you are grading where the best place is to enter the grades. There are advantages to each area. Entering grades from the Assignment has the advantage that it will send a notification to the student when the grade is submitted. This will not happen when the grade is edited from the grader report or single view screen.
Grading from the Assignment page
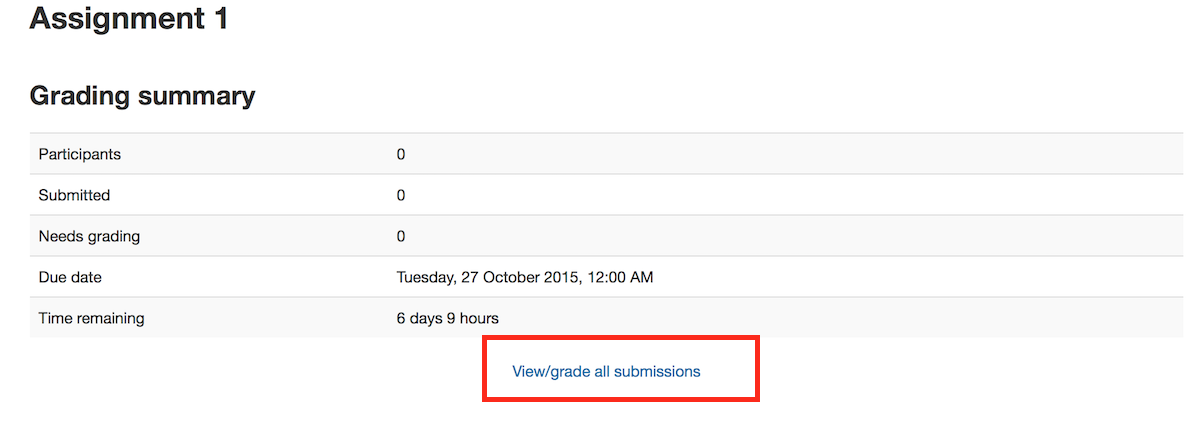
If grading an assignment that has the student submit items to Moodle (file/online text etc.), the best place to enter grades is from the assignment itself. From the assignment, click on View/Grade All Submissions.
On the following page, you will see where you can edit grades/add feedback and review the students' work. At the top of the page is a dropdown list. Here you have the option to download all student submissions. This is very useful if the students have submitted essays or other files.
The table of students can be sorted by clicking on the column headings. If you click on the Status column title twice, it will put all of the assignments that need to be graded at the top of the page.
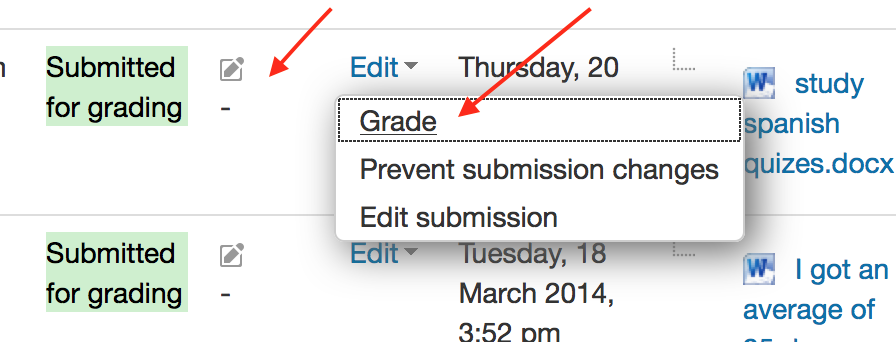
Then use the pencil icon in the Grade column or click on Edit and Edit Grade to get the to grading page for that particular student.
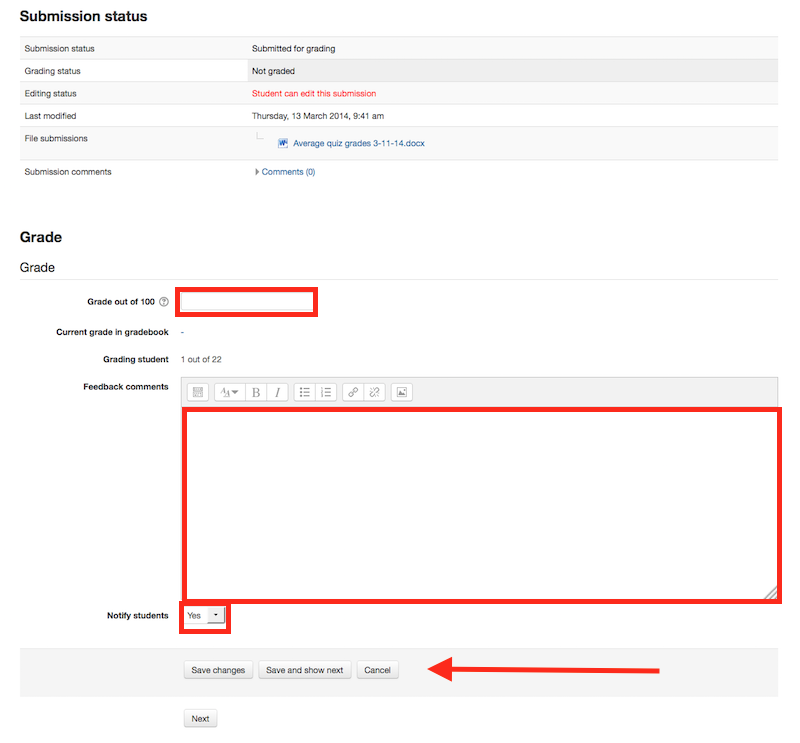
On the following page, you can enter a grade, enter feedback, and select whether to notify the student or not. When finished, be sure to click on Save. The Save and Show Next button will save the grade for this student and move to the grading page for the next student.
Grading from the Grader Report
The grader report is the main overview of the grade-book, showing all grades in a grid for the entire course. It can be accessed from the Administration menu under Course Administration.

To add grades directly into the grader report, Editing needs to be turned on (button is in the top right hand corner.) Once Editing is turned on, each cell in the grid will have one or two entries boxes depending on how your grade-book is set up. The box to the left surrounded by a solid border line is for the grade, the second box with a dashed border line is for feedback.
In most sites, grades are saved automatically as they are entered but the page might need to be refreshed to see the Course Total update with the new grades. In some sites, there will be a Save button in the bottom left hand corner of the page.
When grades are entered on this page, the cell will be shaded yellow or orange. This means that the grade has been overridden from the gradebook directly and any changes made from the Assignment Grading page will not be reflected in the grade-book.


