Parent role
The role of Parent may be used to provide parents/mentors/tutors with permission to view certain information, such as activity reports, grades, blog entries and forum posts, about their children/mentees/tutees.
The Parent role may also be allowed to agree to policies on behalf of their underage child. See the section on agreeing to policies on behalf of the child.
Creating a new role
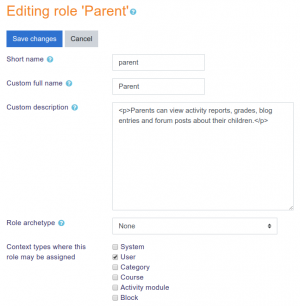
- As an administrator, go to Site administration > Users > Permissions > Define roles and click the "Add a new role" button.
- For archetype role choose "No role."
- Give the role a short name (such as "Parent", but it can be anything appropriate, such as tutor/mentor)
- Give the role a custom full name (such as "Parent", but it can be anything appropriate, such as tutor/mentor)
- Under Context types where this role may be assigned check the user context.
- Under the heading of Course
- Change moodle/user:viewdetails to allow - to access the student's profile
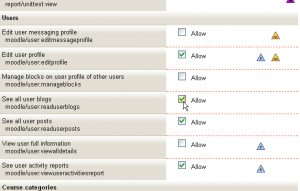
- Under the heading of Users
- Change moodle/user:viewalldetails to allow - to view all aspects of the student's profile
- Change any/all of the following capabilities to allow
- moodle/user:readuserblogs - to read the student's blog entries
- moodle/user:readuserposts - to read the student's forum posts
- moodle/user:viewuseractivitiesreport - to view the student's activity reports and grades
- moodle/user:editprofile - to edit the student's profile
- tool/policy:acceptbehalf for accepting policies on behalf of the student.
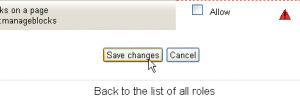
- Click the "Create this role" button.
Some permissions may already be set to "Allow", or the permissions granted here may not be the ones required for that Role. This set of Permissions mean that this Role allows anyone assigned to a Parent Role, then linked to the Student Role, to edit the profile or read the blogs of that Student - not everyone's profile or blogs.
Assigning the parent to the student
- Access the child's full profile page, via Site administration ► Users ► Accounts ► Browse list of users
- Click the child's name to view the profile.
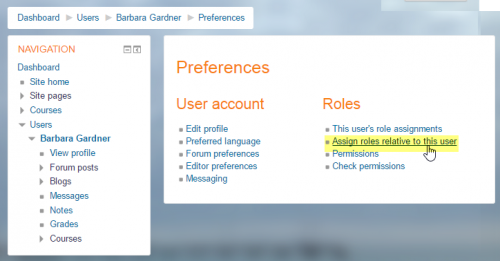
- In the Administration section, click Preferences
- In the Roles section, click Assign roles relative to this user
- Choose the role to assign i.e. Parent by clicking on the word.
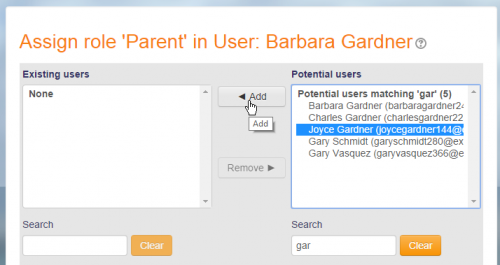
- Select the parent in the potential users list and use the Add button to add it to the existing users list.
At this point you can return to the "Assign roles in user:" page and you should see that the parent name is now in the "Users with Role" column.
- NOTE:The same parent may be assigned to several students, siblings or otherwise.
Agreeing to policies on behalf of the child
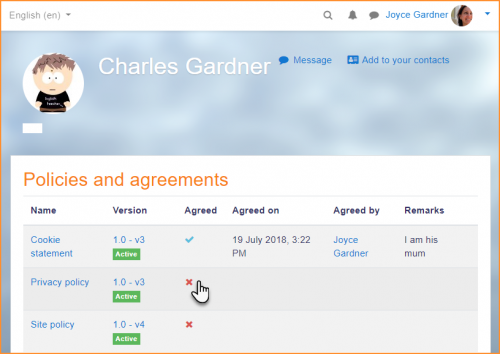
If the parent has been given the Capabilities/tool/policy:acceptbehalf then they can click on the child's profile, click the Policies and agreements link and agree to the policies there:
Adding the Mentees Block
This block needs to be added so parents can see links to their child's profile.
- On the Front Page, turn editing on.
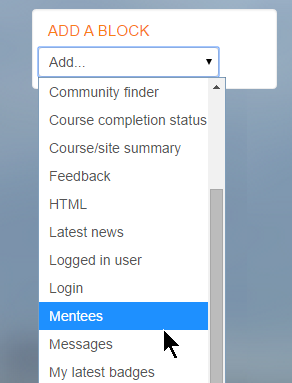
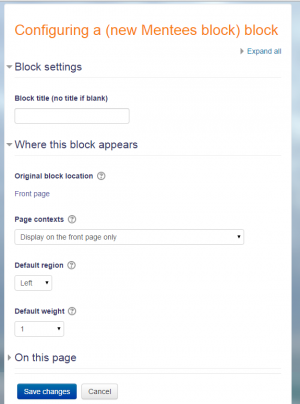
- Go to the Add Blocks block and select the Mentees block and when it appears, click on the Configuration icon.
- Edit the configuration settings to suit the needs of the site. When complete, save the changes and return to the Front Page.
How a parent sees their child's activities
- Once the mentees block has been added, a parent/mentor sees the link to any children/mentees they are responsible for.
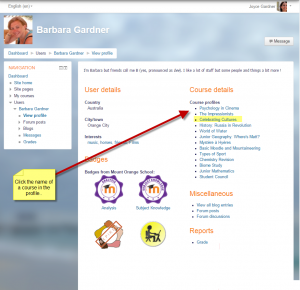
- They click on a name and will be taken to the profile page of that user.
- They then select from "Course profiles" - the name of a course the user is enrolled in.
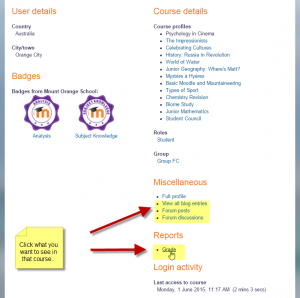
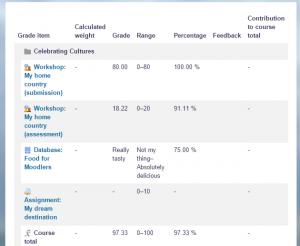
- Grades may then be viewed by clicking in the Reports section
- Forum posts or similar may also be viewed from the user's profile in the Miscellaneous section.
- To view activity in another course, the parent needs to click back to the user's main profile and then select another course link.
