External tool settings
Adding a new external tool to a course

- With the editing turned on, in the section you wish to add your external tool, click the "Add an activity or resource" link and choose either 'External tool' or a preconfigured tool.
- This will take you to the settings page titled "Adding a new external tool". All settings may expanded by clicking the "Expand all" link top right.
- If the external tool has not been configured by the administrator, you will need to have in advance the correct URL, consumer key and secret. These should have been provided to you by the managers of the LTI-compliant website you are going to be connecting to. Click "Show more" to access the consumer key and secret fields.
General settings
 |
- Activity name - give the title you wish the students to see on the course page
- Preconfigured tool - this is how Moodle communicates with the tool provider. If in doubt, leave as default. If your administrator has made a tool available site-wide, you will be able to select it here:

|
- 'Select content' button - for LTI Content-Item configuration
- Tool URL - This is the URL for connecting to site. If your moodle site uses SSL (is on HTTPS) you will only be able to use a tool that also uses SSL. Make sure the tool URL has HTTPS before attempting to use it or you may get a blank page.
- Launch container- this is how the external tool will be displayed.
- Default - if in doubt; leave as default
- Embed - the external tool will be embedded in the Moodle course page with blocks and navigation bar
- Embed without blocks - the external tool will be embedded in the Moodle course page but without blocks
- New Window - the external tool will open in a new window. (A new window or tab will open with the External tool and the old browser window containing the course page will not change.)
The following settings are available by clicking ""Show more":
- Activity description - give a short description here
- Display description on course page - choose to show the description along with the activity name
- Display activity name when launched - have this appear when the student clicks the link.
- Display activity description when launched - have this appear when the student clicks the link.
- Secure tool URL - This overrides the tool URL when moodle uses SSL (if your site is configured to use HTTPS in the wwwroot)
- Consumer key -this tells the connecting LTI compliant site that your Moodle is allowed to connect. The "tool provider", ie the manger of the connecting LTI compliant site will issue you with this key. If you are merely linking to a tool with no secure access or gradebook sharing then you won't need a consumer key. If you are linking to a course or activity from another Moodle site, then you can add any consumer key.
- Shared secret - this is the "password" to connect to the tool - the LTI compliant site.
- Custom parameters - most times you can leave this blank. The tool provider might use this to allow you to display a specific resource.
- Icon URL - you can display a different icon from the default External Tool icon by entering its URL here
- Secure Icon URL - enter the URL of a different icon here if your students are accessing Moodle securely via SSL.
Privacy settings
(These settings are collapsed by default)

|
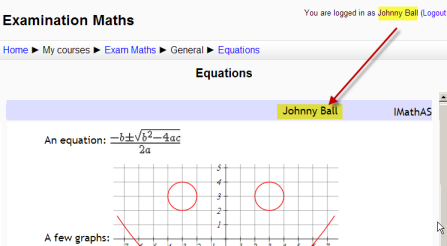
- Share launcher's name with the tool - this means that the student's name will be displayed on the connected site as in this example
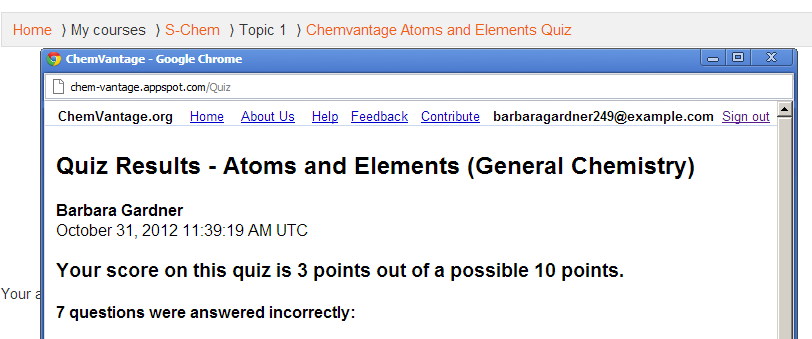
- Share launcher's email with the tool - this means that the student's email will be displayed on the connected site as in this example
- Accept grades from the tool - if this is checked, the connecting site will send back grades to Moodle's gradebook. See Using External tool for more information on this.
Site administration settings
Adding a tool site-wide
An administrator can manually configure external tools in Site administration > Plugins > Activity modules > External tool> Manage tools so that they are available across the site.

A tool may be configured by an administrator so that it is shown in the activity chooser (in addition to the external tool activity) for a teacher to select to add to a course. Its description, if one is present, will appear in the activity chooser.
Registering a tool using a cartridge
You can register a tool type using a cartridge. A cartridge will configure all the information such as launch url, tool name & description and icons for you.
To do this, simply enter the url to a tool's cartridge in the 'Tool URL' and press 'Add'. You will be asked to enter a key and secret. If you don't have them, you can leave them blank and press save changes.

Registering an external tool
To register an external tool, simply enter the url to a tool in the 'Tool URL' and press 'Add'.
This will open the tool, which may in turn ask you to decide on some settings.

Then you will be shown the capabilities the tool wants to use and you can decide if you want to allow the tool or not.
Viewing more details
On the 'Manage tools' page you can also visit 'Manage preconfigured tools' to view the preconfigured tools in a tabular format.
There are tabs to add an external tool, to view those which are pending and to view those which have been rejected:
 |
You can also visit 'Manage external tool registrations' to view the tool registrations in a tabular format, or to add an external registration with limited capabilities.
To add a tool with limited capabilities. 1. Click 'Configure a new external tool registration'

2. Configure the details on the settings page:

'Memberships', allow the external tool to request a list of users with a certain role in a specified context e.g. users enrolled in a course.
3. Click the tick/checkmark to register:

4. After obtaining a success message, click to complete the process:

5. If all requirements are met then you will be able to register automatically.
6. Now go to Site administration > Plugins > Activity modules > External tool > Manage external tool types and click the 'Pending tab'
7. Click the tick/checkmark to activate it:

See the screencast External tool registration for a demonstration of the above steps.
External tool capabilities
- Add course-specific tool configurations
- Add a new external tool
- Submit a tool to admins for configuration
- Be an admin when the tool is launched
- Edit external tool activities i.e. be an Instructor when the tool is launched
- View external tool activities i.e. launch external tool activities