Datalynx View settings
- Views
- Fields
- Filter, Search and Sort
- Datalynx Tags
- Statistics
- Notifications
- JavaScript, CSS
- Calculations
The settings described on this page apply for every view. Each view type has additional settings, that are described in the documentation of the specific view.
View general settings
Name
The name of the view. The name will appear as title in the browser title bar and on the "view index".
Description
Optional. This is only used to display additional information in the "view index"
Visible to
Define which role can access the view. Supported roles are:
| Role | Permission |
|---|---|
| Manager | viewprivilegemanager |
| Teacher | viewprivilegeteacher |
| Student | viewprivilegestudent |
| Guest | viewprivilegeguest |
How it works: The above roles have the permission (= capability), that corresponds to their name. Students have the default permission "viewprivilegestudent", managers "viewprivilegemanager" and so on. Thsee permissions can also be applied to another role. You can add the permission "viewprivilegestudent" to a non-editing teacher. If you then enable the checkbox "student" in the setting "Visible to", the view can be accessed by all users with the role non-editing teacher. It is also possible to delete the permission from a role. If you delete the permission "viewprivilegestudent" from the role student, all users with this role won't be able to access the view even with the "student" checkbox enabled in the "Visible to" setting.
You can change permission of a datalynx activity by first accessing the activity and then follow the path in the block "Administration": "Block Administration -> Datalynx activity administration -> Permissions". This will open a list of permission. Search for "viewprivilegestudent" in order navigate quickly to this permission setting.
Note: If yo do not check any of the available options in "Visible to", then only site administrators can access the view.
Filter
Select a predefined filter for this view. If you do not apply any filter, then 50 entries will be displayed per page. If there are more than 50 entries, add the tag ##pagingbar## to the setting "View template". When setting a filter, it can't be modified by a user filter, that is generated with the tag ##advancedfilter## or ##quicksearch##. This will be changed in future versions.
Redirect on submit option
Target view
This setting is only important, if the view is used as "editing" view. This setting will allow to select the view, that is shown after a user created an entry and clicks on the submit button.
A view can be used to collect data. In order to define the default view for editing entries activate the checkbox in the column E in the "view index". For detailed information have a look at: Datalynx Views. Also tabular view allows editing entries without being defined as "edit view" in the "view index"
View template
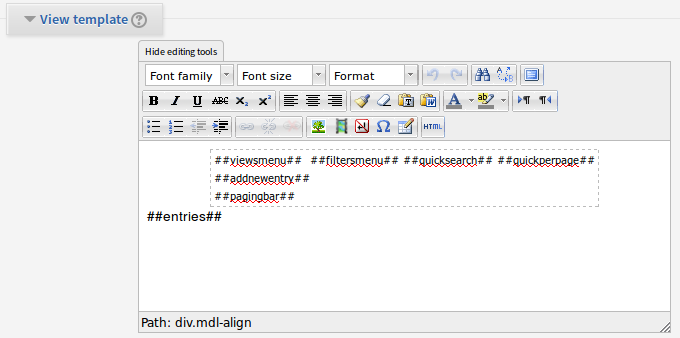
You can create the general layout for the view in this setting. The layout of the entries is defined in the "Entry template" setting. In the "view template" setting, you can define the place, where the entry/entries should go with the tag ##entries##. This tag will be replaced in the brows mode with the actual entries of the users.
Example
The default settings for "View template"
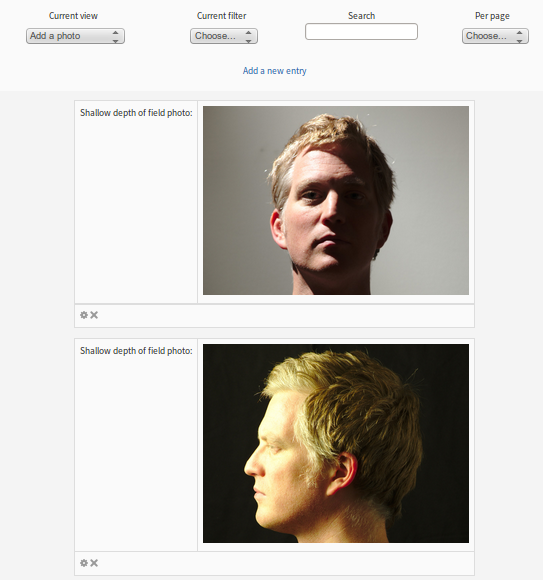
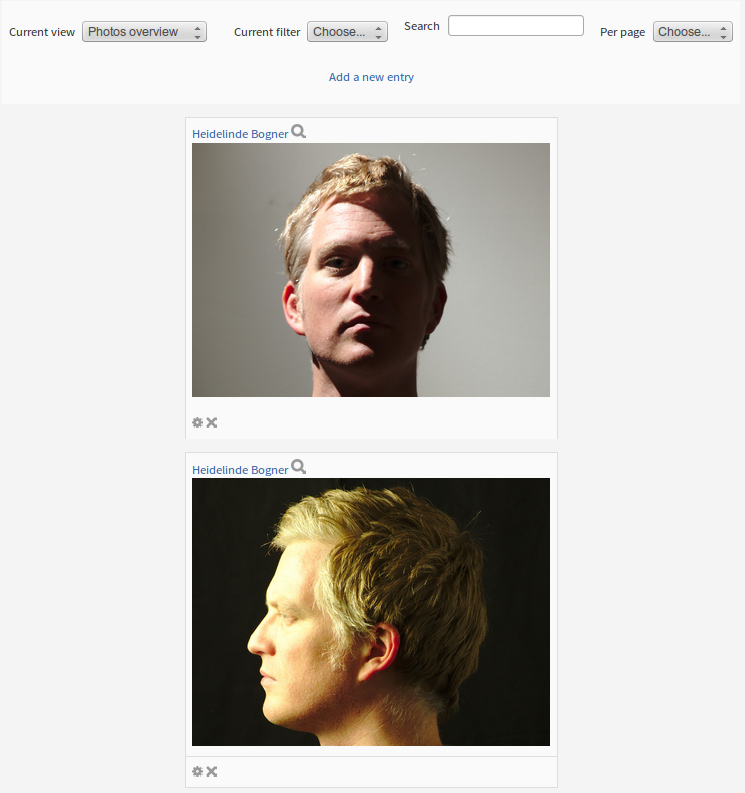
will result in this view (given the user can only add one image per entry and nothing else). The example shows the view, when 2 entries were added.
Entry template
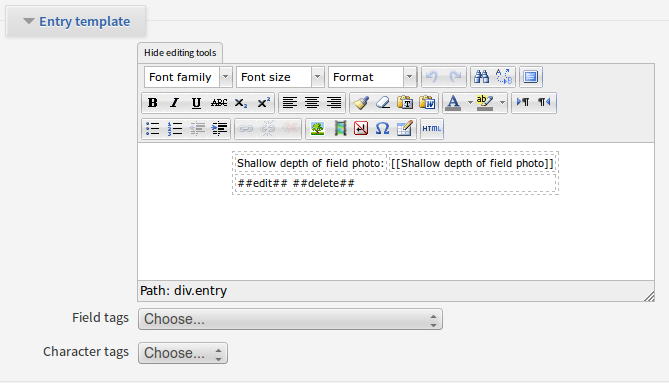
This settings defines how a single entry will be displayed. If there are more than 1 entries in a view, the layout will be repeated as many times as entries exist. The setting for the above example looks like that:
How it works: The name of the field to display is put squared brackets: [[Shallow depth of field photo]]. You can choose this tag from the Dropdown "Field tags". Also the name of the field is displayed and the ##edit## and ##delete## tags. These tags are replaced by the icons with the according link to delete or edit the entry. In the example above in browse mode, you see how the settings are rendered in the view.
Adding field tags and customising the entry template
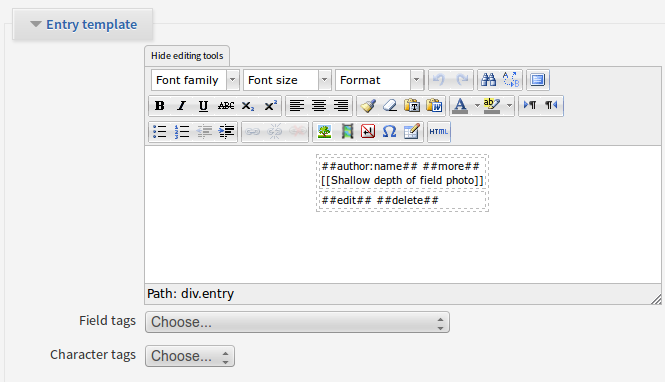
The next example shows following changes:
- Display the author of the entry
- Do not display the name of the field
- Display a link to access the single view, were comments and ratings can be added
Settings:
Result:
