Managing authentication: Difference between revisions
Helen Foster (talk | contribs) (→ReCAPTCHA: update names of keys (MDL-52158)) |
Mary Cooch (talk | contribs) m (new in 3.0 removed) |
||
| Line 33: | Line 33: | ||
===Allow accounts with same email=== | ===Allow accounts with same email=== | ||
By default, usernames must all be unique. If this setting is set to yes, it allows users to be created or uploaded that have the same email address as another account. | By default, usernames must all be unique. If this setting is set to yes, it allows users to be created or uploaded that have the same email address as another account. | ||
Revision as of 11:04, 3 May 2016
Setting the authentication method(s)
An administrator can set the authentication method(s) for the site as follows:
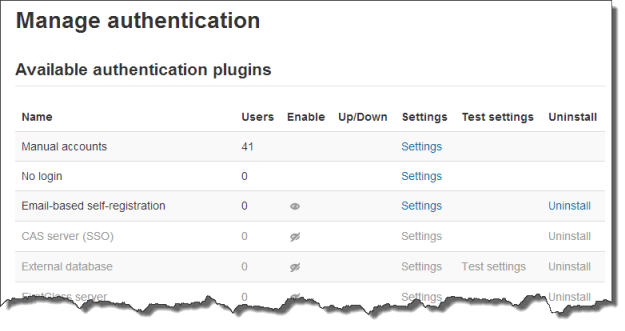
- Go to Administration > Site administration > Plugins > Authentication > Manage authentication
- Click the eye icon to enable selected authentication plugins (closed eye = disabled, open eye = enabled)
- Click the settings link opposite the authentication plugin(s) you have chosen
- Configure the required settings and click the "Save changes" button
- Repeat until you have edited all the plugins you have enabled
More than one authentication plugin may be enabled. Any authentication plugin can be used to find a username/password match. Once found, a user is logged in and alternative plugins are not used. Therefore the plugin which handles the most logins should be moved to the top of the page in order that less load is put on authentication servers.
Authentication common settings
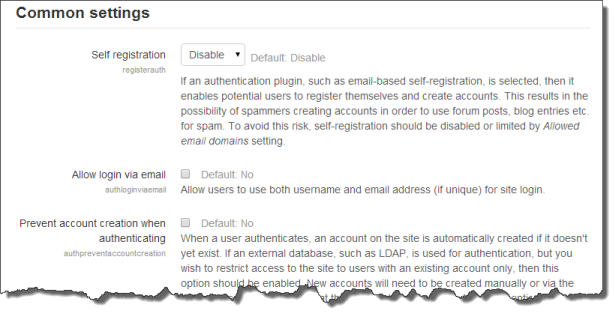
Authentication common settings can be changed by an administrator in Administration > Site administration > Plugins > Authentication > Manage authentication.
Self registration
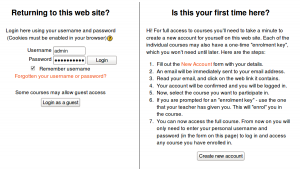
If you wish users to be able to create their own user accounts, i.e. self-register, then select Email-based self-registration (or any other enabled plugin that can support self registration, like LDAP) from the drop-down menu. This will result in a "Is this your first time here?" instructions and a "Create new account" button being displayed on the login page.
Note: The Email-based self-registration authentication plugin must be enabled to allow users who previously self-registered to login with that plugin. Selecting Email-based self-registration as the self registration method allows potential users to self register.
Self-registration can be a source of spam accounts. To reduce this see Authentication_FAQ#How_can_I_prevent_spam_accounts_if_I_use_Self-registration.3F
Allow login via email
If this is enabled then users can use either their email address or their username when logging in.
Allow accounts with same email
By default, usernames must all be unique. If this setting is set to yes, it allows users to be created or uploaded that have the same email address as another account.
Note that it is not recommended to allow this feature. Password resets will be sent to the email account so everyone with access to that email address can gain access to the other user's accounts, and the different users may be confused as to what email was sent to who. Where possible it is recommended you encourage users to mail aliases instead (such as gmail's + alias feature) so that you can differentiate the emails received about the accounts.
Prevent account creation when authenticating
If an external database such as LDAP is used, then normally when a user logs in for the first time, a new account is created for them. Disable this setting if you don't want this to happen but if you only want existing users to be able to access the site.
Guest login button
You can hide or show the guest login button on the login page. Hiding the guest login button disables guest access to the Moodle site, however logged-in users can still enter any courses which allow guest access without being required to enrol.
Limit concurrent logins
By default, there is no limit to the number of concurrent browser logins. (If a user is concerned about this, they can view their Browser sessions page.) This setting allows you to specify how many concurrent browser logins are allowed. Once the limit is reached, the oldest session will be terminated. Note that this does not work with Single sign on plugins.
Alternate login URL
This should be used with care, since a mistake in the URL or on the actual login page can lock you out of your site. If you do mess it up, you can remove the entry alternateloginurl from your database (table mdl_config) using, e.g., phpmyadmin for mysql. Depending on your configuration, you will also have to clear your caches with php admin/cli/purge_caches.php. You can read some more useful information about changing $CFG->alternateloginurl = ' your url '; on the following discussion.
Forgotten password URL
If your lost password handling is performed entirely outside of Moodle (for example, only by a help desk), you can set the url of that service here. Anybody pressing a "lost password" link in Moodle will be redirected to this URL. Note that this will disable all of Moodle's lost password recovery options regardless of authentication method(s) in use.
'Is this your first time here?' instructions
The instructions field is for providing custom login instructions on the login page. If the field is left blank then the default login instructions will be displayed.
Note that this message only applies to certain authentication methods, such as Manual and Self-registration, and does not apply to most external methods that pull users from external lists (LDAP, etc.).
Multiple languages
Custom instructions in more than one language may be provided as follows:
- Go to Site administration > Language > Language customisation
- Select a language then click the button 'Open language pack for editing' then click continue
- Select moodle.php and enter loginsteps as string identifier then click 'Show strings'
- Enter your custom login instructions in the local customisation text box
- Click the button 'Save changes to the language pack' then click continue
- Repeat the steps for other languages
Note: The instructions field must be left blank for the above method to work. Custom login instructions in English can be provided by editing the English language pack.
Allowed and denied email domains
Authentication may be restricted to particular email domains when using Email-based self-registration so that, for example, only students with a university email can login.
Restrict domains when changing email
You can choose to enforce email domains only when users create an account using Email-based self-registration i.e. after creating an account, users may change their email to a different domain.
ReCAPTCHA
A CAPTCHA is a program that can tell whether its user is a human or a computer. CAPTCHAs are used by many websites to prevent abuse from bots, or automated programs usually written to generate spam. No computer program can read distorted text as well as humans can, so bots cannot navigate sites protected by CAPTCHAs.
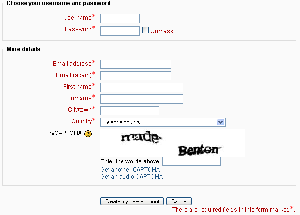
Spam protection may be added to the Email-based self-registration new account form with a CAPTCHA element - a challenge-response test used to determine whether the user is human.
ReCAPTCHA keys can be obtained from http://www.google.com/recaptcha by signing up for an account (free) then entering a domain. The site and secret keys provided can then be copied and pasted into the recaptchapublickey and recaptchaprivatekey fields in the manage authentication common settings, located under Site administration > Plugins > Authentication > Manage authentication, and the changes saved.
In addition to setting reCAPTCHA keys, email-based self-registration should be set as the self registration authentication plugin in the manage authentication common settings and the reCAPTCHA element should be enabled in the Email-based self-registration settings.
Profile fields data mapping and locking
Most (but not all) authentication plugins that use an external source for the user account details allow us to retrieve some user profile details (like first name, last name, email, etc.). By using the Data Mapping section on those authentication plugins configuration page we can configure what, when and how to manage all those user profile details.
These fields are optional. You can choose to pre-fill some Moodle user fields with information from the external authentication source (if you are using one), from the fields that you specify here. If you leave these fields blank, then nothing will be transferred from the external authentication source and Moodle defaults will be used instead. In either case, the user will be able to edit all of these fields after they log in.
In addition to specifying how to fill this fields, we can set how to update them (in both directions, to Moodle or from Moodle), and whether we want to lock them (so the user cannot modify their value) or not:
- Update local: When the user field will be updated from the external authentication source:
- On creation: when the user account is created during the first login
- On every login: every time the user logs in (or there is a user synchronization, for those authentication plugins that support it). Fields set to update locally should be locked.
- Update external: When the external authentication source will be updated from the user field:
- Never: never update the external authentication source from Moodle.
- On update: the external authentication source will be updated when the user profile is updated. Fields should be unlocked to allow edits.
- Lock value: To prevent users from altering some fields (e.g. students changing profile information to inappropriate or misleading information), the site administrator can lock profile fields. It's usually a good idea to lock profile fields if you are maintaining this data in the external authentication system.
- Unlocked: The field is unlocked and can be edited by the user at any time.
- Unlocked if empty: The field is unlocked if it is empty, but once the user fills in some information, it becomes locked and cannot be edited any more.
- Locked: The field is locked and cannot be edited by the user.
If you are using a mixture of authentication types (such as IMAP and manual), then the fields you map and lock in the authentication options are specific to that particular authentication plugin. Each authentication plugin has its own set of mapped and locked fields.
Remember to test the field locking by logging in with the proper type of account! If you test with a manual account but have set the field locking to apply to IMAP accounts, you will not be able to tell if it worked!


