ELIS Custom fields examples
Custom Field Examples
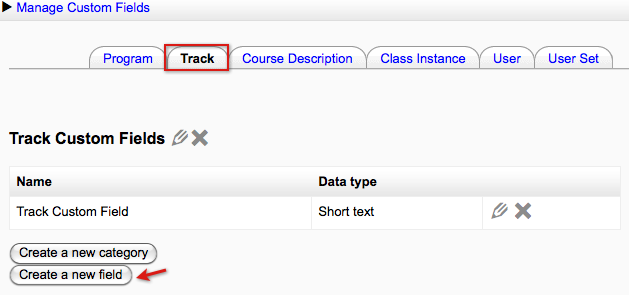
To access the Custom fields go to the Program Management block > Admin > Custom fields. From there use the tabs at the top of the page to navigate to a section and create a new field. Custom fields are added to categories, if there isn't a category on the page one will need to be added.
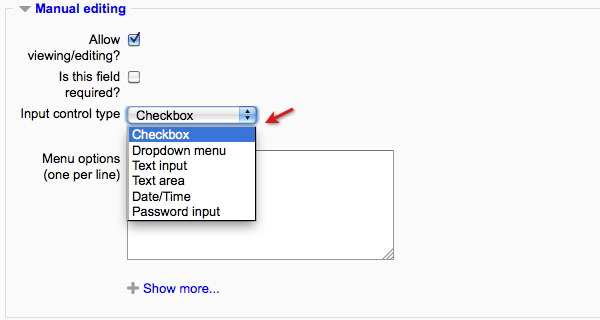
There are 6 custom field input control types:
- Checkbox
- Dropdown menu
- Text input
- Text area
- Password input
- Date/time
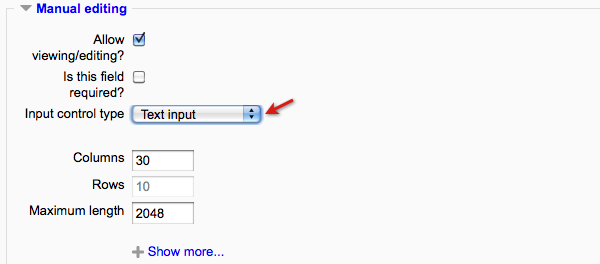
The control types are selected on the creating/editing screen for custom fields. The following image of this screen shows the Manual editing section of the form.
Checkbox
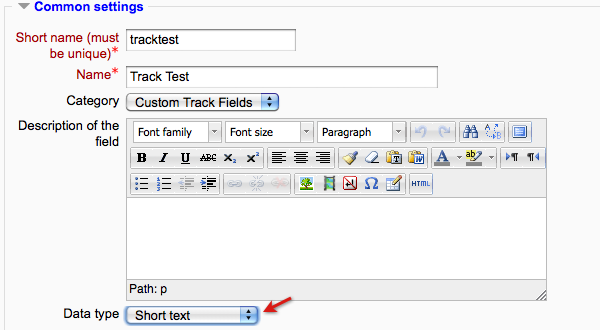
To demonstrate the checkbox input control type I will create a custom track field. The first image shows the first section of the screen to create a custom field, the Common settings section.
The short text data type has been selected for this example. This data type enables a list to be added with a checkbox next to each value.
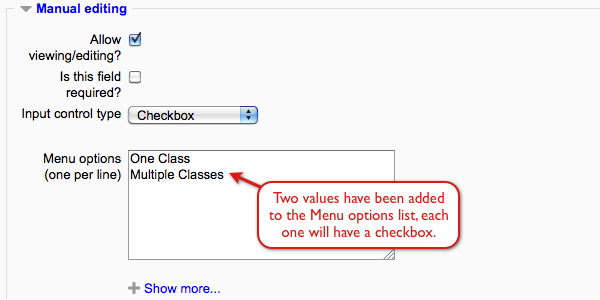
The following image shows the second section of the custom field creation screen, the Manual editing section. The input control type is selected here, checkbox is selected in this example. Since we are using the short text data type, we can add a list of values that will be shown when adding a track.
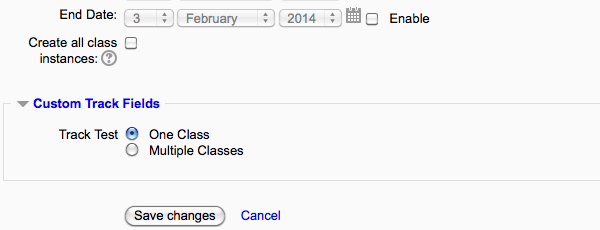
This image is showing the Add Track screen with the custom field we just added.
Dropdown Menu
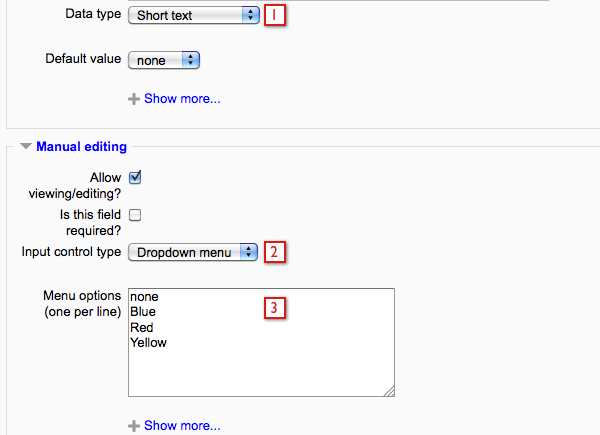
To demonstrate the dropdown menu input control type I will create another custom track field. The name of this custom field is Track Color. In the following image I am creating the custom field, I have scrolled down near the Manual editing section.
- The short text data type has been selected.
- The dropdown menu input control type has been selected.
- 4 values or options have been added. I add the 'none' option for a default value, because with this setup the first option will be automatically assigned to new tracks unless edited.
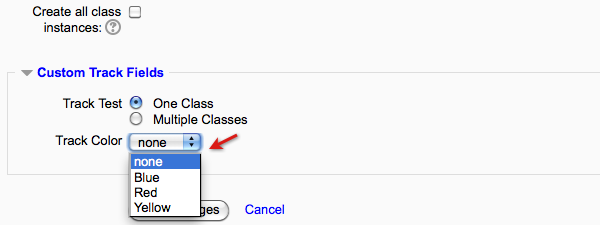
The following image shows the add track screen with the new dropdown menu custom field.
Text Input
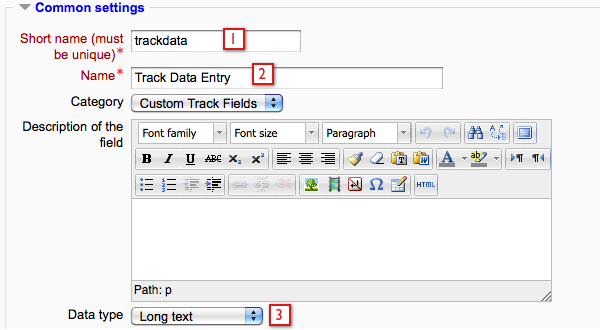
This is an example of the text input type. I'll be creating another custom track field for this example. The following screen is showing the Common settings section for this new field.
- Shortname of the new custom field
- Name
- The Data type will be "long text"
The next image shows the manual editing section. For the input control type, Text Input has been selected from the drop down menu.
Save changes and the new option is displayed on the add/edit track screens. For this field, just add the text.
Text Area
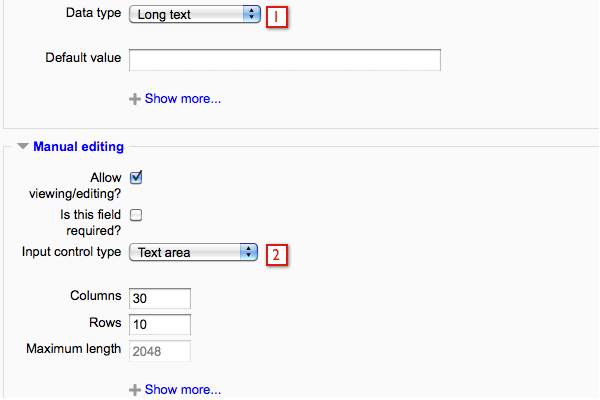
This example will demonstrate the "text area" input control type. The following image is showing the setup screen for this custom field.
- "Long text" has been selected for the Data type.
- "Text area" has been selected for the Input control type
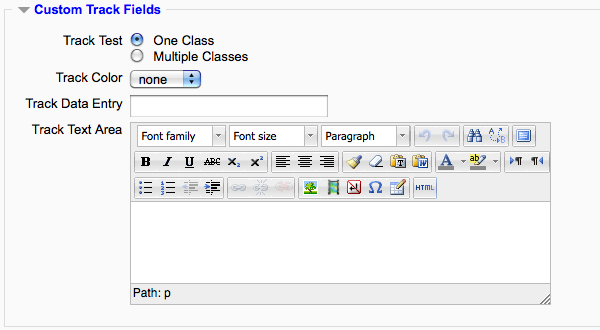
The following image shows the new custom field on the add/edit track screen. This Input control type enables an html editor.
Password Input
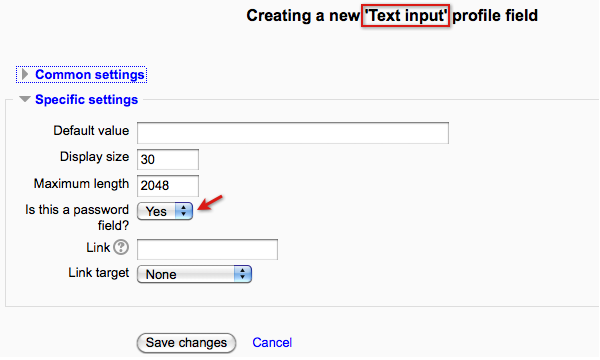
The following use case will demonstrate a Password Input type profile field:
An administrator wants to assign users to user sets by sending them a password that they will enter in a survey, which updates their profile and assigns them to a user set.
First, create a custom Moodle profile field. Go to the Administration block > Users > Accounts > User profile fields. The are a couple reasons why we create a Moodle profile field first:
- User sets use Moodle profile fields to auto-assign users to user sets.
- The survey will use the Moodle profile field.
- Custom user fields in ELIS are created from Moodle profile fields. In this use case the custom user field in ELIS isn't necessary, but we will create it and synchronize it to copy values from Moodle anyways.
Adding the Moodle profile field:
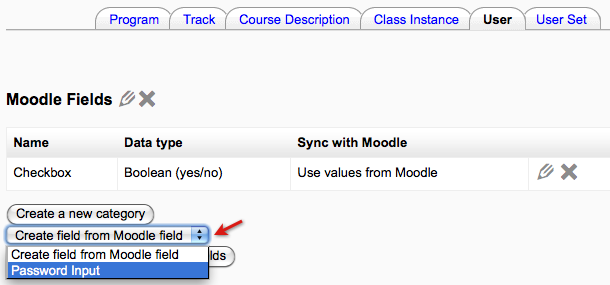
Create the ELIS custom user field. Go to the Program Management block > Admin > Custom Fields > User tab. Select the Moodle field that will be used to create this field.
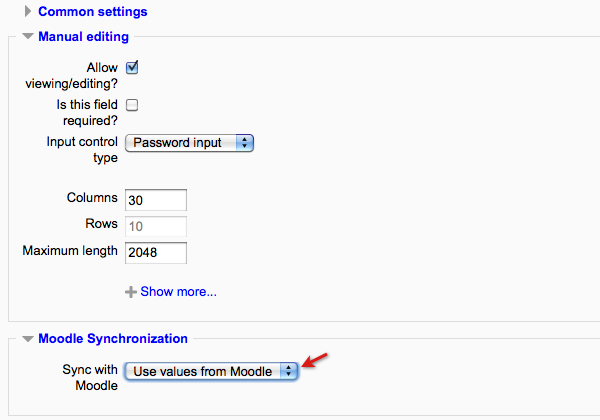
Edit the settings for the new field.
Save changes when finished.
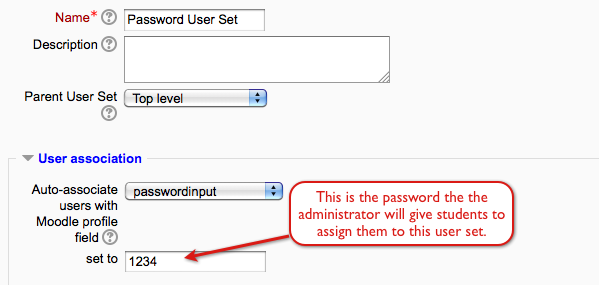
Now we will create the user set. The user set is being auto-associated with the Moodle profile field "Password Input" and the password "1234". Other user sets could be created and assigned different passwords, e.g., 12345.
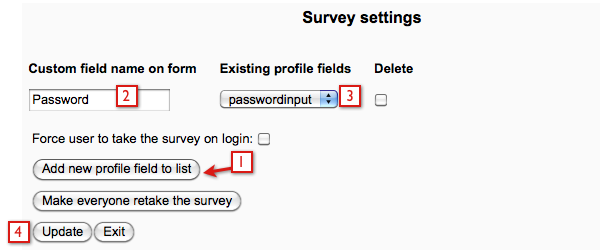
The new profile field needs to be added to the survey. We are adding the Moodle profile field to the survey.
The administrator sends the users a password that they enter in the profile survey. In this example the password is 1234.
When users enter their password in the profile survey it updates their profile, which auto-associates them with the user set. The user set could be auto-associated with programs/tracks - auto-enrolling users of the user set in programs, tracks, and classes.
