Moodle IDE
| Warning: This page is no longer in use. The information contained on the page should NOT be seen as relevant or reliable. |
Moodle IDE (1.0.6)
Student Developer: Grady Laksmono
Mentor: Petr Skoda and Anthony Borrow
Google Summer of Code 2008
https://docs.moodle.org/en/Student_projects/Moodle_IDE
- Community feedback forum discussion
Features
- Create a Moodle project
- Apache, MySQL, and PHP (XAMPP)
- XDebug
- Moodle CVS
- Splashscreen
- Moodle Browser
- Checkstyle
- Installer
Workspace Environment
1. Install Java SE (http://java.sun.com/javase/downloads/index.jsp) if you don't have it installed
2. Run Moodle-IDE-Setup.exe
3. Run Moodle IDE.exe as Administrator (Right click → Run as Administrator)
4. Workspace Launcher dialog box shows up, check mark Use this as the default and do not ask again, leave everything else as default, then click OK
!NOTE Default Workspace configuration is needed if you don't want to configure Virtual Server.
4. File → New → Other..., then Moodle → Moodle Project, then click Next
5. If you have the local zip package (from http://download.moodle.org/) that you wanted to use, then Browse for Moodle zip package for Moodle field. Otherwise, click on the drop down list on the Download Moodle and select the version that you wanted to download, the IDE will download and unpacks the package in the project folder.
6. Name the project (e.g. 19stable, Moodle 1.9, or MoodleWorld)
7. Click Finish
!NOTE
It will take a while for the IDE to either unpacks the Moodle package or Download the Moodle then unpacks it. In general, if you chose to download the Moodle, then the process should take longer than if you have the local Moodle package because the IDE will download the Moodle package first before unpacking it to the project folder in the workspace.
Installing Moodle
Press the orange X button in the toolbar to run XAMPP (Apache, PHP, and MySQL).
!NOTE
If you have previously installed Apache on your computer, and have it running, then you will see red error messages when you're trying to run XAMPP. The solution is to stop your previously installed Apache through Control Panel → Administration → Sevices, find Apache that is currently running, Right Click, select Stop, then run XAMPP through Moodle IDE.
1. Right click install.php in the project
2. Select Open Moodle Browser
3. Create a single database for Moodle to store all it's tables in (or choose an existing database).
4. Install Moodle
OR
1. Open a web browser
2. Go to http://localhost/<Project Name>/moodle/install.php
3. Create a single database for Moodle to store all it's tables in (or choose an existing database).
4. Install Moodle
CVS
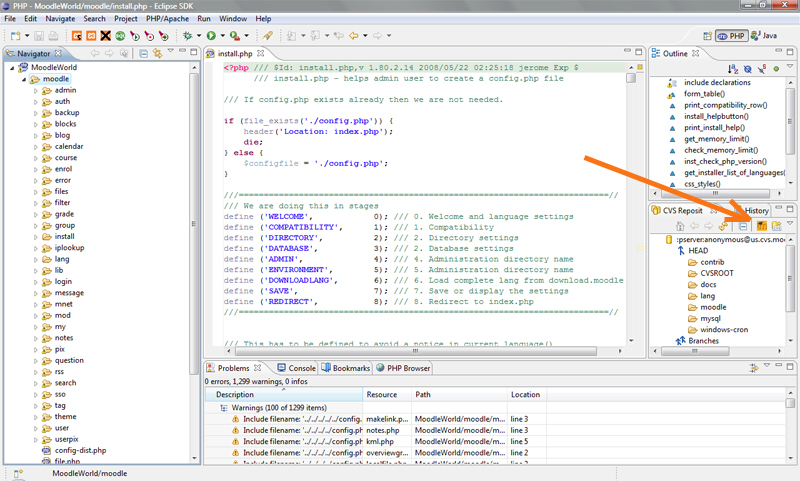
1. Click the Moodle icon (located on the CVS Respository view panel)→ CVS Dialog Box
2. Drop down arrow for the Host (already pre-populated with Moodle hosts)
3. Drop down arrow for the Repository Path (already pre-populated with Moodle repository path)
4. Username, drop down arrow for annonymous, or use yours if you have one (already pr-populated with anonymous)
!NOTE
Password for annonymous user is blank
5. Password
6. Click Finish
XDebug
Debugging Script
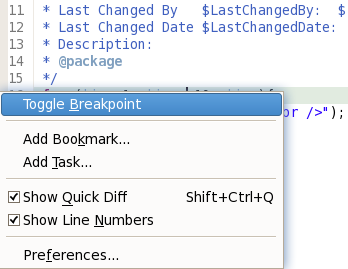
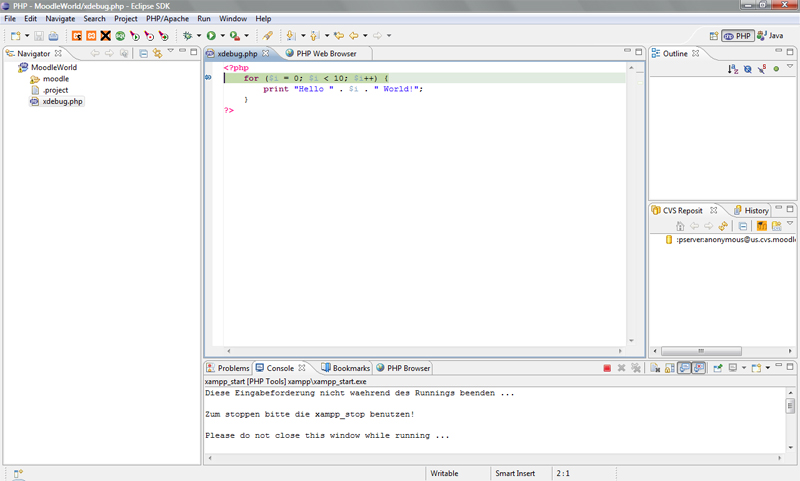
1. Right click in the gutter and selecting Toggle Breakpoint
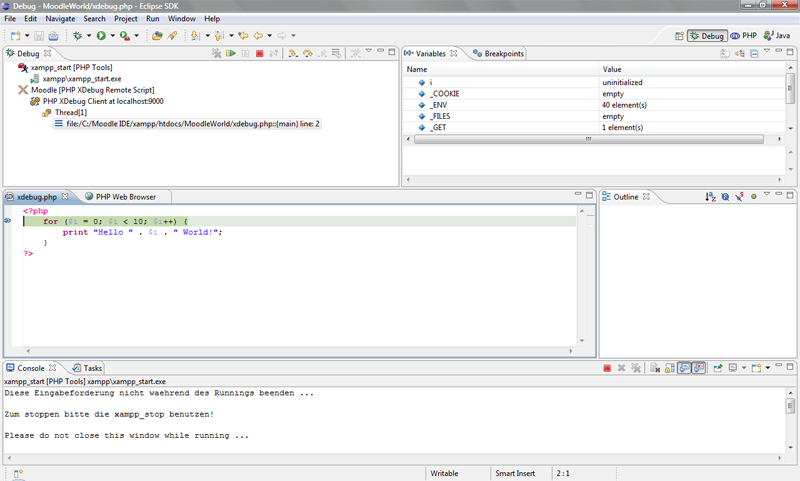
You should see a blue dot appear to signify where the breakpoint is. Now change to the Debug Perspective. Window→ Open Perspective → Debug Now we can configure our XDebug Debug Profile. We will only need to do this once per project.
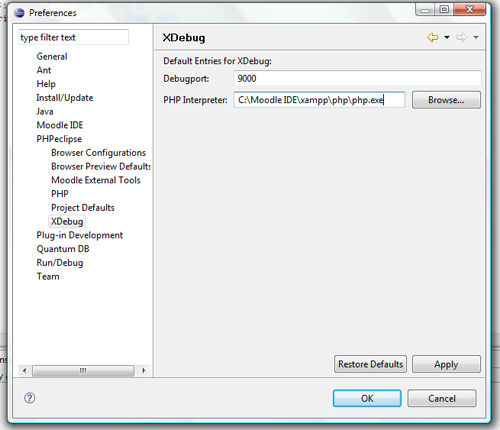
2. Specify the PHP Interpreter Path, go to Window → Preferences → PHPeclipse → XDebug, if you're using the default Moodle IDE's installation, the Interpreter path should be C:\Moodle IDE\xampp\php\php.exe
3. Click on the OK button.
XDebug Debug Profile
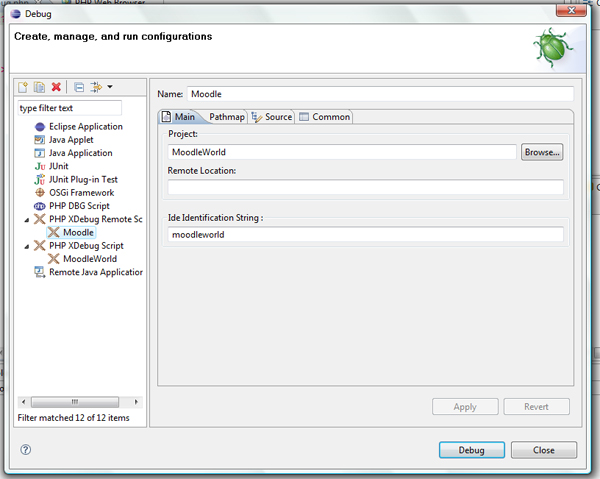
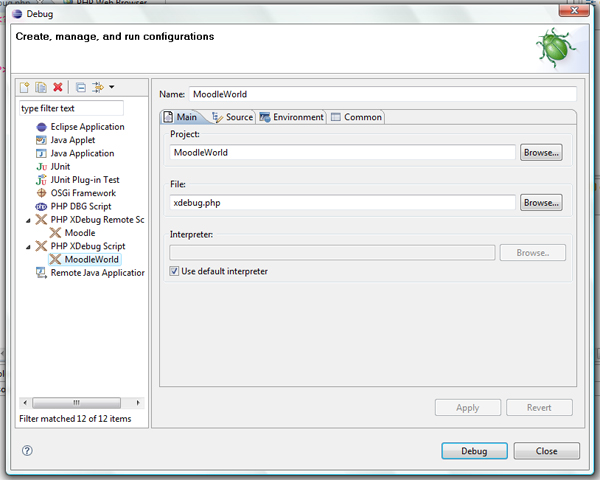
Now that we have configured XDebug, we need to create a debug configuration. This will tell Eclipse how to start the debugger for your project. To do this, select Open Debug Dialog from the Run drop down menu. You will be presented with a list of items which you can debug. Double click on the entry titled PHP XDebug Script. This will create a new configuration and allow you to specify the necessary options. You can provide a name for your debug configuration, and then you must specify the filename which should be executed for debugging purposes. In this case, the filename that I created for testing purpose is named xdebug.php.
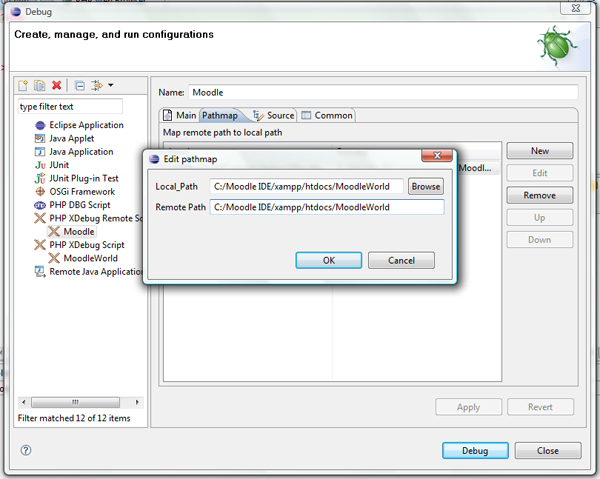
Once you have selected a configuration name and have chosen an identification string, click on the Pathmap tab'. In the pathmap tab, you specify how Eclipse translates local path names to remote path names. To map a path, click on the New button to create a new map. 'If your web server is located on the same system that Eclipse is running on, both of these paths will be the same.' In either case, under Local Path enter the path to the root of your project on the machine that Eclipse is running on. In Remote Path, enter the path to the root of your project on the machine the web server is running on.
4. Once you have specified the proper pathmap, press the Debug button to begin the debugger.
Now in your browser you will need to start the XDEBUG_SESSION, so type in the following
http://localhost/<Project Name>/moodle/<File Name>.php?XDEBUG_SESSION_START=<Ide Identification String>
The debugger should stop at the breakpoint that we set earlier.
!NOTE
Starting XDEBUG_SESSION can be done by Right clicking the file → Open Moodle Browser → Append the ?XDEBUG_SESSION_START=<Ide Identification String> to the URL
I created xdebug.php that contains a loop for testing purposes. But in general, the file will be much bigger such that it will take longer for XDebug to complete its debugging process.
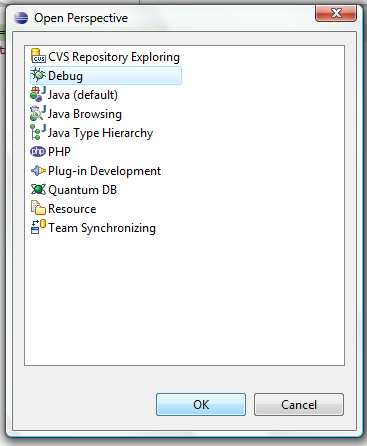
Open the Debugger Perspective
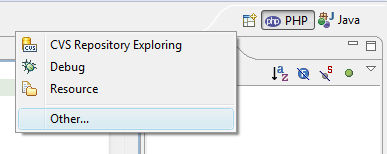
5. Press the Open Perspective button
6. Select Other..., Open Perspective dialog box will pop up
7. Select Debug
8. Click OK, debug perspective will be displayed
Checkstyle
1. Right click on any PHP file that you want to check
2. Select PHP Checkstyle
3. Report will be displayed
Reference
https://docs.moodle.org/en/Development:Coding#Coding_style
Screenshots
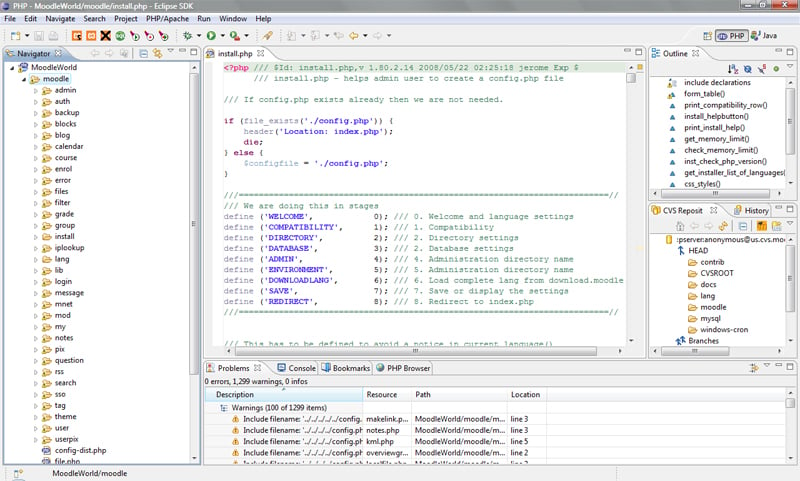
Moodle IDE 1.0.6
Source code
Extract the following .jars located in the eclipse's plugin directory to obtain the source codes:
- org.moodle_<version>.jar
- net.sourceforge.phpeclipse.externaltools_<version>.jar

