File system repository: Difference between revisions
Helen Foster (talk | contribs) m (image edit) |
Helen Foster (talk | contribs) m (Reverted edits by Tsala (talk) to last revision by Mary Cooch) |
||
| Line 9: | Line 9: | ||
*Inside it, create a folder called "repository" | *Inside it, create a folder called "repository" | ||
*Inside that folder, create as many folders as you need, named appropriately. | *Inside that folder, create as many folders as you need, named appropriately. | ||
[[File:Moodledatarepo2.png | [[File:Moodledatarepo2.png]] | ||
*FTP into the appropriate folder the files you want. (The folders can hold all types of files) | *FTP into the appropriate folder the files you want. (The folders can hold all types of files) | ||
Revision as of 15:32, 25 August 2011
The file system repository allows users within Moodle to access files which have been uploaded via FTP into designated folders on the server. A file system repository may be available site wide for everyone; within an individual course or for an individual user
This must be done by a systems admin who has write permissions to the server directories
Creating folders for your file system repositories
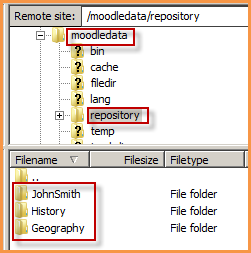
- Find the moodledata folder on the server
- Inside it, create a folder called "repository"
- Inside that folder, create as many folders as you need, named appropriately.
- FTP into the appropriate folder the files you want. (The folders can hold all types of files)
Enabling the File System repository plugin
- Go to Site Administration>Plugins>Repositories>Manage Repositories;
- Select from the drop down next to File sytem "Enabled and visible"
Setting up a site-wide file system repository
- Once the repository is enabled as above, click on the "Settings" link to the right.
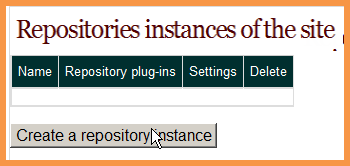
- Scroll down to Repositories instances of the site
- Click Create a repository instance
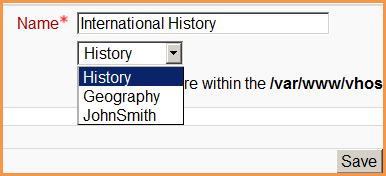
- Give it a name and (if there are several folders on the server) choose from the dropdown the one you want. Click save
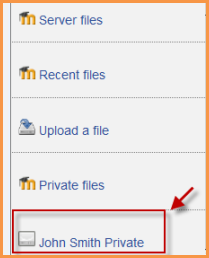
- It will now be available in the file picker in all courses.
NOTE: Just repeat the process to get more than one site wide file system repository
Setting up a repository inside a course
NOTE: A regular user needs to have been given permission to do this by admin (MORE DETAILS SOON)
- Go to the desired course and click on “repositories” in the administration block
- Scroll down and click "Create File System instance"
- Follow the same process as here
Setting up an individual file system repository instance
NOTE: A regular user needs to have been given permission to do this by admin (MORE DETAILS SOON)
- In the navigation block, click on “my profile”
- Click on “repositories”
- Scroll down and click “create File System instance”
- Follow the same process as here
- This will create a personal file system repository connecting just you to a folder on the server.
Using it
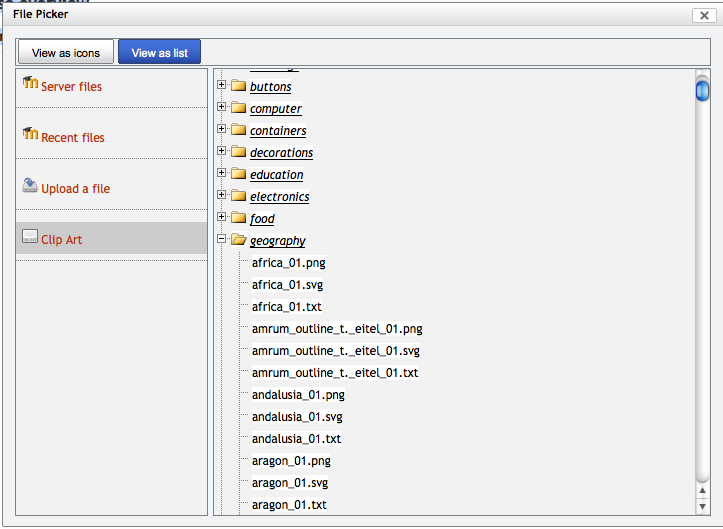
If you try to add a file in Moodle, then the File Picker should show you your new file system repository, and you should be able to browse it and select files to use.
Note that file types are respected (based on file extensions), so if you are adding an image in the editor, then you won't see Office docs (for example) appear in the File Picker.
FAQ
How do the files get into the File system repository?
- Files must be uploaded to the folder on the server via FTP
- This is done by those who have FTP access to that folder.
- If you don't have this access, ask your system admin if they are able to set this up for you.
Is there a way to upload files to a File system repository from inside Moodle?
No. You use a repository to get files from elsewhere and bring them into Moodle. They are not for uploading files into. In other words, repositories are for "pulling" content into Moodle; not for "pushing" it outside of Moodle.
See also
- Overview of Repositories
- FTP files into Moodle 2.0 with the repository API article from moodle.drupalgardens.com including screencast
