Kursseite: Unterschied zwischen den Versionen
Keine Bearbeitungszusammenfassung |
Keine Bearbeitungszusammenfassung |
||
| Zeile 1: | Zeile 1: | ||
{{ | {{Kurse}} | ||
{{Zum Übersetzen}} | {{Zum Übersetzen}} | ||
Version vom 15. Dezember 2011, 13:12 Uhr
![]() Diese Seite ist noch nicht vollständig übersetzt.
Diese Seite ist noch nicht vollständig übersetzt.
Siehe [1] und [2] (2.0, englisch) und [3] (1.9, deutsch)
Die Kursseite ist die Einstiegsseite in einen Kurs. Hier werden alle Lerninhalte bereitgestellt - Arbeitsmaterialien, Aktivitäten usw. Bei einem neu angelegten Kurses ist im wesentlichen leer. Die Darstellung Ihrer Kursseite hängt vom gewählten Kursformat, vom Kursdesign und der Wahl der Kursblöcke ab. In jedem Fall finden Sie auf der Kursseite (wie auf jeder anderen Moodle-Seite auch!) die Blöcke Navigation und Einstellungen.
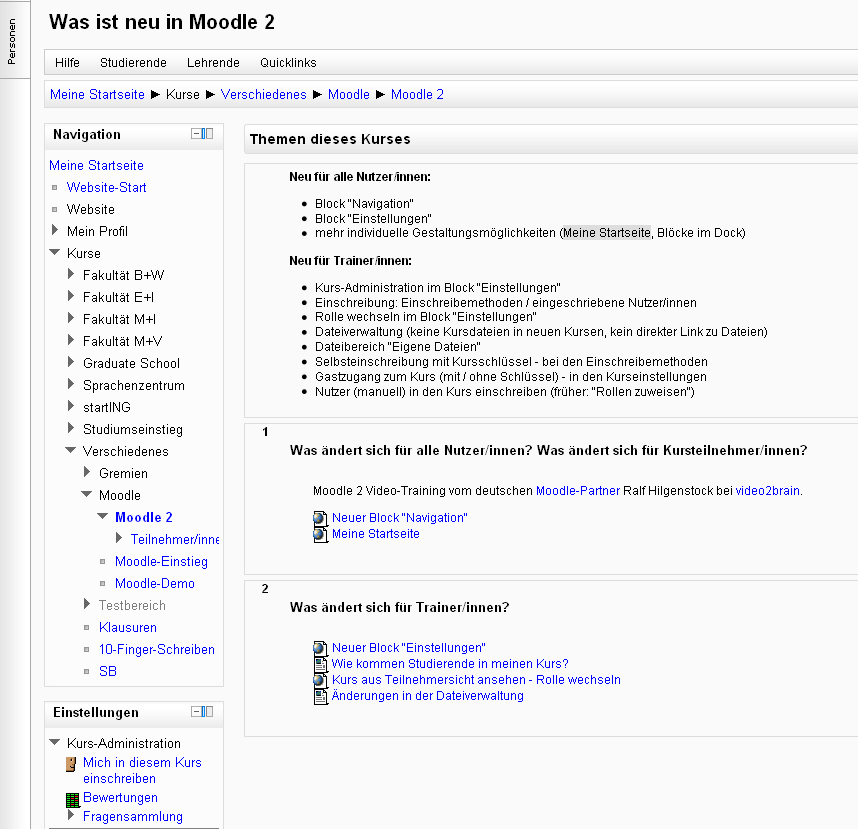
Hier sehen Sie die Kursseite eines neu angelegten Kurses im Themenformat.
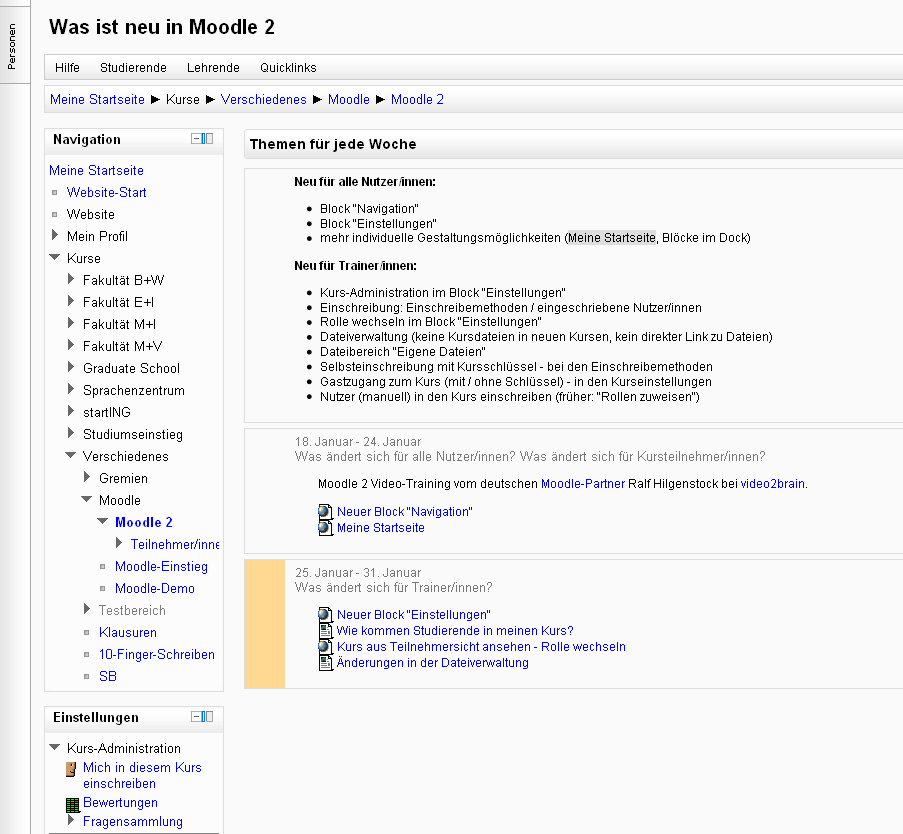
Das folgende Bild zeigt die Kursseite eines neu angelegten Kurses im Wochenformat und mit eingeschaltetem Bearbeitungsmodus.
Tipps und Tricks
Wenn ein Kurs sehr umfangreich ist und viele Lerninhalte zur Verfügung stellt, dann kann die Kursseite sehr lang werden, so dass man scrollen muss. Wünschenswert wäre dagegen eine Darstellung, die einer normalen Webseite ähnelt und Links zu den einzelnen Themen bzw. Abschnitten in kompakter Form bereitstellt. Eine Methode, um dies zu realisieren, besteht darin, die Materielien und Aktivitäten in einem Kusrabschnitt anzulegen und diesen Abschnitt anschließend "unsichtbar" zu schalten.
Standardbeispiel:
- Wählen Sie die Anzahl der Themen/Wochen in den Kurseinstellungen um eins höher, als letztendlich auf der Kursseite angezeigt werden sollen (z.B. 7 bei 6 anzuzeigenden Abschnitten).
- Fügen Sie ein Arbeitsmaterial oder eine Aktivität im letzten Kursabschnitt an und kopieren Sie anschließend den Link auf dieses Kurselements (mit der rechten Maus-Taste).
- Stellen Sie genau diesen Link in einem Kursabschnitt weiter oben zur Verfügung, z.B. als Link in einem Text oder als Arbeitsmaterial Link/URL.
- Reduzieren Sie die Anzahl der Themen/Wochen in den Kurseinstellungen um eins (z.B. 6, wenn Sie anfangs auf 7 erhöht hatten).
Wenn Sie jetzt in dem oberen Kursabschnitt den Link auf das Kurselement im letzten (nun nicht mehr auf der Kursseite sichtbaren) Abschnitt anklicken, sehen Sie dennoch das entsprechende Arbeitsmaterial oder die entsprechende Aktivität, die Sie vorher im letzten Abschnitt angelegt haben.
Varianten:
- Das folgende Video auf Youtube zeigt, wie Sie das oben beschriebene Standardbeispiel in Moodle umsetzen können.
- Im Extremfall wird die Zahl der sichtbaren Kursabschnitte auf letztendlich auf 1 gesetzt und alle Kursinhalte in den Kursabschnitten 2 und höher angelegt.
Standard view of a blank course
Our examples will be for a course homepage that is the standard default for a new install on a site. There are many course options that determine a course's appearance and make it look very different from our examples. The example course has a header, a footer (both content largely determined by a theme) and 3 columns in the middle.
Here are basic elements of a course page and links to Moodle documentation.
Parts of a course homepage
Using the above image, here are the parts of a typical course homepage. It is possible to move and hide parts of the page and different themes display blocks in different regions, so not all courses will look like this.
| Column left | Course sections - Center | Column right |
| *1 Course full name | *6 Section header & News topic | *9 Login information |
| *2 Navigation bar | *7 Current week - First section | *10 Turn editing on button |
| *4 Navigation block | *8 Future week - Second section | *11 Latest news |
| *5 Settings block | *14 "Show only this section" | *12 Upcoming events |
| *15 "Switch role to" | *13 Recent activity | |
| *16 User profile settings | ||
| *17 Site Administration |
Adding elements to your course home page
- Turn on the editing by clicking the button top right or the link in Settings>Course Administration.
- For resources and activities, dropdown menus will appear in each section. Click the appropriate dropdown menu to add your item.
Datei:Addresourceactivitydropdown.png
- For blocks, click the "add block" dropdown which is usually situated bottom right of the screen.
Editing elements on your course homepage
With the editing turned on, each item on your course homepage and each section/block will have icons next to it which all perform different functions such as edit/move/copy/delete/hide. Note: your theme may have icons different from these below::
- Datei:Edit.gif - the edit icon allows you to change the wording or settings of the item.
- Datei:Duplicateicon.png - the duplicate icon allows you to copy an activity or resource within your course
- Datei:Open.gif - the open-eye icon means an item is visible to students. It will close when you click on it
- Datei:Closed.gif - the closed-eye icon means an item is hidden from students. It will open when you click on it
 - the move here icon appears when moving a course element. Click into the box to re-locate your item.
- Datei:Updownarrow.png - the up/down arrows allow you to move course sections up or down.
- Datei:Ajaxmoveicon.png- the "crosshairs" move icon allows you to move items or sections by dragging and dropping. It appears if your admin has enabled Ajax in Settings > Site Administration > Appearance > Ajax and Javascript
- Datei:Groupsicon.png - the groups icon allows you to change between no groups or separate/visible groups
- Datei:Rolesicon.png - the roles icon allows you to assign roles locally in the item.
The following icons are visible when editing is both on and off
The following icon only applies to sections
- Datei:Marker.gif - the highlight icon allows you to highlight a section as current
Moving sections or blocks on your course's homepage
To move a Block
Blocks appear at the side(s) of your course area. To move one,
- Turn Editing On and *click and release* the Block's crosshair icon. Place holders - zones with a dashed border - appear on the screen indicating the possible areas where your Block can appear.
- Click the placeholder where you want the Block appear. On course area homepages, you can move Blocks from one side to the other, but not into the middle.
- The block should now appear in the location you chose.
To move a Section
To move a Topic or Week section:
- turn editing on
- click the up or down arrow or the crosshairs icon to move the section
Displaying activity descriptions on the course page
Vorlage:New featuresActivity and resource descriptions can be displayed on the course page just below the link to the activity or resource by clicking the 'Display description on course page' checkbox in the activity or resource settings.
Tips and tricks
- Make your course home page look more like a webpage - see Course FAQ
See also
- Course settings for details of how to change the number of sections displayed on the course homepage

