Translating User tours from Moodle.net: Difference between revisions
From MoodleDocs
(tidy up) |
(tidy up) |
||
| Line 35: | Line 35: | ||
[[File:FIXED_User_tour_for_Dashboard_31.png|400px]] | [[File:FIXED_User_tour_for_Dashboard_31.png|400px]] | ||
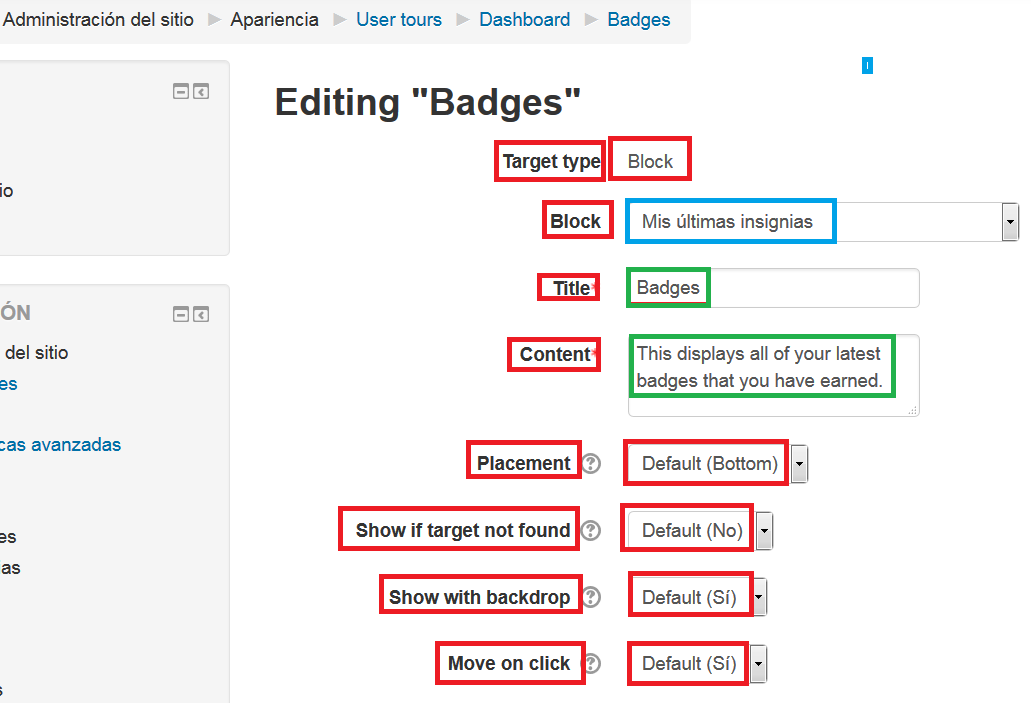
* Notice in the following image of the same server, same user tour, same step, but with a different language pack, that there are some strings from this language pack that have not been translated (red rectangles), and only one is translated (blue rectangle). In such cases, please [[Contributing_a_translation| help with the translation]] by contacting [https://lang.moodle.org/local/amos/credits.php your language pack maintainer]. | * Notice in the following image of the same server, same user tour, same step, but with a different language pack, that there are some strings from this language pack that have not been translated (red rectangles), and only one is translated (blue rectangle). In such cases, please [[Contributing_a_translation| help with the translation in AMOS]] by contacting [https://lang.moodle.org/local/amos/credits.php your language pack maintainer]. | ||
[[File:FIXED_ES international User tour for Dashboard 31.png]] | [[File:FIXED_ES international User tour for Dashboard 31.png]] | ||
Revision as of 21:02, 30 June 2016
You can easily translate the User tours from Moodle.net, following these steps:
- You must first install the User Tours additional plugin. See the User Tours Documentation.
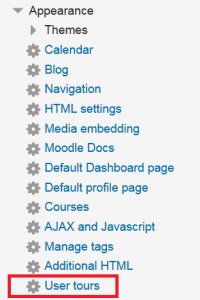
- After you install the plugin, you will see 'User tours' in ' Administration ► Site administration ► Appearance ► User tours '
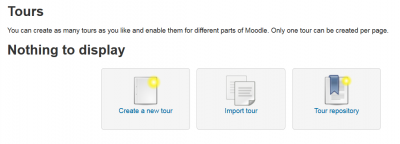
- Obviously, there will be no user tours to display initially:
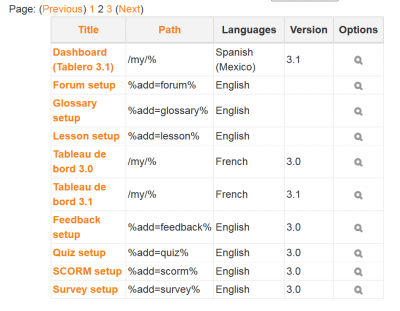
- Click on the ' Tour repository ' link. You will see several pages with many available user tours in different languages, for various Moodle branches:
- Click on the one you want to translate
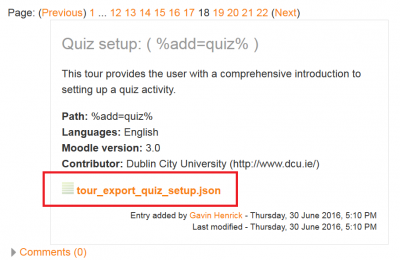
- Check the details and click on the orange-coloured link to download the *.json file:
- Take a note of where the downloaded file was saved.
- Go back to ' Administration ► Site administration ► Appearance ► User tours '
- Click on the ' Import tour ' link:
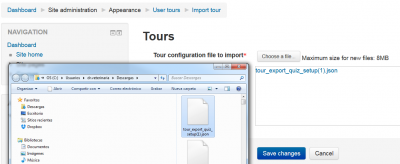
- Drag and drop the *.json file and click on the ' Save changes ' button.
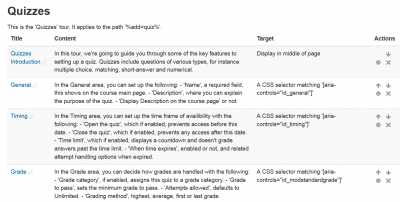
- You wil then see all the steps of your newly imported tour:
- You can now edit the steps of the user tour in order to translate it into your language.
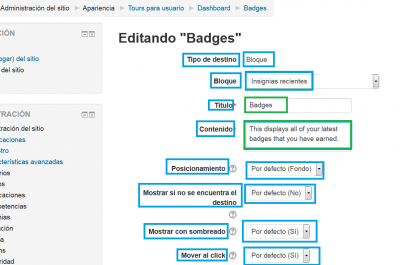
- Note in the following screen image that some strings (inside a blue rectangle) already appear as translated; that is because those language strings are part of your language pack and had been properly translated at AMOS.
- The strings you can now translate are the ones seen here enclosed in a green rectangle:
- Notice in the following image of the same server, same user tour, same step, but with a different language pack, that there are some strings from this language pack that have not been translated (red rectangles), and only one is translated (blue rectangle). In such cases, please help with the translation in AMOS by contacting your language pack maintainer.
- Edit the remaining steps, one at a time, replacing the English language strings with your translation.
- Check that your edited (translated) file works as intended.
- Export the tour.
- The exported file is your translation.
- Submit it to the Moodle.net user tours database.
- If you can, please translate the User Tools Moodle documentation too.
