Translating User tours from Moodle.net: Difference between revisions
From MoodleDocs
(Expanded the text and added many screen dumps) |
(tidy up) |
||
| Line 1: | Line 1: | ||
{{Translation}} | {{Translation}} | ||
You can easily translate the [https://docs.moodle.org/31/en/User_tours User tours] from [https://moodle.net/mod/data/view.php?id=17 Moodle.net], | You can easily translate the [https://docs.moodle.org/31/en/User_tours User tours] from [https://moodle.net/mod/data/view.php?id=17 Moodle.net], following these steps: | ||
* You must first install the [https://moodle.org/plugins/local_usertours User Tours additional plugin]. See the [https://docs.moodle.org/31/en/User_tours User Tours Documentation]. | * You must first install the [https://moodle.org/plugins/local_usertours User Tours additional plugin]. See the [https://docs.moodle.org/31/en/User_tours User Tours Documentation]. | ||
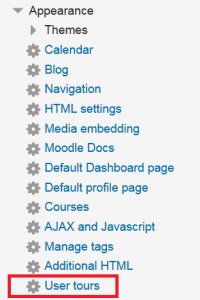
** After you install the plugin, you will see 'User tours' in ' Administration ► Site administration ► Appearance ► User tours ' | ** After you install the plugin, you will see 'User tours' in ' Administration ► Site administration ► Appearance ► User tours ' | ||
Revision as of 19:12, 30 June 2016
You can easily translate the User tours from Moodle.net, following these steps:
- You must first install the User Tours additional plugin. See the User Tours Documentation.
- After you install the plugin, you will see 'User tours' in ' Administration ► Site administration ► Appearance ► User tours '
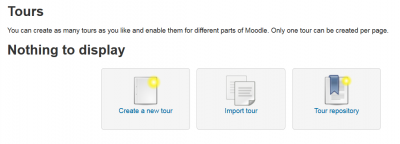
- Obviously, there will be no user tours to display initially:
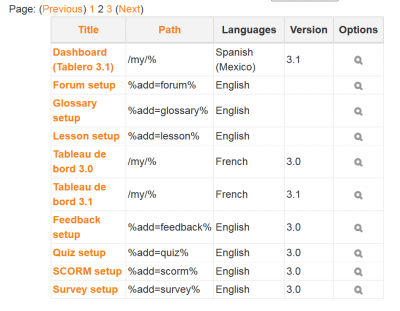
- Click on the ' Tour repository ' link. You will see several pages with many available user tours in different languages, for various Moodle branches:
- Click on the one you want to translate
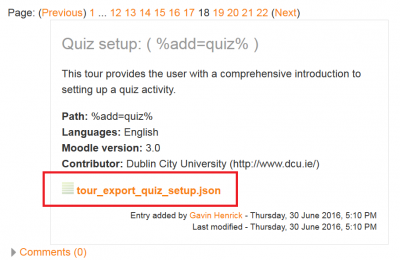
- Check the details and click on the orange-coloured link to download the *.json file:
- Take a note of where the downloaded file was saved.
- Go back to ' Administration ► Site administration ► Appearance ► User tours '
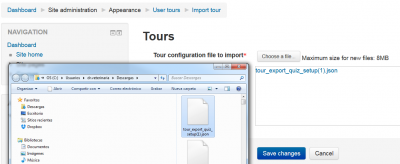
- Click on the ' Import tour ' link:
- Drag and drop the *.json file and click on the ' Save changes ' button.
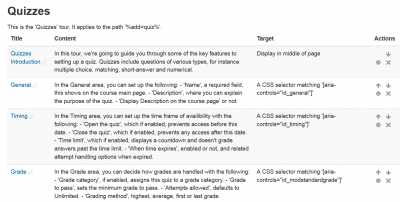
- You wil then see all the steps of your newly imported tour:
- You can now edit the steps of the user tour in order to translate it into your language.
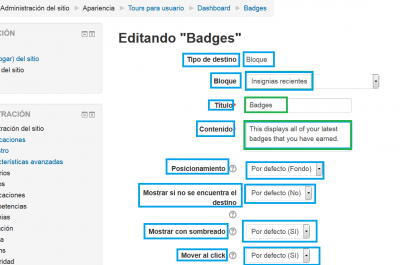
- Note in the following screen image that some strings inside a blue rectangle already appear as translated; that is because those language strings are part your language pack and had been properly translated at AMOS. Otherwise, please contact your language pack maintainer.
- The string you can now translate is the one enclosed in a green rectangle:
- Edit the remainding steps, one at a time, replacing the English language strings with your translation.
- Check that your edited (translated) file works as intended.
- Export the tour.
- The exported file is your translation.
- Submit it to the Moodle.net user tours database.
- Please translate the User Tools Moodle documentation too.
