Primeramente deberá crear una base de datos, como se describe en Configuraciones de actividad BasedeDatos. Después, ...
- A continuación Usted define el tipo de campos que definen la información que Usted desea colectar, Por ejemplo, una base de datos de pinturas famosas podría tener un campo para la imagen llamado pintura, para subir un archivo de imagen que muestre la pintura, y dos campos de texto llamados artista and titulo para el nombre del artista y el de la pintura. Alternativamente, Usted puede usar una preconfiguración de base de datos (vea debajo).
- Entonces será opcional el editar las Plantillas de BasedeDatos para alterar la forma en la cual la base de datos muestra las entradas.
Campos de BasedeDatos
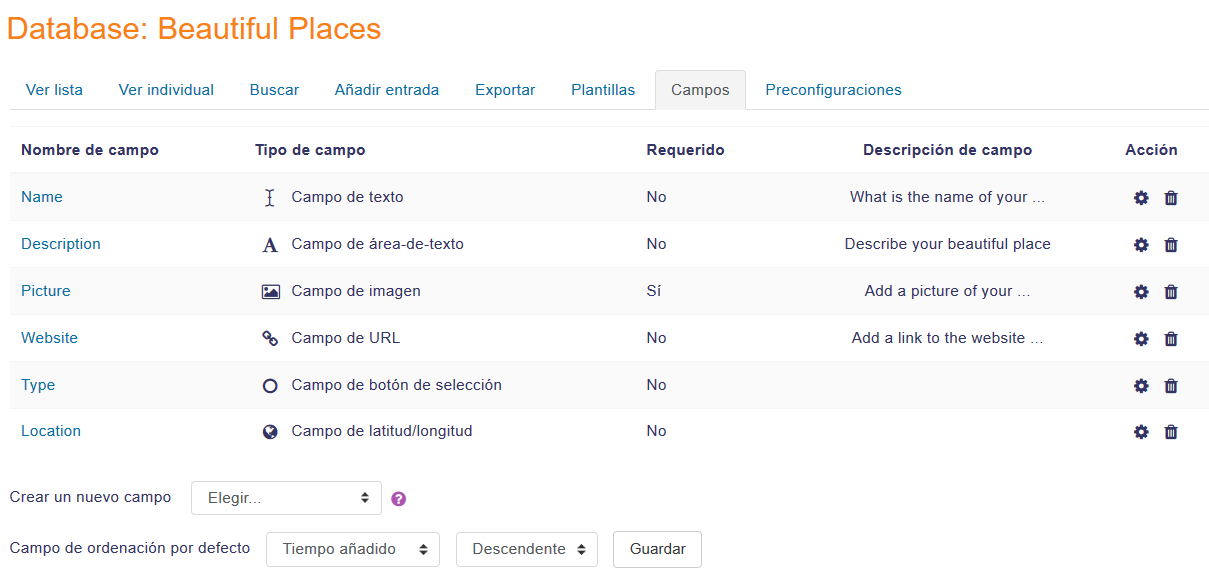
Un campo es una unidad nombrada de información. Cada entrada en una Módulo de actividad BasedeDatos puede tener varios campos de varios tipos; por ejemplo, un campo de texto llamado 'color favorito' que le permite a Usted escribir su tono favorito, o un menú llamado 'estado' que le permite elegir uno de entre los 50 que forman los Estados Unidos de América. Al combinar varios campos con nombres y tipos apropiados, Usted debería de poder capturar toda la información relevante acerca de los ítems en su base de datos.
Nota: Pendiente de Traducir. ¡Anímese a traducir esta página!. ( y otras páginas pendientes)
Note that if you later edit the fields in the databases you must use the Reset template button, or manually edit the template, to ensure the new fields are added to the display.
Nombre y descripción del campo
The name is what is shown when an entry is added. It must be unique and short. The description is for your benefit to help identify that field.
¡Nueva característica
en Moodle 2.9!
Campo requerido
If you need to ensure one or several particular fields are always completed, then tick the box 'Required field' when setting up the fields for your database. The field(s) will display a red asterisk when students contribute to the database, and they will not be able to save their work until they have entered the relevant information. A new column will show the teacher which fields are required and not:
Tipos de Campos
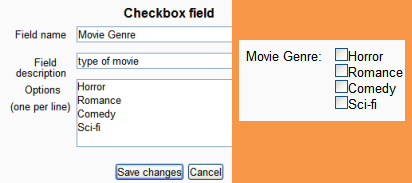
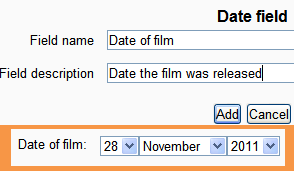
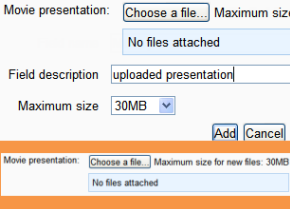
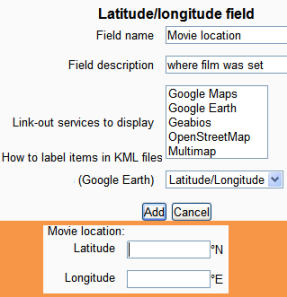
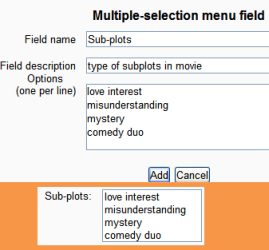
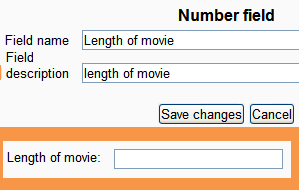
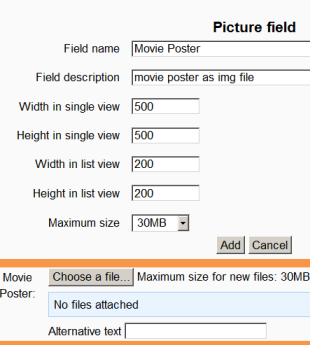
The following screenshots show "before" and "afters" of setting up fields. The selection in orange shows the field as it is displayed for the user when they add an entry.
- Checkbox
- This allows you to offer checkboxes for the user to select. Add the options one under the other. The word will appear next to a checkbox when the user clicks to add an entry. They can check more than one box.
- Date
- This allows a user to enter a date by picking a day, month and year from a drop down list.
- File
- Users can upload a file from their computer. If it is an image file then the picture field may be a better choice.
- Latitude/longitude
- Users can enter a geographic location using latitude and longitude. For example, Moodle HQ is at latitude -31.9545, longitude 115.877. When viewing the record, links are automatically generated linking to geographic data services such as Google Earth, OpenStreetMap, GeaBios,Mapstars and more. (The teacher can choose which of those links appear, if any.)
- Data input requirements: Data for this field must be input relative to North and East coordinates. To convert coordinates from West (e.g. 120W) to East, simply input them into the field with a '-' in front (e.g., -120). Also, data must also be input in decimal format, not degree format. Simple converters are a web search away.
- Menu
- The text entered in the options area will be presented as a drop-down list for the user to choose from. Each line become a different option.
- Menu (Multi-select)
- The text entered in the options area will be presented as a list for the user to choose from and each line become a different option. By holding down control or shift as they click, users will be able to select multiple options. This is a fairly advanced computer skill so it may be wise to use multiple checkboxes instead.
- Number
- This allows users to enter any number. For example:
- 42
- -1000
- 0
- 0.123
- 3.0e8
- (For those who care about the technical details, the field stores floating point numbers.)
- Picture
- This allows a user to upload and display an image file. "Single view" is when the image is viewed on its own; "list view" is when it is viewed in with other images. Single view can be larger than list view.
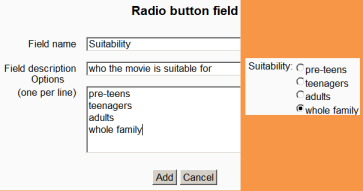
- Radio buttons
- The user gets radio buttons and can choose only one. They can only submit the entry when they have clicked on one button. (Note:If you only have two options and they are opposites (true/false, yes/no) then you could simply use a single checkbox instead. However checkboxes default to their unchecked status and so people could submit without actively selecting one of the options. This may not always be appropriate.)
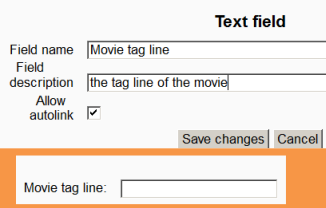
- Text input
- Users can enter text up to 60 characters in length. For longer text, or for text that requires formatting such as headers and bullet points, you can use a text area field.
- Text area
- This allows users to enter a long piece of text using the text editor.
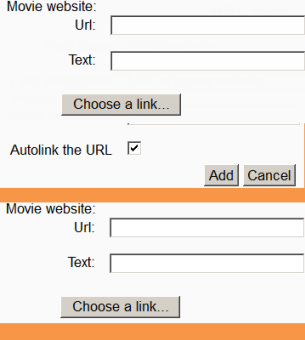
- URL
- The user can add a link to a website here. If you select autolink then the URL becomes clickable.. If you also enter a forced name for the link then that text will be used for the hyperlink. For example in a database of authors you may wish people to enter the author's website. If you enter the text 'homepage' as a forced name then clicking on text "homepage" will take you to the entered URL.
You can choose to have the URL open in a new window if so desired.
Presets
¡Nueva característica
en Moodle 4.1 !
La actividad de BasedeDatos le ofrece cuatro preconfiguraciones que usted puede usar o adaptar en lugar de crear las suyas propias. elija el nombre de una preconfiguración para pre-visualizarla y elija el botón de 'Usar preconfiguración' a la derecha para seleccionar su pre-configuración preferida.
Nota: Urgente de Traducir. ¡ Anímese a traducir esta muy importante página !. ( y otras páginas muy importantes que urge traducir)
Importar una pre-configuración
- When creating a new Database activity, click the button Import preset on the starter page once you have saved your settings.
- Alternatively, click the link Presets in the Database activity navigation.
- After the import, you can customise the fields and, if needed, add or import entries. .
You will see a "Overwrite current settings" checkbox after the "Import" button has been pressed. If checked/ticked, the Database activity overwrites some of its current general settings by those stored in the preset.
Exportar una pre-configuración
To share your Database activity, you have two options:
- Export it as a zip file, which can then be imported to another course or Moodle site. To do this, click into your Database activity and then from the Templates link in the Database activity navigation, click the Actions menu, selecting Export preset.
- Save as a preset, which publishes the Database for other teachers on your site to use. It will then appear in the preset list. (You can delete it from the list at any time.) To do this,from the Templates link in the Database activity navigation, click the Actions menu, selecting Publish preset on this site.
Nuevo en 4.3: Al exportar entradas, es posible incluir archivos.
Note: Only the fields and templates of the database are copied when exporting or saving it as a preset, not the entries.
Pre-configuraciones para descargar
You can browse other presets from the Database presets collection on Moodle.net. You can create your own presets as well and share them with others.
Vea también
- Moodle 2.0 Database - part 1 MoodleBites video on YouTube
- Moodle 2.0 Database - part 2 MoodleBites video on YouTube
Using Moodle forum discussions:
- Can't get columns to line up in list view including moodle.org presets for download
- New preset, please review, and make suggestions! including FAQ preset for download
- Issue 53: Encyclopedia database preset including encyclopedia-style preset for download
- Issue 51 - Design a Database Preset for Document Sharing including preset for download
- Looking for some stellar examples of Moodle courses including book reviews preset for download
- Restricting access to database content by user? with research diary preset for download
