Programs: Difference between revisions
(First changes in programs) |
(Details) |
||
| Line 10: | Line 10: | ||
Programs are also the basis for [[Certifications|certifications]] to model recurring programs, for example, in compliance setups. | Programs are also the basis for [[Certifications|certifications]] to model recurring programs, for example, in compliance setups. | ||
==Programs details== | ==Programs details== | ||
You can access the management of programs via '''Site administration > Learning > Programs''' or directly via the '''Programs''' icon in the Workplace launcher. | You can access the management of programs via '''Site administration > Learning > Programs''' or directly via the '''Programs''' icon in the Workplace launcher. | ||
| Line 19: | Line 18: | ||
To create a new program, click on the '''+New program''' button. You will then see a pop-up screen and a range of program details. | To create a new program, click on the '''+New program''' button. You will then see a pop-up screen and a range of program details. | ||
[[File:Programs - Program details.png|border|right|frameless| | [[File:Programs - Program details.png|border|right|frameless|536x536px]] | ||
* '''Program name''' (Required) The name of the program which is displayed in the list of active programs and the users’ dashboards | |||
* '''Program | * '''Program ID number''' Unique ID number that is used by the [[Upload users in Moodle Workplace|Moodle upload user tool]] and web services | ||
* '''Program description''' Summary of the program which is displayed on the users’ dashboard | |||
* '''Program image''' Program picture, which is displayed on users’ dashboards. Supported formats are JPG, PNG, and GIF. | |||
* '''Program | * '''Program visibility''' Toggle indicating whether the program is shown on the dashboard and if it can be accessed | ||
* '''Program | * '''Program tags''' Tags to be shown on the active programs list | ||
* ''' | * '''Allow direct allocation''' If enabled, users can be allocated directly to this program. | ||
* '''Add to course groups''' If enabled, users will be added to a course group when they get enrolled in the course. The group’s name is the same as the program; it will be created automatically when it doesn’t exist. See also [[Programs#Sharing content across tenants|sharing content across tenants]]. | |||
[[File:Programs - Program custom fields I.png|border|right|frameless|375x375px]] | [[File:Programs - Program custom fields I.png|border|right|frameless|375x375px]] | ||
| Line 37: | Line 36: | ||
Note that program custom fields are defined globally; that is, they will be available across tenants. | Note that program custom fields are defined globally; that is, they will be available across tenants. | ||
[[File:Programs - Program custom fields II.png|border|right|frameless|375x375px]] | [[File:Programs - Program custom fields II.png|border|right|frameless|375x375px]] | ||
Program custom fields appear at the bottom of the program details form. | Program custom fields appear at the bottom of the program details form. | ||
==Program content == | ==Program content == | ||
The program content contains courses, sets, and completion types that make up the program. When you select the +Add icon at the top right, a drop-down menu will appear with two options: | The program content contains courses, sets, and completion types that make up the program. When you select the +Add icon at the top right, a drop-down menu will appear with two options: | ||
=== Program courses === | === Program courses === | ||
From the course drop-down menu, you can select as many courses as you wish. Each Moodle course will be treated as a separate program entry. | From the course drop-down menu, you can select as many courses as you wish. Each Moodle course will be treated as a separate program entry. | ||
== Adding courses== | == Adding courses== | ||
Courses can be added to your program from the program "Content" tab. We can either add individual courses, or group them together in "sets". | Courses can be added to your program from the program "Content" tab. We can either add individual courses, or group them together in "sets". | ||
Revision as of 12:35, 20 October 2021
Programs allow you to establish learning pathways for your employees by adding a combination of courses or a hierarchical sequence of courses. A typical use case would be the onboarding of new employees.
Overview
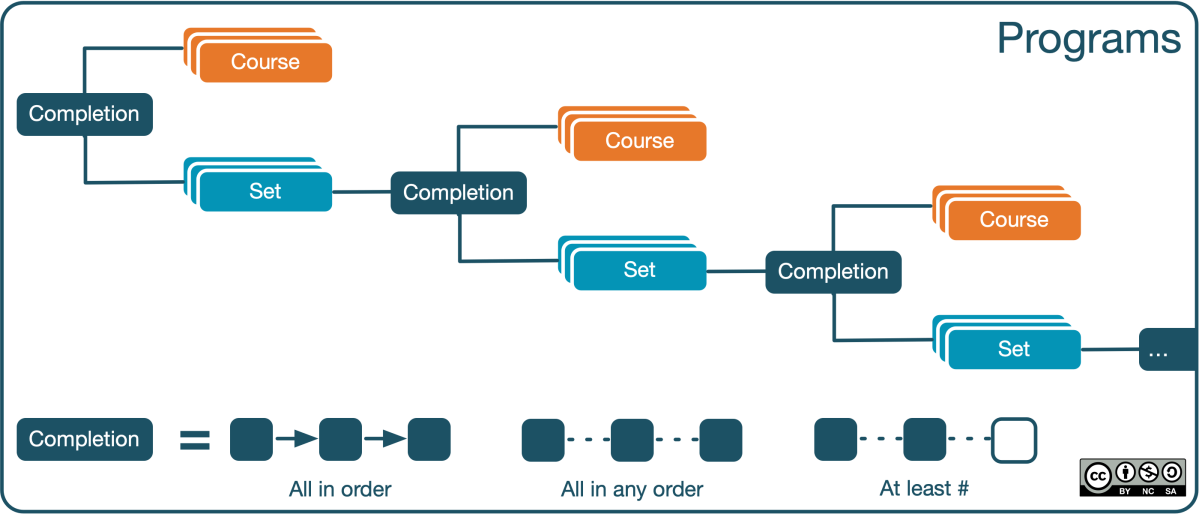
A program consists of courses and sets; both are optional and can be arranged in any order. A set contains one or more courses that have to be completed. Interestingly, a set can also contain another set — a great vehicle for creating hierarchical curricula. The recursive structure of programs is depicted in the following diagram:
Learners can see all programs they are allocated to on their Dashboard and self-enrol into the program courses by clicking on them. Some program courses may not be available until prerequisites have been met.
Programs are also the basis for certifications to model recurring programs, for example, in compliance setups.
Programs details
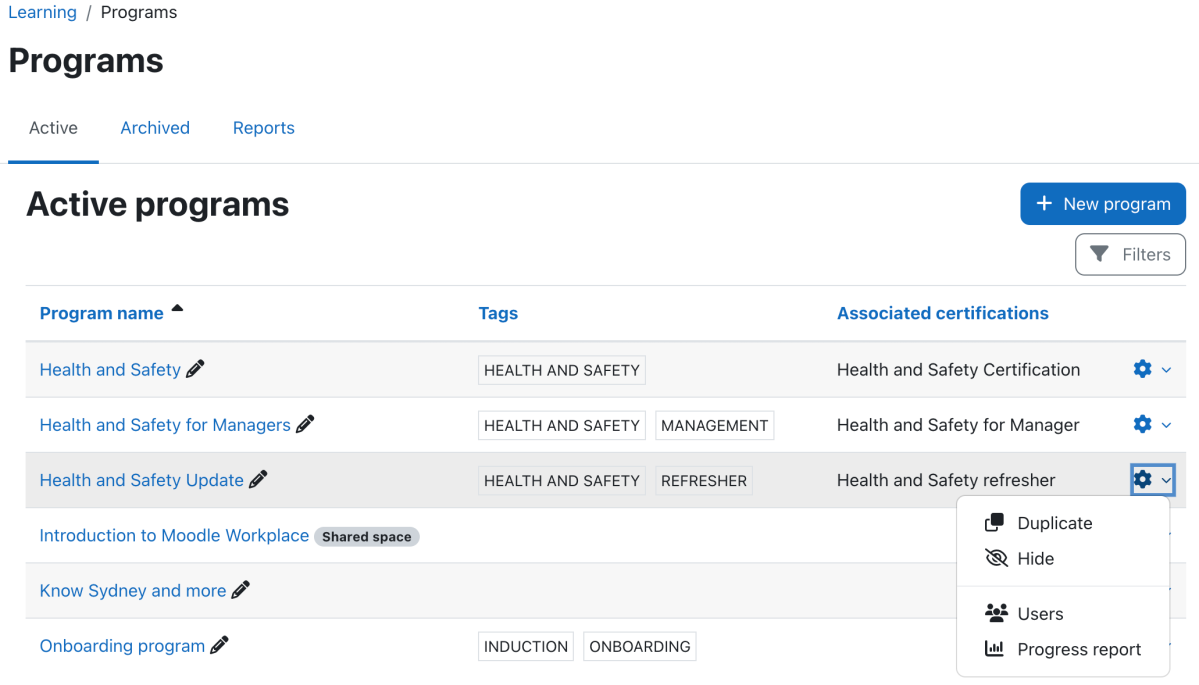
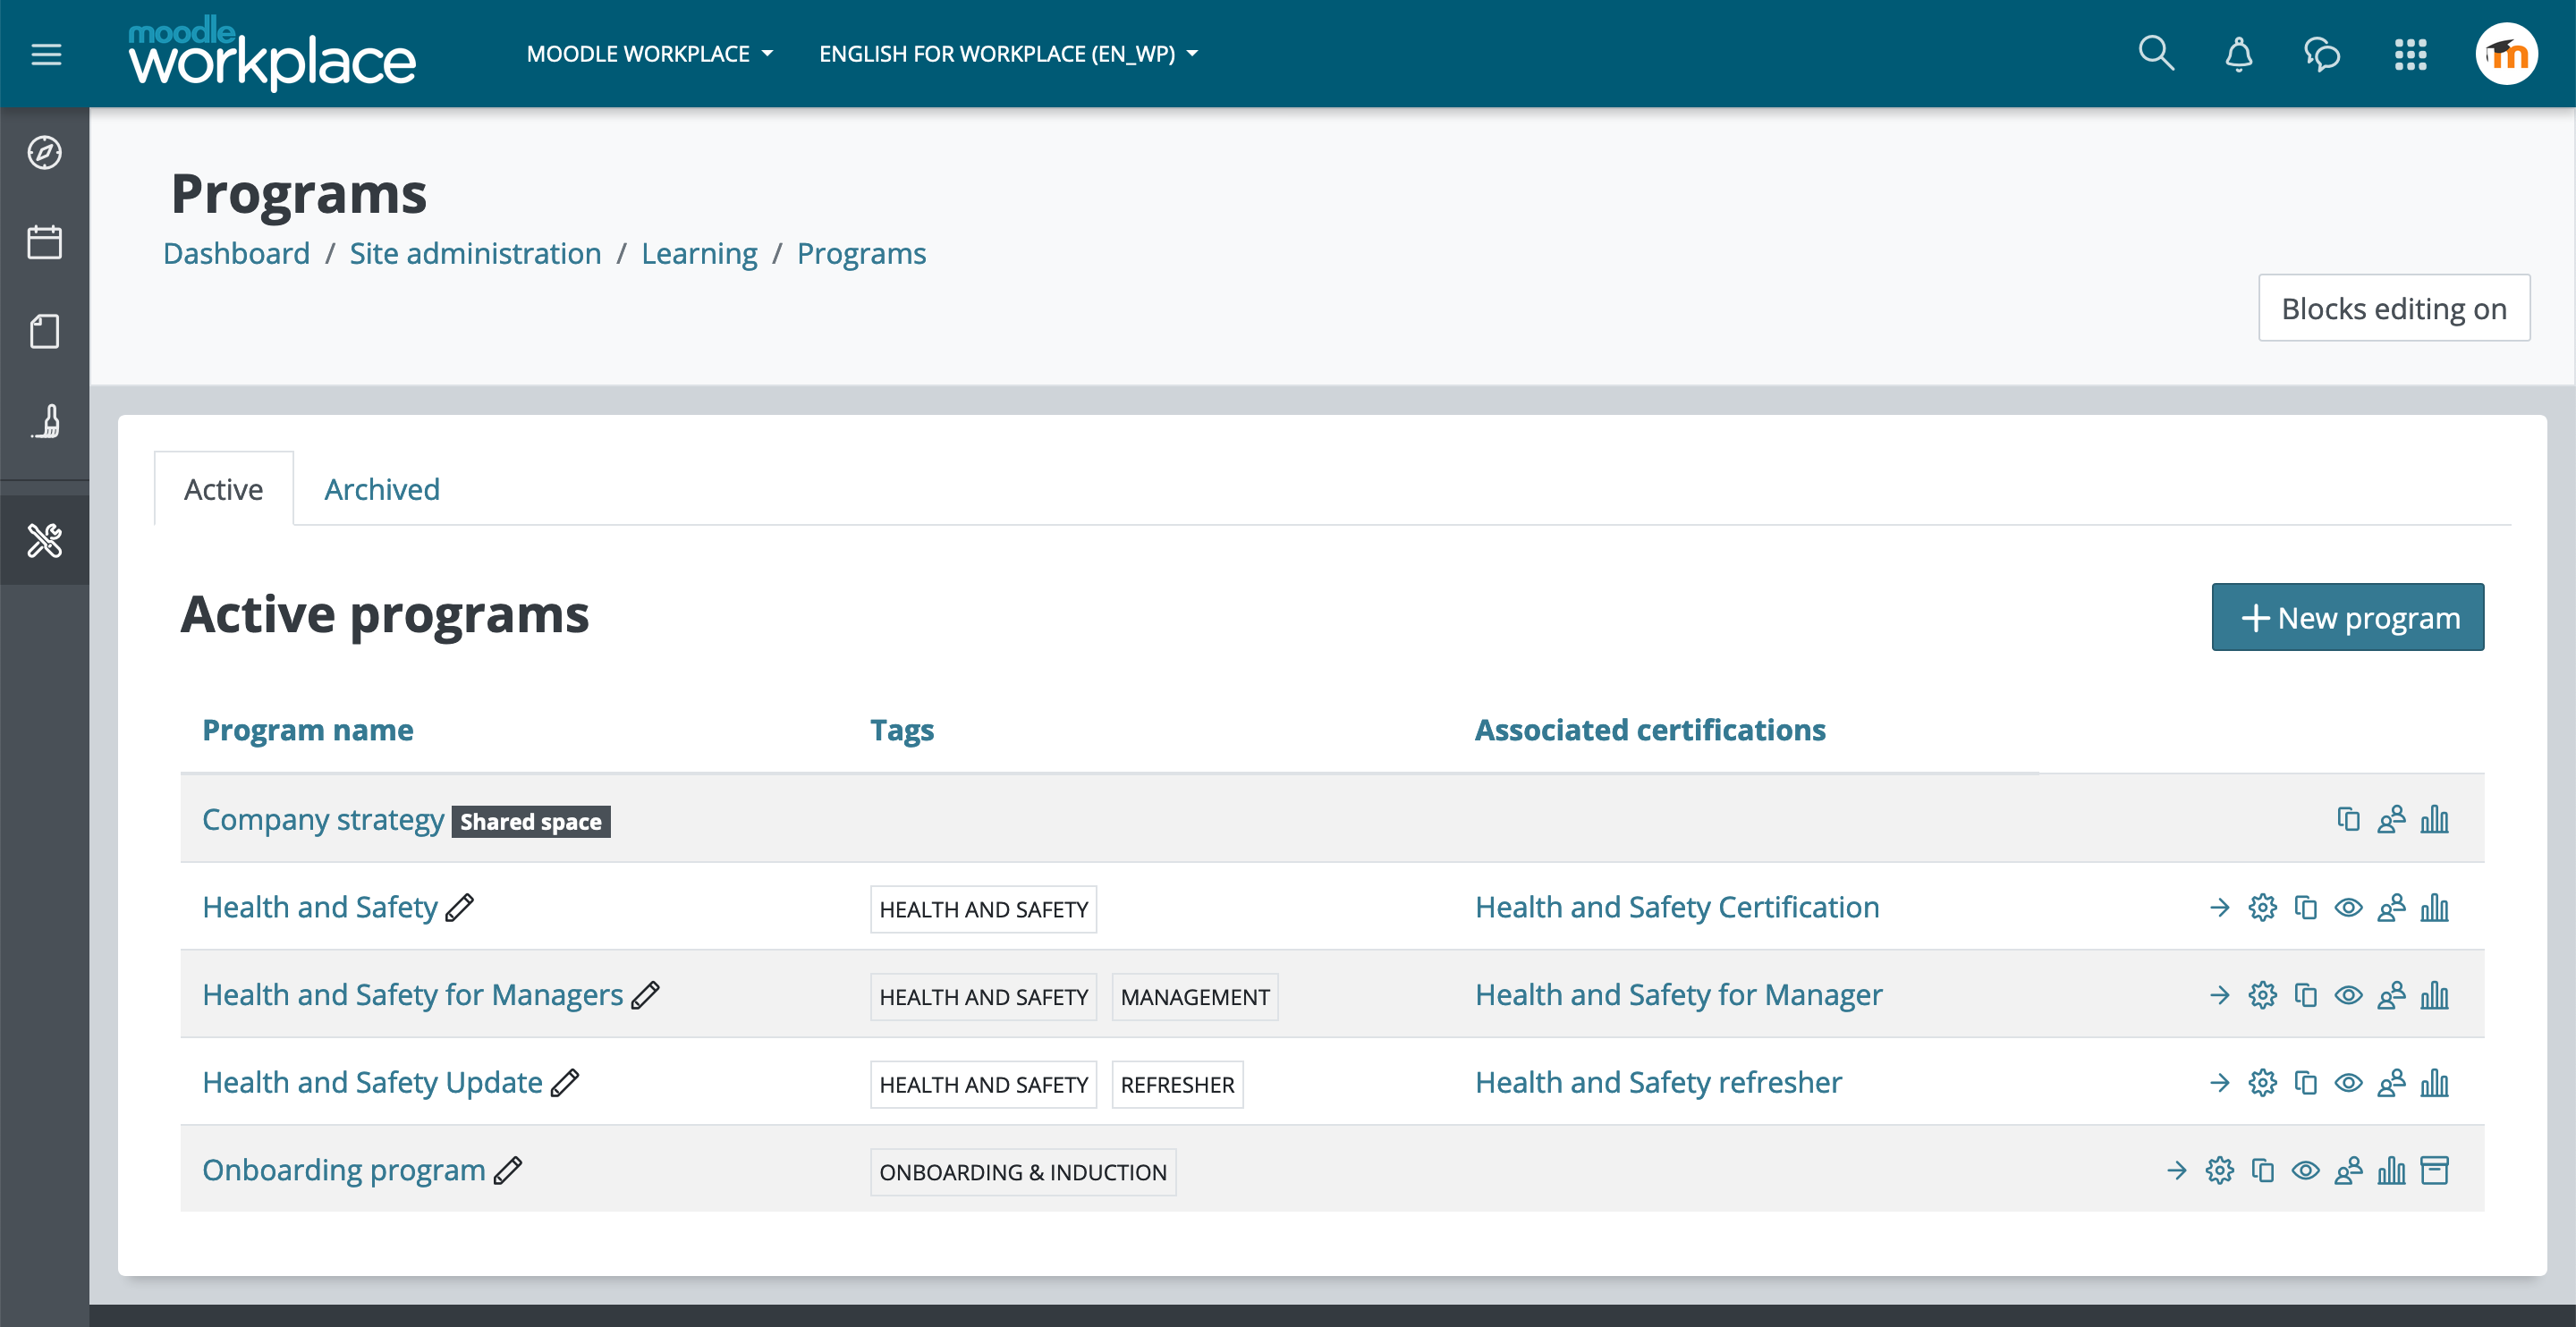
You can access the management of programs via Site administration > Learning > Programs or directly via the Programs icon in the Workplace launcher.
For each active program, you see the Program name, any given Tags, and Associated certifications. You will see the usual Workplace icons (Edit, Details, Duplicate, Show/Hide, Users, Report, and Archive) to the right of each program. You can filter the list of active programs by Program name and Associated certification.
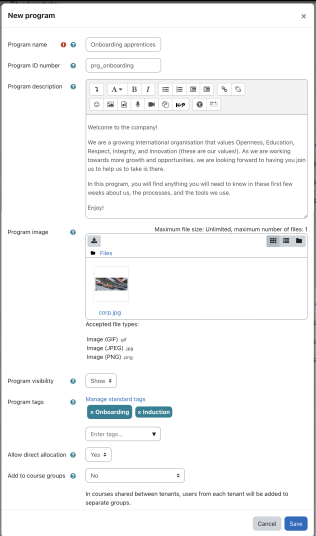
To create a new program, click on the +New program button. You will then see a pop-up screen and a range of program details.
- Program name (Required) The name of the program which is displayed in the list of active programs and the users’ dashboards
- Program ID number Unique ID number that is used by the Moodle upload user tool and web services
- Program description Summary of the program which is displayed on the users’ dashboard
- Program image Program picture, which is displayed on users’ dashboards. Supported formats are JPG, PNG, and GIF.
- Program visibility Toggle indicating whether the program is shown on the dashboard and if it can be accessed
- Program tags Tags to be shown on the active programs list
- Allow direct allocation If enabled, users can be allocated directly to this program.
- Add to course groups If enabled, users will be added to a course group when they get enrolled in the course. The group’s name is the same as the program; it will be created automatically when it doesn’t exist. See also sharing content across tenants.
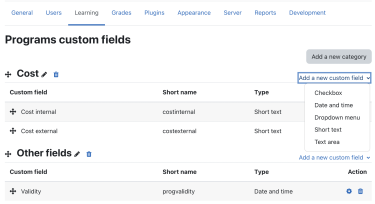
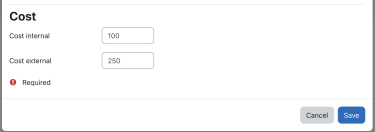
Programs support custom fields, which are user-defined properties to store extra program information, such as the program’s cost. They are managed in Site administration > Learning > Programs customs fields and they work in precisely the same way as course custom fields.
Note that program custom fields are defined globally; that is, they will be available across tenants.
Program custom fields appear at the bottom of the program details form.
Program content
The program content contains courses, sets, and completion types that make up the program. When you select the +Add icon at the top right, a drop-down menu will appear with two options:
Program courses
From the course drop-down menu, you can select as many courses as you wish. Each Moodle course will be treated as a separate program entry.
Adding courses
Courses can be added to your program from the program "Content" tab. We can either add individual courses, or group them together in "sets".
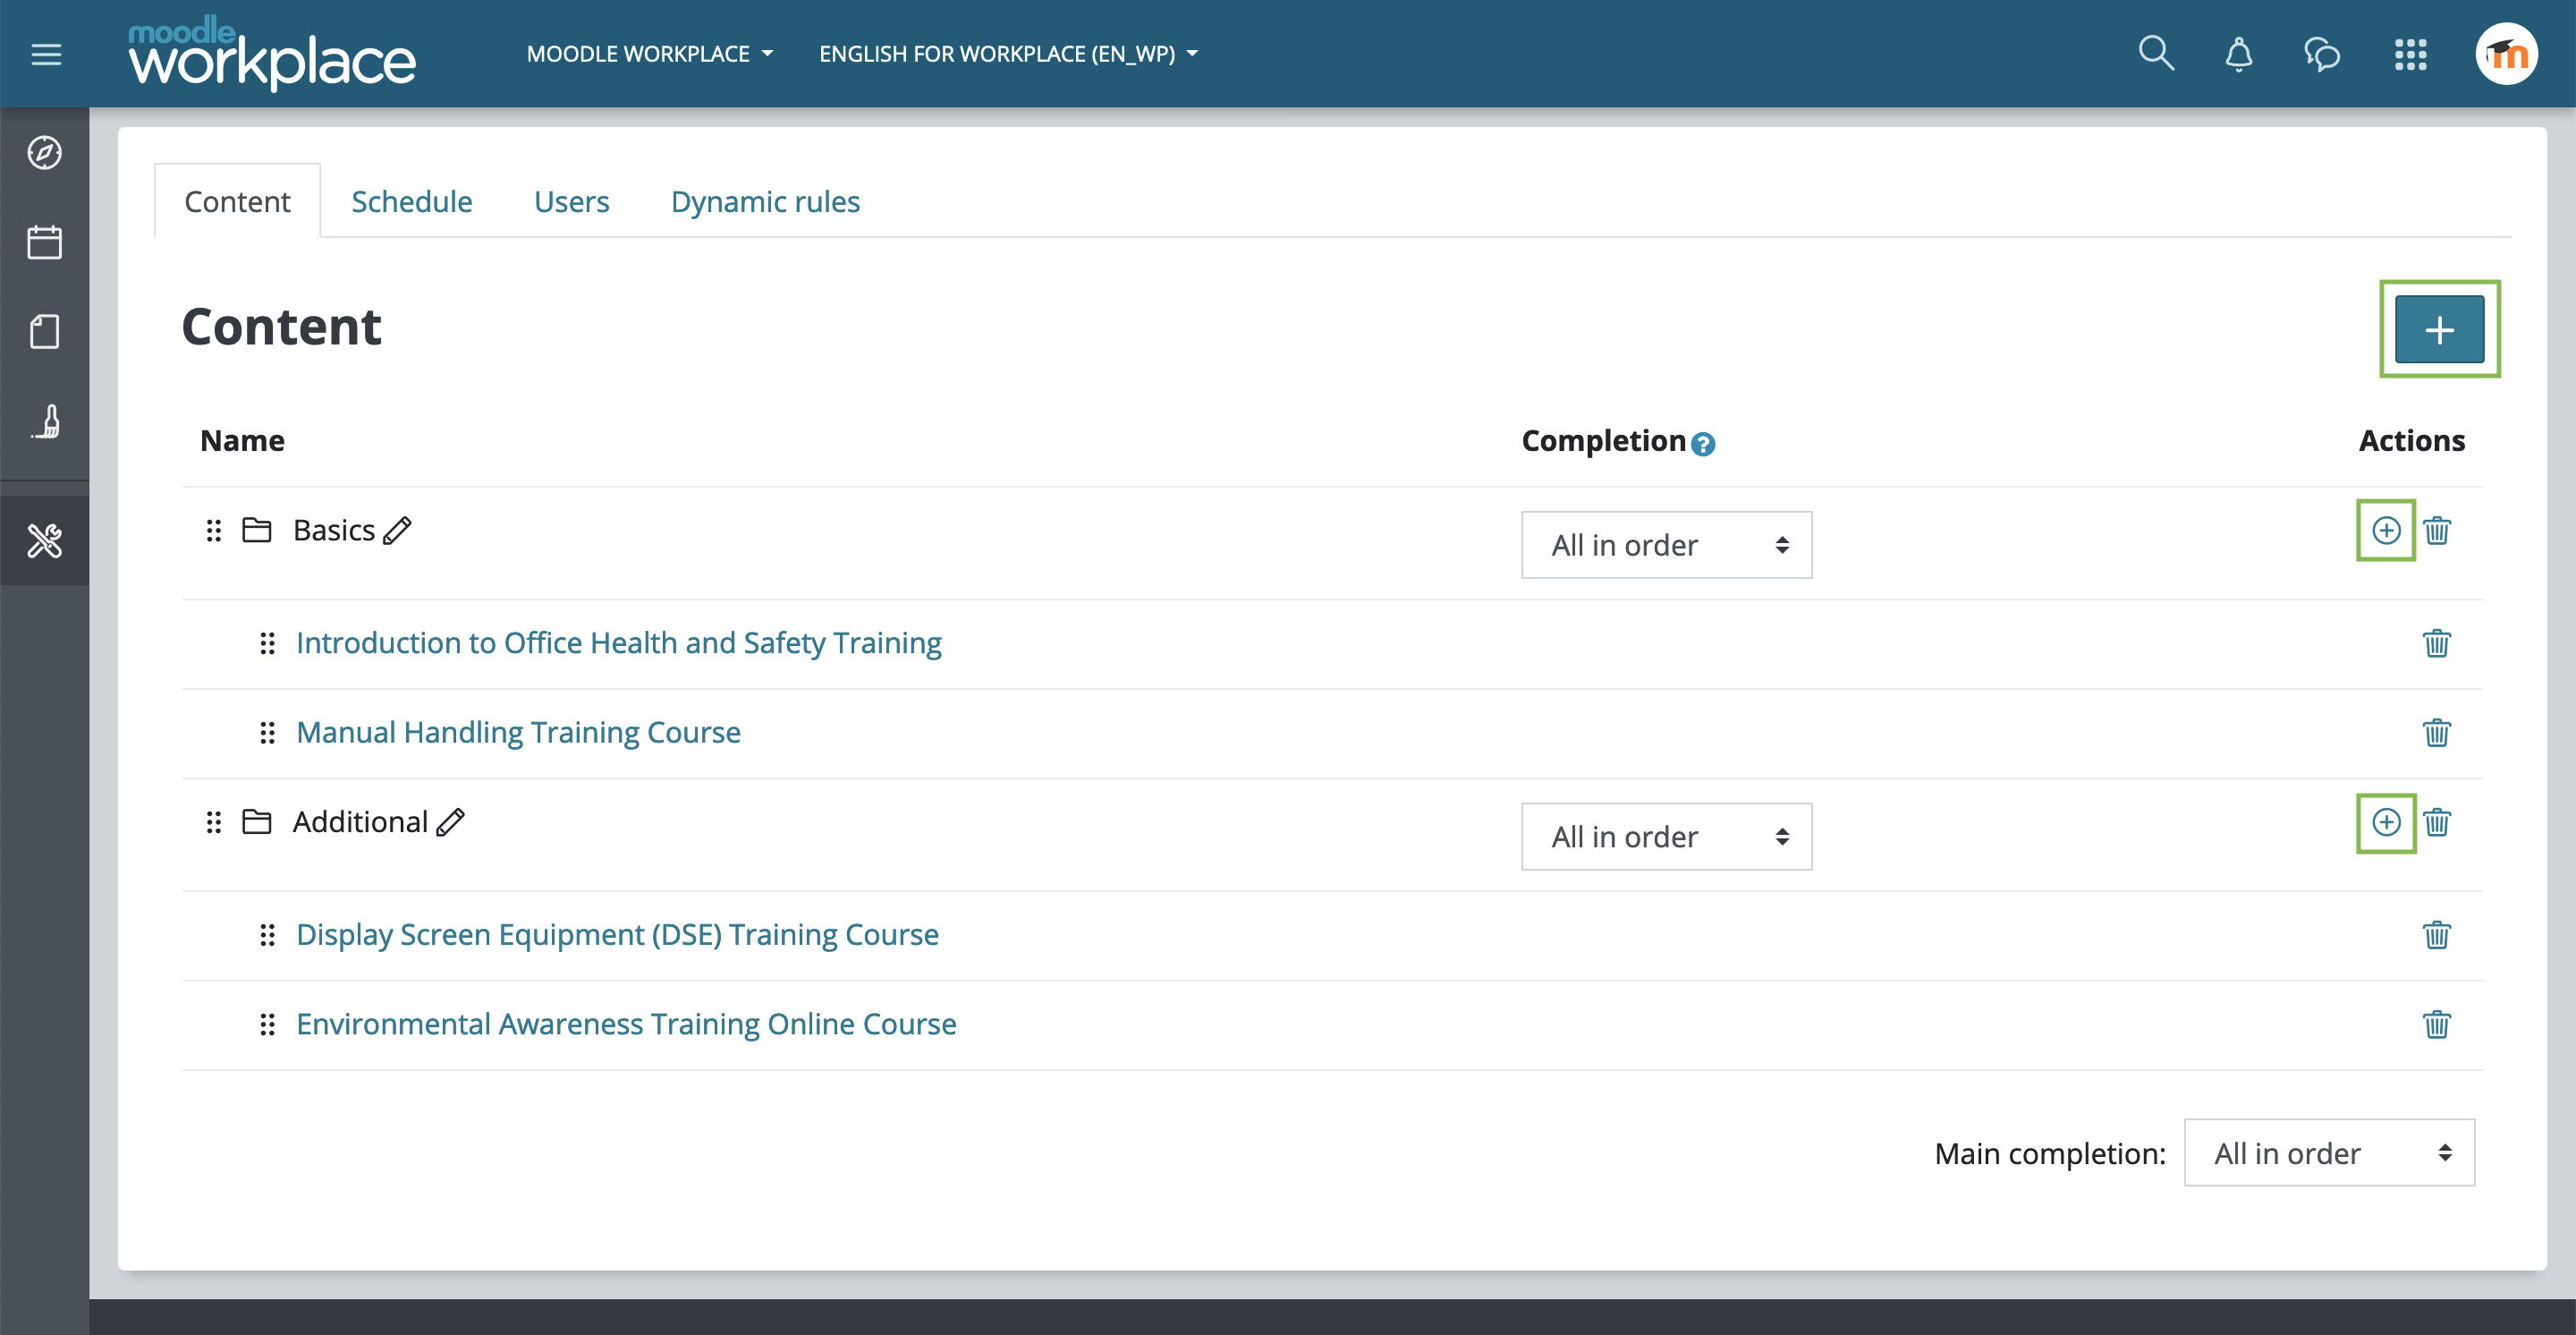
- To add a course click the add button and select "Course". You can select as many courses as you want.
- To add "sets" of courses click the add button and select "Set". Give your set a name and select which courses you want to add to it. See the section on completion below to define how the set should be completed by a user
You can use drag-and-drop o re-order elements within the program in order to set a specific order.
Completion
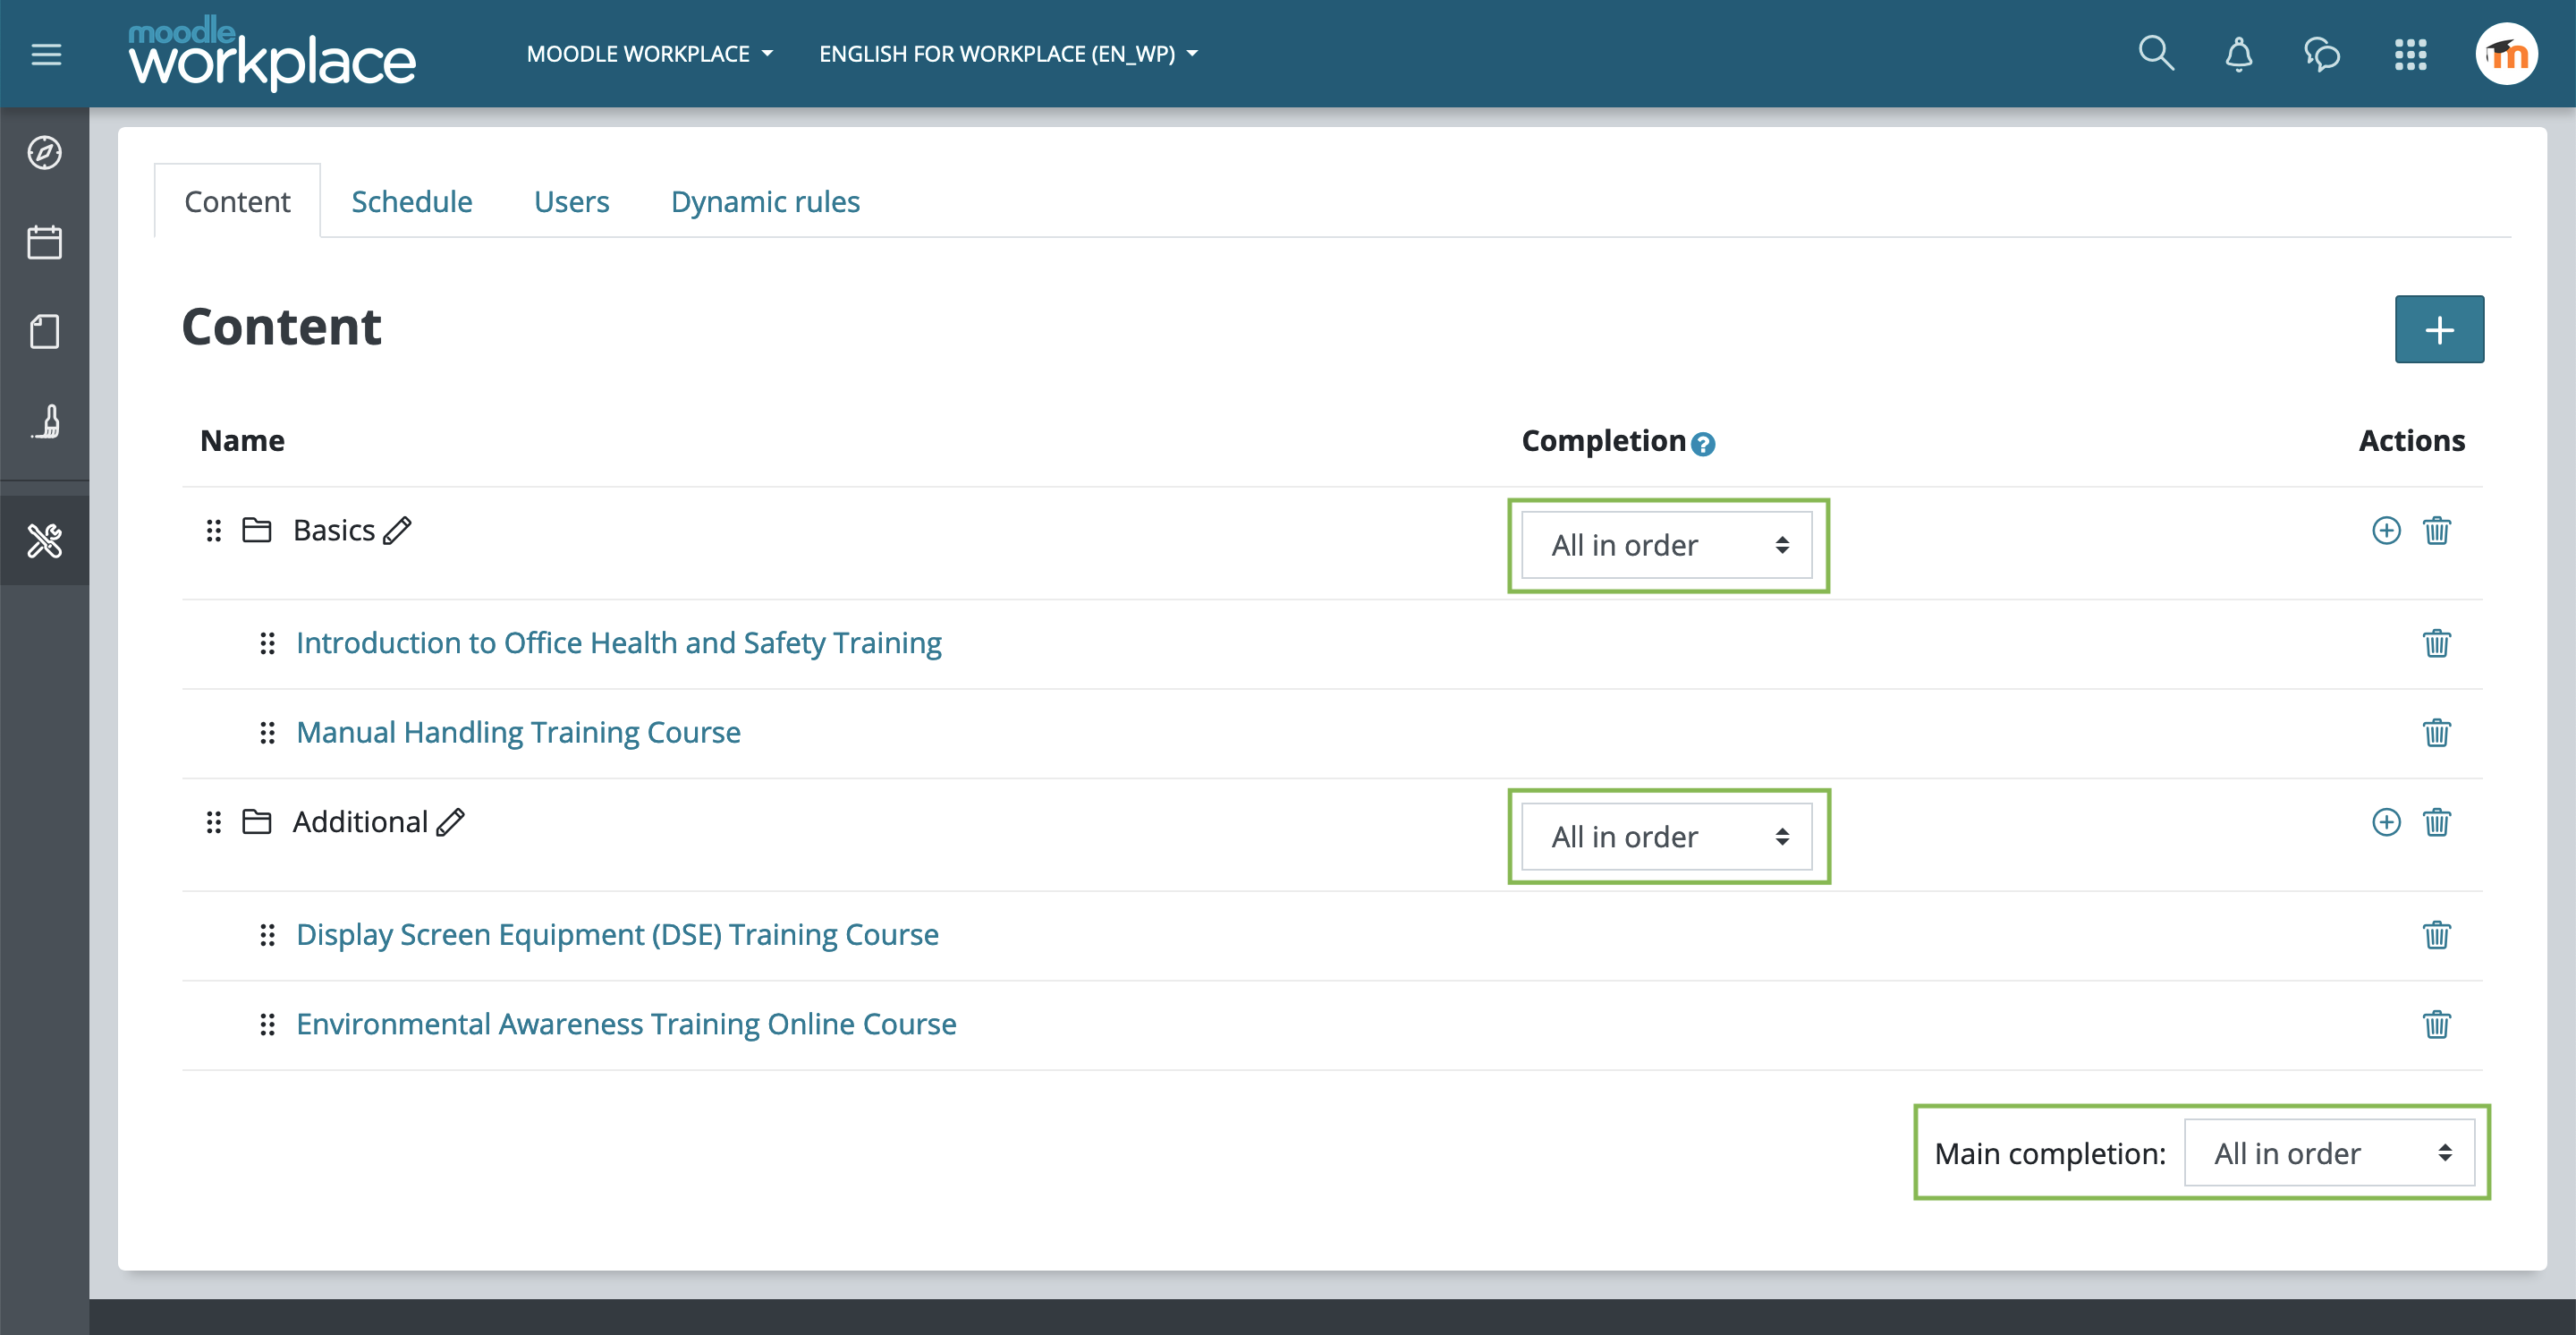
Each program, and course sets within it, can define how they should be considered as being completed by the user:
- All in order - the user must complete all courses in the order specified
- All in any order - the user must complete all courses in no particular order
- At least X - the user must complete at least X number of the courses
Schedule
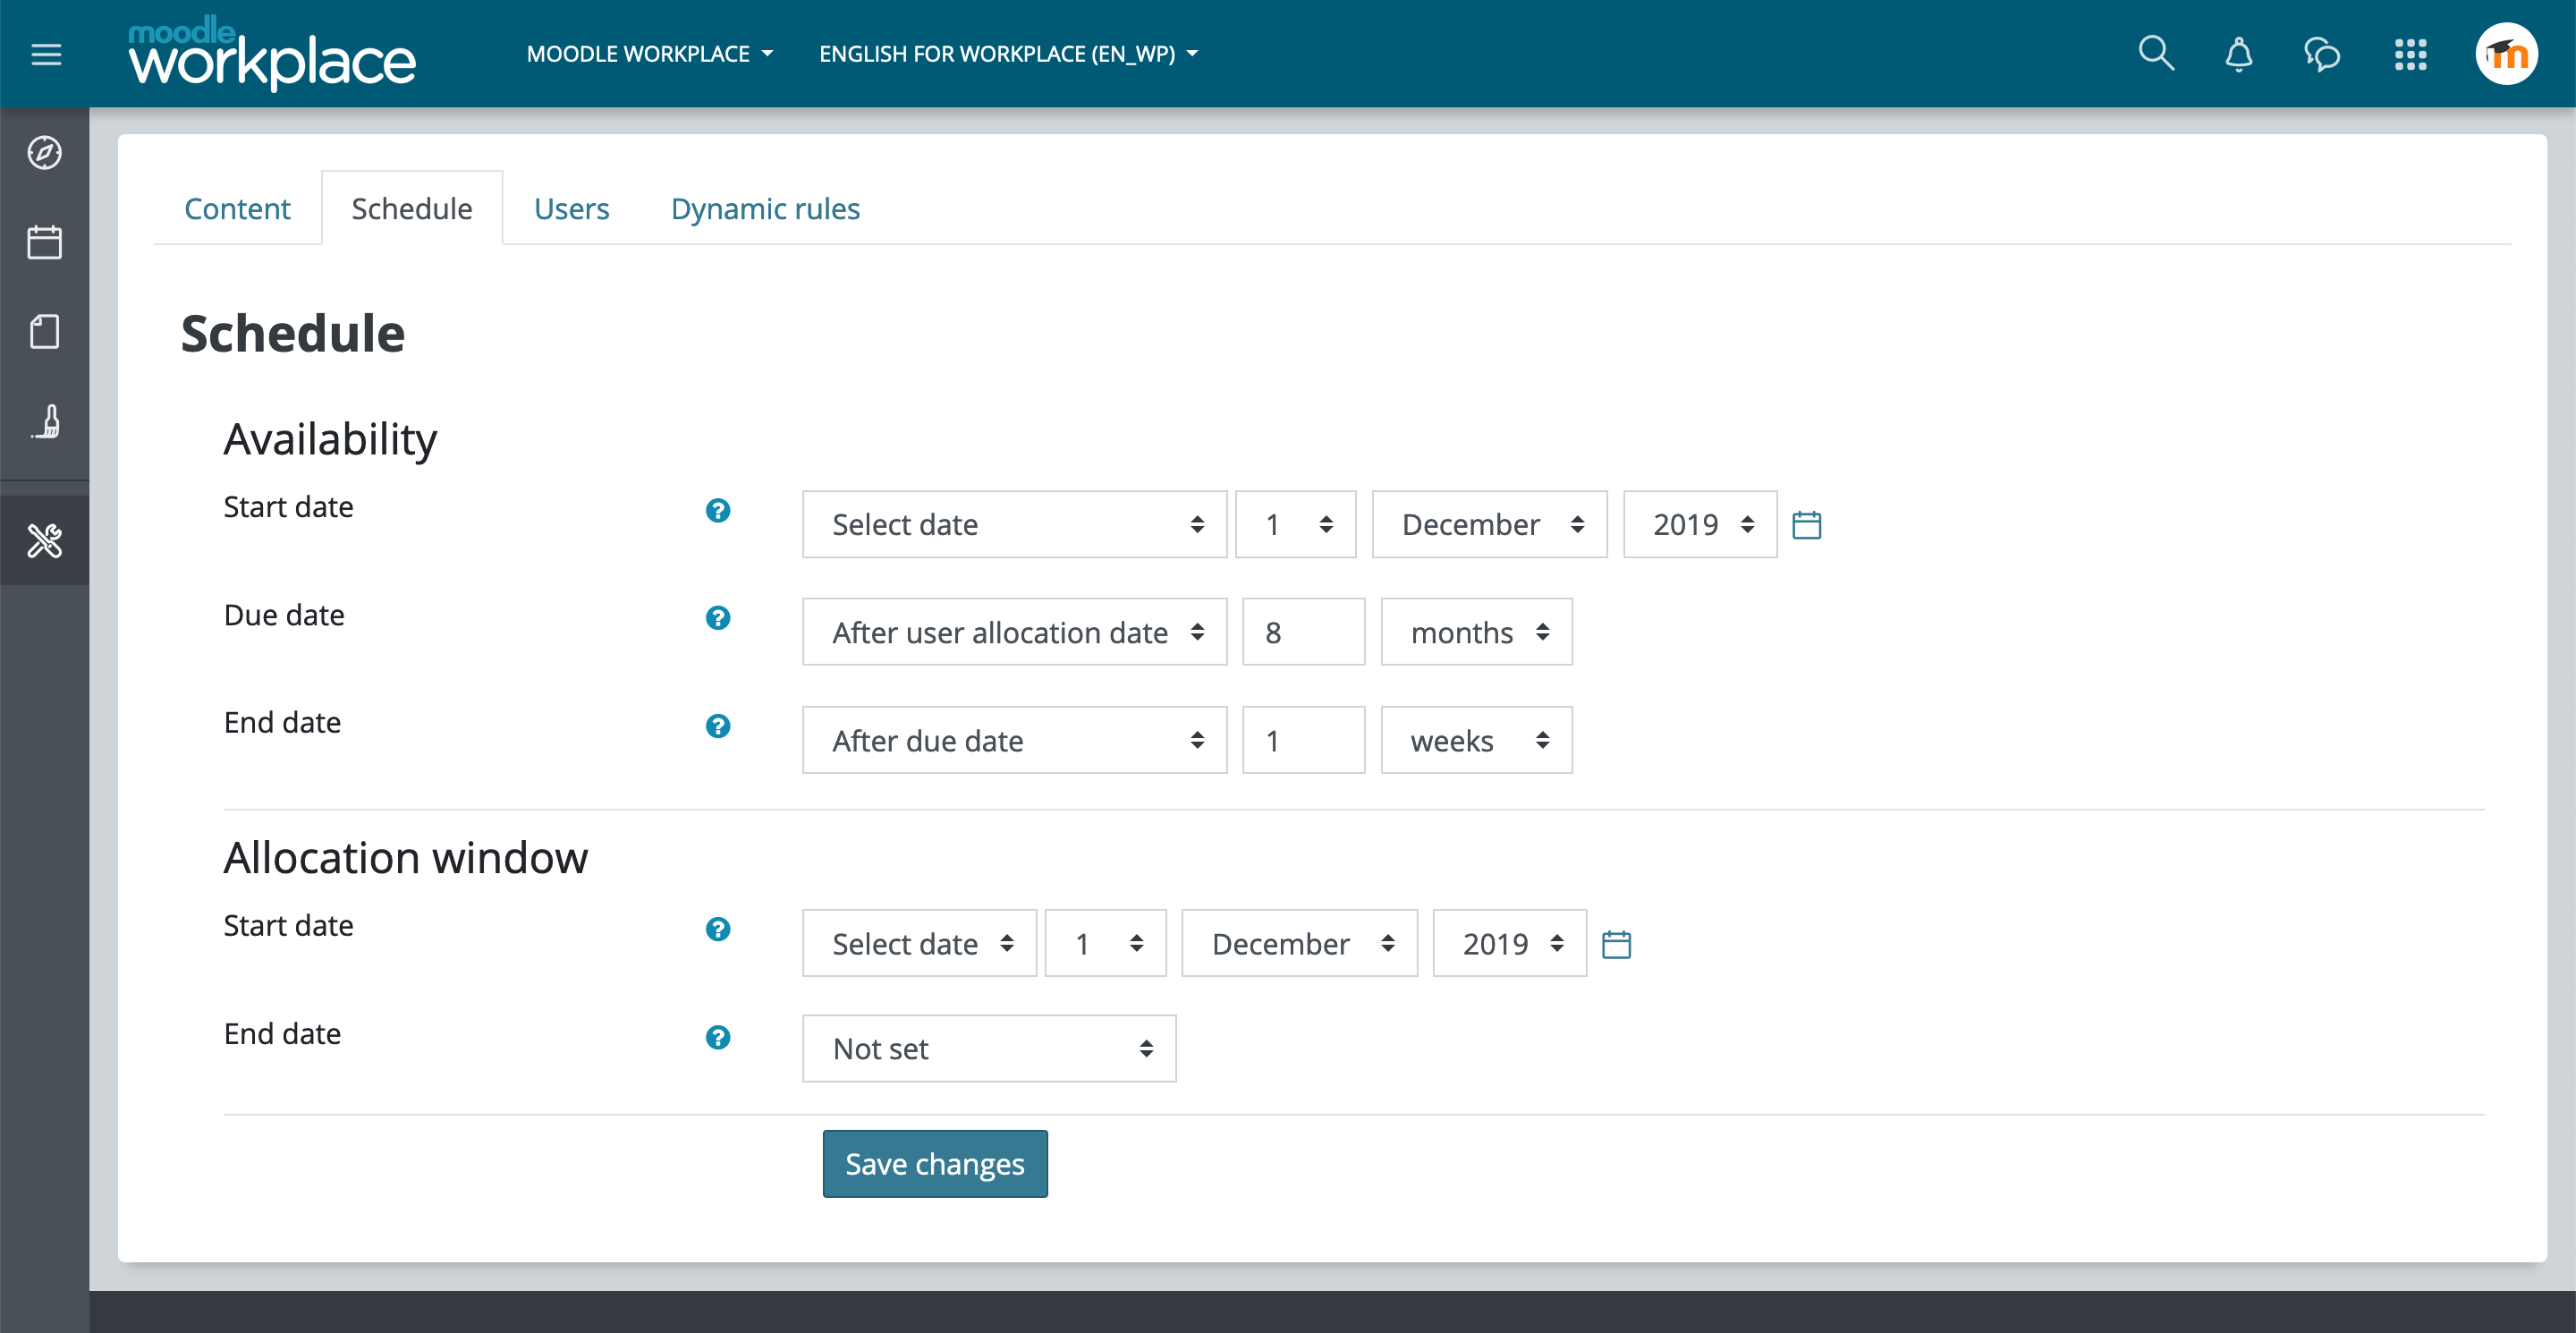
Under the program "Schedule" tab, we can define the availability and allocation times for the program. The "Allocation window" defines when a user can be allocated to a program using manual direct allocation (so allocation through Certifications and Dynamic Rules ignore this configuration). The "Availability" section defines a start and end date during which time a user can access the program. The due date is the time by which the user should have completed the program. Each of the times can be set relative to another, for example a users start date could be considered to be immediately after their allocation date with a due date one month later.
User allocation
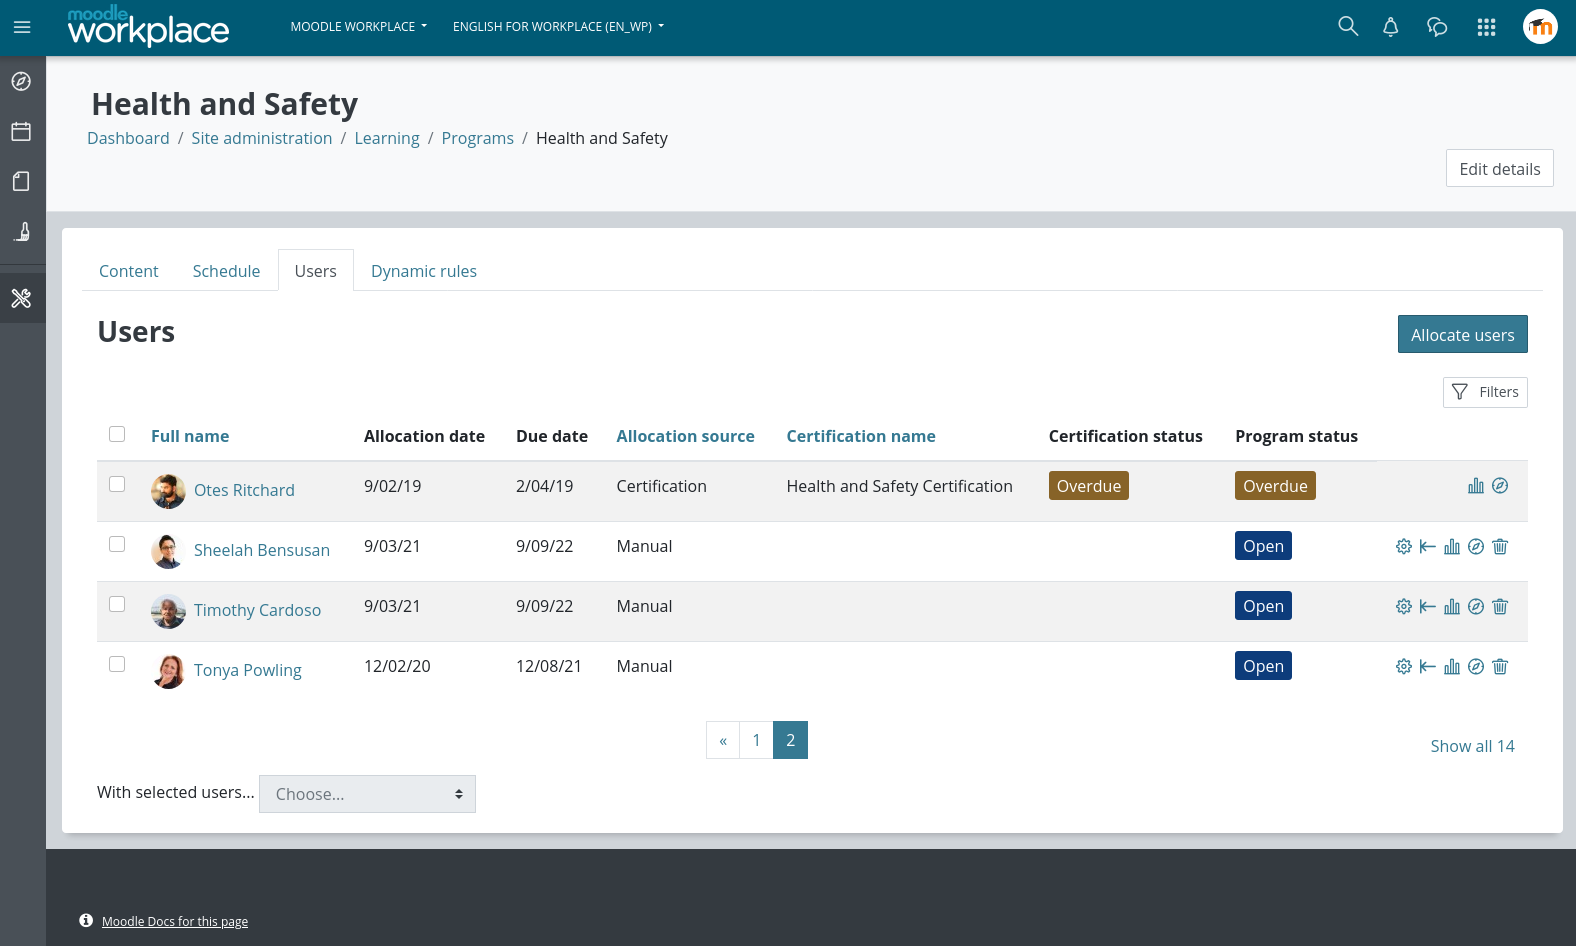
Users can be manually allocated to a program from the "Users" tab. This page also lists all allocated users from other sources (such as via a Certification). For those users allocated to a program via a certification, the status of the certification is also shown.
On this page we can also modify allocation dates (start date, due date and end date) individually for each user, suspend a user allocation and reset a user's program (caution: this will reset all program set/course completion for the user). We can also select several users at a time and perform these actions in bulk.
Dynamic rules
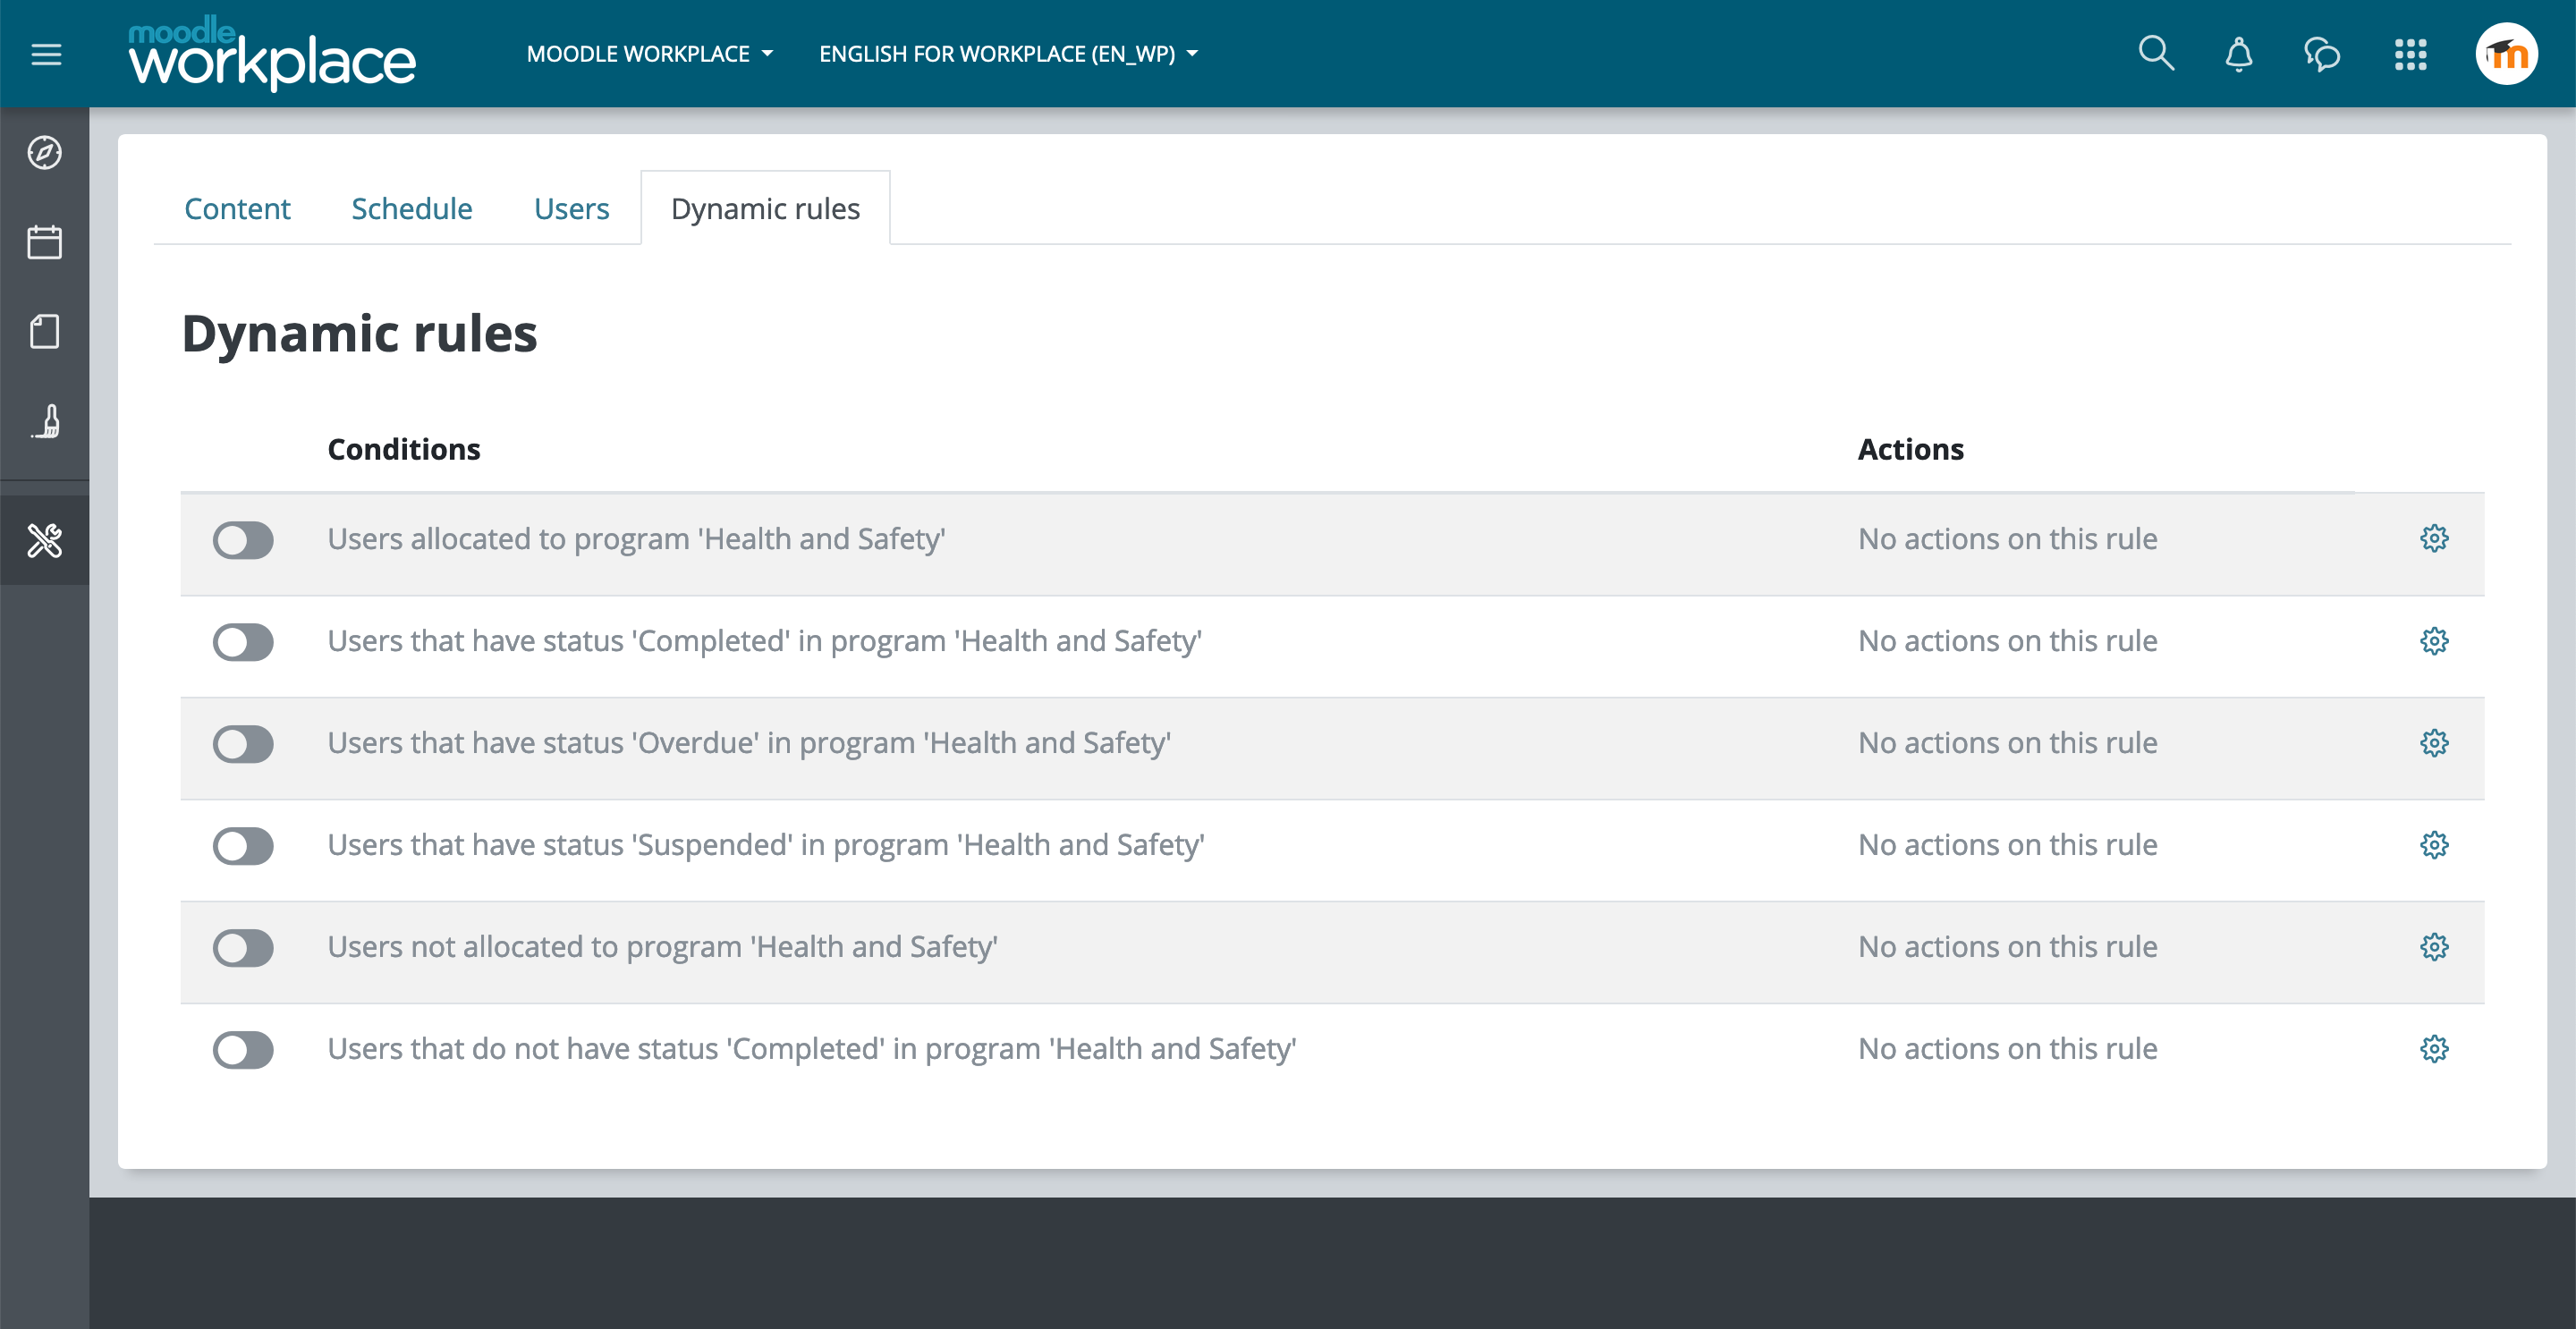
The Dynamic rules tab gives quick access to some rules which affect this program and are created by default. This will allow the site administrator to do things like sending a notification to the user when they're allocated to the program, issuing a certificate or a badge, granting a competency upon program completion, or sending a reminder when the program is overdue. Set actions for these predefined rules and click the toggle button to activate them.
User Dashboard
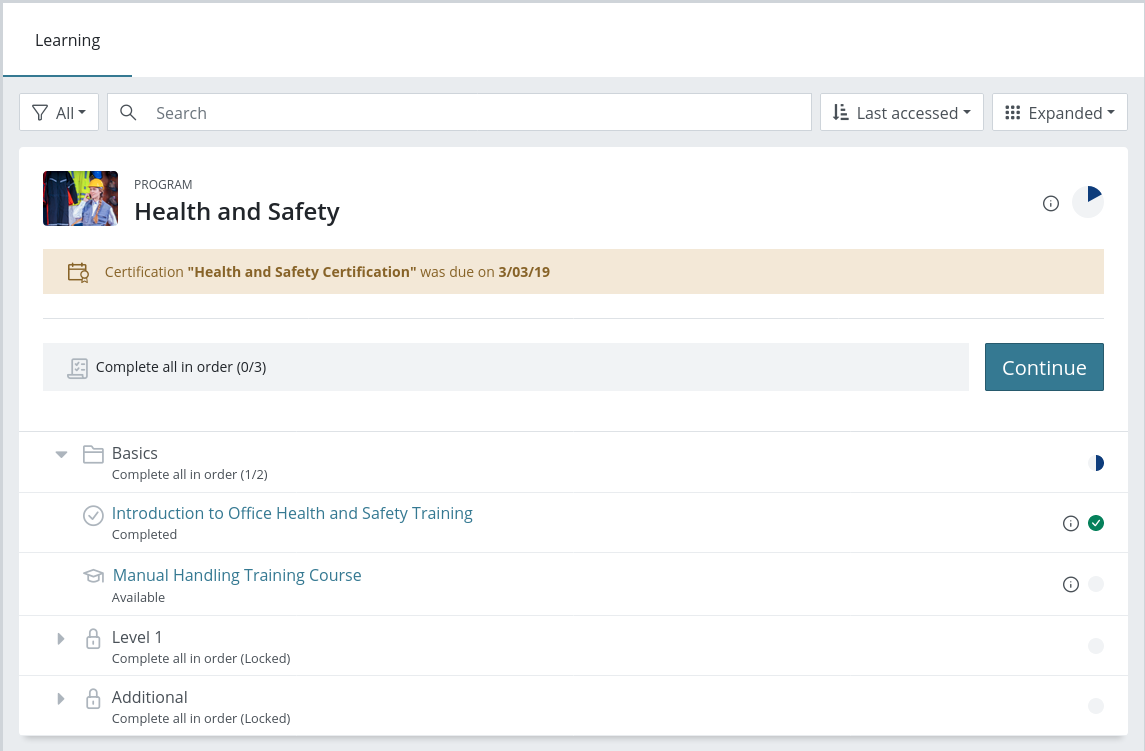
When a user logs into Moodle Workplace and visits their Dashboard they will see all the active programs they have been allocated to, showing their completion status and allowing easy access to the courses contained within the program. User will have to complete courses in each set according to the completion criteria previously defined in the program content page.
Program reset
A manager is able to reset a program for an individual user from the program users list. This will reset all courses that are part of this program. The users' course completion data, individual assignments, grades and ratings will be reset. Data related to collaborative activities inside program courses will not be reset - this includes workshop, forum, assignment group submissions and collaborative wikis.
A course reset report is also available from the Report builder. To generate it a manager just needs to go into the Report builder tool and create a new report using the “Course reset for individual user” report source.
Sharing courses between tenants
In the default Workplace installation users do not have the capability moodle/category:viewcourselist outside of their tenant's category. This means that the Tenant administrator or Programs Manager will not see courses outside of their own tenant's course category when they add courses to the programs.
However the site can be configured so that there is a "Shared" course category that overrides permissions and allows users to browse courses there, or a special user could be created who creates programs for different tenants and has access to all courses. In any case, it is possible to add the same course to different programs that belong to different tenants.
A manager who manages the program will see the "attention" icon next to the courses that do not belong to the current tenant's course category. It is highly recommended to have all shared courses in "Separate groups" mode and force the group mode for all activities.
The Programs enrolment method will always allocate users from different tenants into different groups. Groups will be created automatically based on the name of the tenant. They can be manually renamed later without affecting the allocation of future students.
Sharing courses between programs
Even within the same tenant, multiple programs may use the same course. By default users enrolled into the same course via different programs will not be in different groups, however it is possible to specify in Program settings that a group has to be created in each program course for the users allocated to the program.
The same can be done for certifications. Each certification can have their own groups in the courses. For example, a new certification may be created for each cohort of students taking the same program and by separating them into groups the manager can ensure that they don't see forum posts or other activity from other cohorts.
After enabling Shared space, users can create shared programs inside of it. These shared programs will be listed in Programs main page in all tenants and will be marked with a "Shared space" label next to it. Users from these tenants with no access to the Shared space will be only able to allocate users to these programs.
Access the Shared space from the tenant switch dropdown, in the navigation bar. When inside the Shared space go to Programs in the Workplace launcher and create a new program as usual.
