Ero sivun ”Oppitunnin rakentaminen” versioiden välillä
| Rivi 15: | Rivi 15: | ||
===Tuo kysymykset=== | ===Tuo kysymykset=== | ||
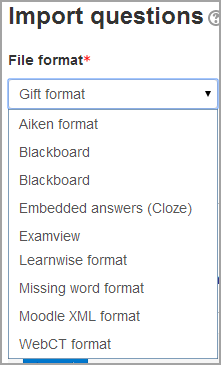
*Jos sinulla on kysymyksiä seuraavissa formaateissa, voit tuoda ne oppituntiin klikkaamalla Tuo kysymykset -linkkiä. | *Jos sinulla on kysymyksiä seuraavissa formaateissa, voit tuoda ne oppituntiin klikkaamalla Tuo kysymykset -linkkiä. Yleistä tietoa näistä kysymystyypeistä löydät sivulta [[Tuo kysymykset]] | ||
[[Tiedosto:importlessonquestions.png]] | [[Tiedosto:importlessonquestions.png]] | ||
Versio 30. marraskuuta 2015 kello 12.01
Moodle 3.0
Tämä sivu kertoo miten rakentaa oppitunti kun se on ensin luotu Oppitunnin luominen (asetukset) mukaisesti. Tietoa siitä, kuinka parhaiten käyttää Moodlen oppituntia ja kuinka opiskelijat käyttävät sitä, katso Oppitunnin käyttäminen.
Oppitunnin suunnittelu
- Oppitunti rakentuu sivuista joilla saattaa olla sisältöä opiskelijoiden luettavaksi tai kysymyksiä joihin opiskelijan on tarkoitus vastata. Opettaja voi luoda kysymykset tai tuoda ne tietyllä tavalla muotoillusta tiedostosta. Opettaja päättää missä järjestyksessä nämä sivut näytetään.
- Ennen oppitunnin rakentamista sinulla tulee olla selkeä kuva mitä haluat tällä oppitunnilla tehdä. Tuleeko se olemaan lineaarinen oppimiskokemus josta annetaan arvosana? Vaiko ei-lineaarinen harjoitusoppitunti, josta ei anneta arvosanaa? Voivatko opiskelijat palata oppitunnin eri osiin vai voiko oppitunnin tehdä vain yhden kerran?
- Myös ne, joille on luonnollista työskennellä suoraan verkossa, saattavat hyötyä siitä, että oppitunnin rakenne kuvataan ensin paperille, ettei eri sivujen välillä siirtymistä tarvitse muistaa ja visualisoida pelkästään omassa päässä.
- Vihjeitä ja ideoita Oppitunti-aktiviteetin käyttöön löydät sivuilta Oppitunnin käyttäminen sekä Oppitunti FAQ
Sisällön ja kysymysten lisääminen oppituntiin
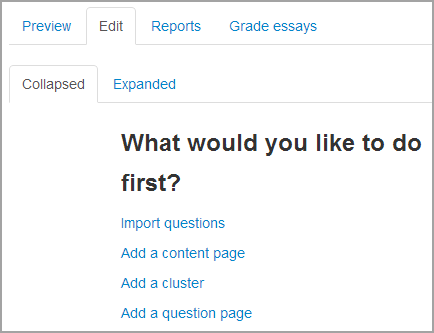
- Kun olet valmistellut oppituntisi Oppitunnin luominen (asetukset) mukaisesti, klikkaa "Tallenna ja näytä" niin pääset näkymään, joka on alla olevassa kuvassa.
- Jos klikkaat "Tallenna ja palaa kurssille" klikkaa oppitunnin nimeä kurssisivulla.
Tuo kysymykset
- Jos sinulla on kysymyksiä seuraavissa formaateissa, voit tuoda ne oppituntiin klikkaamalla Tuo kysymykset -linkkiä. Yleistä tietoa näistä kysymystyypeistä löydät sivulta Tuo kysymykset
Add a cluster
- A cluster is a group of question pages which will be offered randomly to a student as they work through the lesson.It is best if you have made the question pages beforehand and can then decide where to mark the start and end of the cluster. The start is marked by a "cluster" page and the end by an "end of cluster" page. See Clusters for more information.
Add a content page
- This is a page where a teacher can provide information to move the lesson forward but without requiring the student to answer specific questions.
- The student sees the page's title, some information and then one or more buttons at the bottom to select.
- When the student clicks on a button, they go to the next page but their choice is not scored.
Page title
- The title of a content page appears to the student at the top of the page.
- A teacher will also see the title in the collapsed edit mode when they are working on the Lesson, and they will also be able to choose the title (and hence this page) from the drop down "jump" lists.
- The title in a content page is also used with the "display left menu" setting.
Page contents
- This is where the teacher can add information for the student, making use of the Text editor and its multimedia features.
Content
- Here the teacher writes the words they want the student to click on to get to the next part of the lesson.
- These words will appear to the student as a button.
- The teacher can check the box to have the buttons appear horizontally, or uncheck it for them to appear centered vertically.
Number of options available
- How many of these you have depends on your choice in the Maximum Number of Answers setting in Lesson settings
The Jump
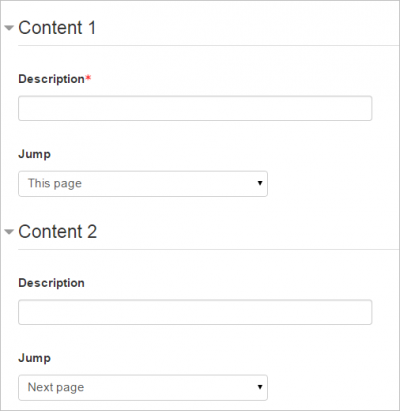
- Each Description in a Content page has a Jumps menu. "Jumps" take a student from one page to another.
- A "relative jump" is "next page" or "end of lesson" whereas an "absolute jump" gives the actual name of a page.
- The teacher chooses from the dropdown the correct page to send the student to if they click on the button that will be made from this particular description. Any pages created by the teacher will have their titles appear in this dropdown, allowing them to be selected.
- When a student clicks on a description button, they are sent to the page defined in the Jump associated with the button.
- See Jumps for more detailed information.
Add a question page
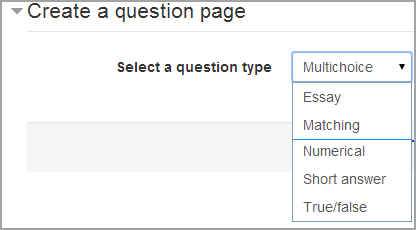
- From this link you can choose from a variety of question types which will then be added as pages to your lesson:
- (Note: These question types are not the same as the Quiz Question types and are in no way connected with quiz questions.)
- The format of question pages is similar to content pages outlined in Section 2.4 above.
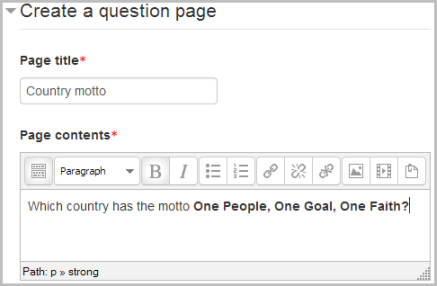
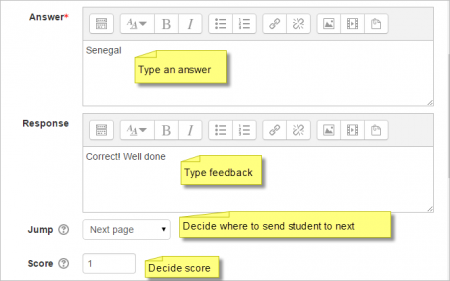
- A typical question page could include:
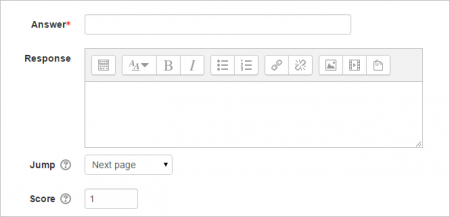
Note: Short answer questions and Numeric questions only have the plain text editor in the answer field, as below:
Question types
Multichoice
- The student is given a question and a list of answers. The answer list will be shuffled every time the question is view by a student. By default they choose one answer but you can check the box "multiple answer" to allow them to choose more than one answer.
The file picker is available in the editor so that images and other media may be uploaded as part of the answers and responses.
Essay
- Students can write a longer answer as part of the lesson and this can be graded manually by the teacher.
See Using Lesson for more information on grading essays. If the main purpose of your lesson is for students to write an essay, consider the Assignment module instead.
Note: Non-editing teachers may also grade lesson essay questions, even though they cannot edit the lesson itself.
Matching
- This allows you to set up lists which must be matched against other lists, for instance, words, pictures, numbers etc. The student must match all correctly to receive the score.
Numerical
- This requires a number as an answer. A number within a range may also be accepted as correct. The range separator to be used is the colon : For example, to accept as correct any number between 10 and 12 (10, 11 and 12) you would type 10:12 in the answer box. Only the plain text editor is available in the answer box.
Short answer
- A student must provide a single word or short phrase answer. The teacher must anticipate the possible answers and enter them in the answer box, using ** wild cards if appropriate. Only the plain text editor is available in the answer box.
You can include 5 or more underscores in the question text and these will be replaced for the student by the answer box. (This also means that fill in the blank questions may be imported from Blackboard and other LMS.) Including more underscores will make the answer box wider.
True/false
- The student is given a sentence and must decide if it is true or false.
Moving your lesson forward
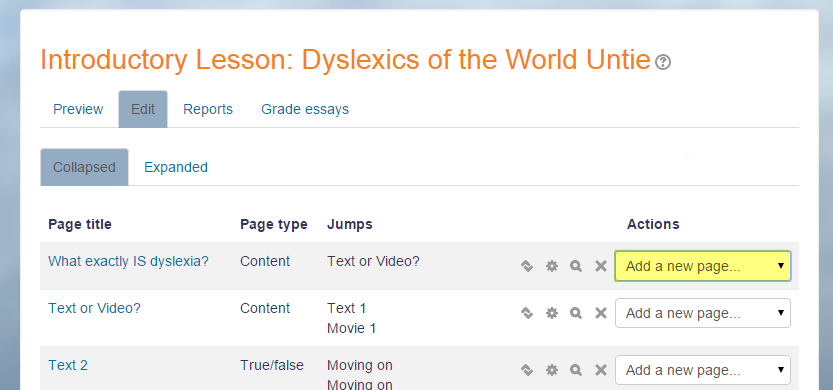
- Once you have added your first content or question page, you reach the next screen which displays your page title/type/jumps (ie where the responses take the student to) and actions you can take next:
- The Actions icons allow you to move (if you have more than one), edit, preview or delete your pages.
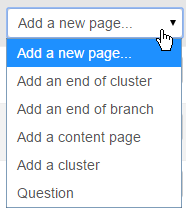
- The drop down allows you to create another page of your choice:
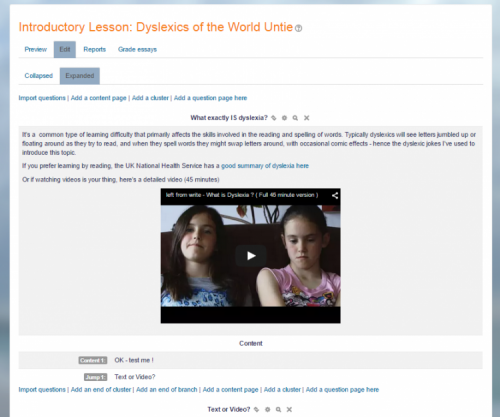
- Note the different view options:
Collapsed view
- This gives a brief outline of the lesson structure as in the two screenshots above.
Expanded view
- This shows more detail as in the screenshot below:
Ending your lesson
- To bring the lesson to a close, select the "End of Lesson" option from the Jump menu on any relevant pages.
- The student will then see a generic message as in the next screenshot, with a direction back to the main course page or to view their grades:
