Building Database: Difference between revisions
Helen Foster (talk | contribs) m (→See also: rewording) |
m (→Field types: Added information about how to input data for the Lat/Long field type) |
||
| (3 intermediate revisions by one other user not shown) | |||
| Line 41: | Line 41: | ||
:Users can enter a geographic location using latitude and longitude. For example, [http://moodle.com/hq/ Moodle HQ] is at latitude -31.9545, longitude 115.877. When viewing the record, links are automatically generated linking to geographic data services such as [http://earth.google.com Google Earth], [http://www.openstreetmap.org/ OpenStreetMap], [http://www.geabios.com/ GeaBios],[http://www.mapstars.com/extern/deltaworks-holland Mapstars] and more. (The teacher can choose which of those links appear, if any.) | :Users can enter a geographic location using latitude and longitude. For example, [http://moodle.com/hq/ Moodle HQ] is at latitude -31.9545, longitude 115.877. When viewing the record, links are automatically generated linking to geographic data services such as [http://earth.google.com Google Earth], [http://www.openstreetmap.org/ OpenStreetMap], [http://www.geabios.com/ GeaBios],[http://www.mapstars.com/extern/deltaworks-holland Mapstars] and more. (The teacher can choose which of those links appear, if any.) | ||
:Data input requirements: Data for this field must be input relative to North and East coordinates. To convert coordinates from West (e.g. 120W) to East, simply input them into the field with a '-' in front (e.g., -120). Also, data must also be input in decimal format, not degree format. Simple converters are a web search away. | |||
[[File:Latlongfield.png]] | [[File:Latlongfield.png]] | ||
| Line 92: | Line 93: | ||
==Presets== | ==Presets== | ||
To avoid the necessity of always having to create a new database from scratch, the database activity module has a presets feature. An image gallery preset is | To avoid the necessity of always having to create a new database from scratch, the database activity module has a presets feature. An image gallery preset is included in the database module or you can browse and download one from the [https://moodle.net/mod/data/view.php?id=22 Database presets database on Moodle.net]. You can create your own presets as well and share them with others. | ||
===Importing a preset=== | ===Importing a preset=== | ||
| Line 124: | Line 126: | ||
===Presets for download=== | ===Presets for download=== | ||
The [ | The [https://school.moodledemo.net/course/view.php?id=57 Activity Examples course] on the School demo site has a number of database activities with presets for download. | ||
==See also== | ==See also== | ||
| Line 138: | Line 140: | ||
[[de:Datenbank erstellen]] | [[de:Datenbank erstellen]] | ||
[[es:Construyendo BasedeDatos]] | [[es:Construyendo BasedeDatos]] | ||
[[fr:Construire une base de données]] | |||
Latest revision as of 07:44, 12 January 2020
After creating a database, as explained in Database activity settings...
- Next you define the kind of fields that define the information you wish to collect. For example a database of famous paintings may have a picture field called painting, for uploading an image file showing the painting, and two text fields called artist and title for the name of the artist and the painting. Alternatively, you can use a database preset (see below).
- It is then optional to edit the database templates to alter the way in which the database displays entries.
Database fields
A field is a named unit of information. Each entry in a database activity module can have multiple fields of multiple types e.g. a text field called 'favourite color' which allows you to type in your favourite shade, or a menu called 'state' that lets you choose one from a list of the 50 that make up the United States of America. By combining several fields with appropriate names and types you should be able to capture all the relevant information about the items in your database.
Note that if you later edit the fields in the databases you must use the Reset template button, or manually edit the template, to ensure the new fields are added to the display.
Field name and description
The name is what is shown when an entry is added. It must be unique and short. The description is for your benefit to help identify that field.
Required field
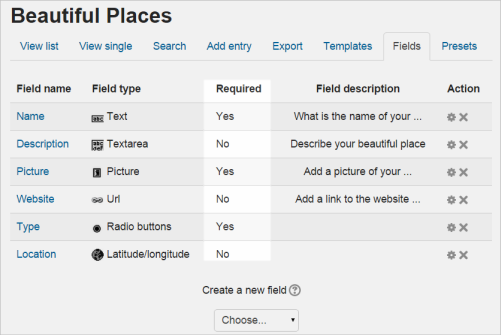
If you need to ensure one or several particular fields are always completed, then tick the box 'Required field' when setting up the fields for your database. The field(s) will display a red asterisk when students contribute to the database, and they will not be able to save their work until they have entered the relevant information. A new column will show the teacher which fields are required and not:
Field types
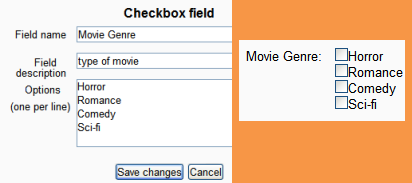
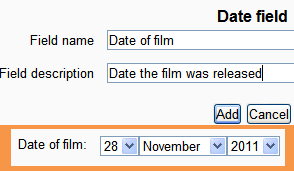
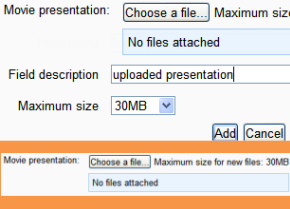
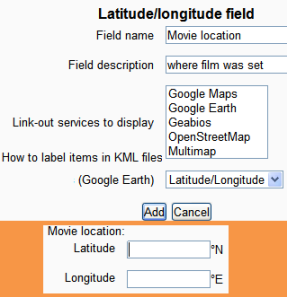
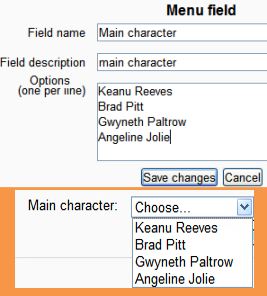
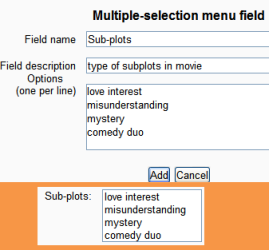
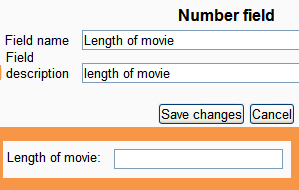
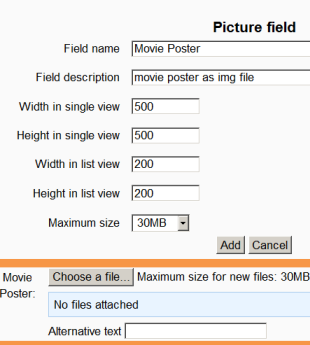
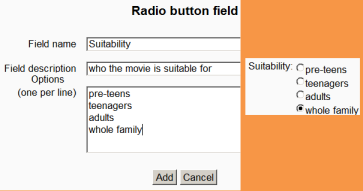
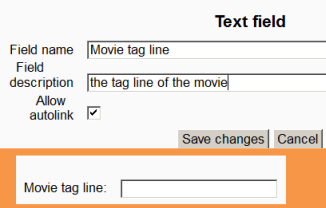
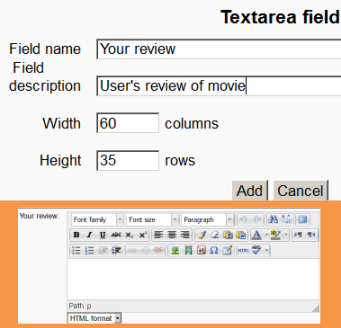
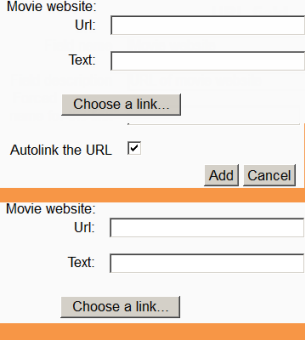
The following screenshots show "before" and "afters" of setting up fields. The selection in orange shows the field as it is displayed for the user when they add an entry.
- Checkbox
- This allows you to offer checkboxes for the user to select. Add the options one under the other. The word will appear next to a checkbox when the user clicks to add an entry. They can check more than one box.
- Date
- This allows a user to enter a date by picking a day, month and year from a drop down list.
- File
- Users can upload a file from their computer. If it is an image file then the picture field may be a better choice.
- Latitude/longitude
- Users can enter a geographic location using latitude and longitude. For example, Moodle HQ is at latitude -31.9545, longitude 115.877. When viewing the record, links are automatically generated linking to geographic data services such as Google Earth, OpenStreetMap, GeaBios,Mapstars and more. (The teacher can choose which of those links appear, if any.)
- Data input requirements: Data for this field must be input relative to North and East coordinates. To convert coordinates from West (e.g. 120W) to East, simply input them into the field with a '-' in front (e.g., -120). Also, data must also be input in decimal format, not degree format. Simple converters are a web search away.
- Menu
- The text entered in the options area will be presented as a drop-down list for the user to choose from. Each line become a different option.
- Menu (Multi-select)
- The text entered in the options area will be presented as a list for the user to choose from and each line become a different option. By holding down control or shift as they click, users will be able to select multiple options. This is a fairly advanced computer skill so it may be wise to use multiple checkboxes instead.
- Number
- This allows users to enter any number. For example:
- 42
- -1000
- 0
- 0.123
- 3.0e8
- (For those who care about the technical details, the field stores floating point numbers.)
- Picture
- This allows a user to upload and display an image file. "Single view" is when the image is viewed on its own; "list view" is when it is viewed in with other images. Single view can be larger than list view.
- Radio buttons
- The user gets radio buttons and can choose only one. They can only submit the entry when they have clicked on one button. (Note:If you only have two options and they are opposites (true/false, yes/no) then you could simply use a single checkbox instead. However checkboxes default to their unchecked status and so people could submit without actively selecting one of the options. This may not always be appropriate.)
- Text input
- Users can enter text up to 60 characters in length. For longer text, or for text that requires formatting such as headers and bullet points, you can use a text area field.
- Text area
- This allows users to enter a long piece of text using the text editor.
- URL
- The user can add a link to a website here. If you select autolink then the URL becomes clickable.. If you also enter a forced name for the link then that text will be used for the hyperlink. For example in a database of authors you may wish people to enter the author's website. If you enter the text 'homepage' as a forced name then clicking on text "homepage" will take you to the entered URL.
You can choose to have the URL open in a new window if so desired.
Presets
To avoid the necessity of always having to create a new database from scratch, the database activity module has a presets feature. An image gallery preset is included in the database module or you can browse and download one from the Database presets database on Moodle.net. You can create your own presets as well and share them with others.
Importing a preset
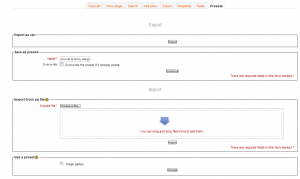
To use a preset:
- On the database page, click the Presets tab.
- The usual way to import a preset is clicking the "Choose file" button and browsing to the ZIP file containing the preset (eg. "preset.zip") stored on the server. If there does not yet exist a preset ZIP file on the server, upload it from your local machine. Choose the desired preset file by clicking on its action "Choose". Finally, press the "Import" button.
- Alternatively, you can choose a previously loaded preset.
- After the import, you can start to add or import entries. All the hard work of setting up the fields and templates has been done for you. If you desire, you can still customize the fields and templates.
You will see a "Overwrite current settings" checkbox after the "Import" button has been pressed. If checked, the database activity overwrites some of its current general settings by those stored in the preset:
- the "Introduction" HTML text
- "Required entries"
- "Entries required before viewing"
- "Maximum entries"
- "Comments"
- "Require approval?"
- rssarticles
Exporting a preset
If you wish to share your database presets with others, you have two options:
- Export as a ZIP file, which can then be imported to another course or Moodle site.
- Save as a preset, which publishes the database for other teachers on your site to use. It will then appear in the preset list. (You can delete it from the list at any time.)
Note: Only the fields and templates of the database are copied when exporting or saving it as a preset, not the entries.
Presets for download
The Activity Examples course on the School demo site has a number of database activities with presets for download.
See also
Forum discussions:
- Can't get columns to line up in list view including moodle.org presets for download
- New preset, please review, and make suggestions! including FAQ preset for download
- Issue 53: Encyclopedia database preset including encyclopedia-style preset for download
- Issue 51 - Design a Database Preset for Document Sharing including preset for download
- Looking for some stellar examples of Moodle courses including book reviews preset for download
- Restricting access to database content by user? with research diary preset for download
