OAuth2 Microsoft Service: Unterschied zwischen den Versionen
Keine Bearbeitungszusammenfassung |
Keine Bearbeitungszusammenfassung |
||
| Zeile 5: | Zeile 5: | ||
==Einen OAuth2 Client für Microsoft aufsetzen== | ==Einen OAuth2 Client für Microsoft aufsetzen== | ||
Um einen OAuth2 Client für Microsoft aufzusetzen, müssen Sie sich als erstes auf der Seite [https://apps.dev.microsoft.com/#/appList Microsoft Application Console] | Um einen OAuth2 Client für Microsoft aufzusetzen, müssen Sie sich als erstes eine neue App anlegen. | ||
*Melden Sie sich auf der Seite [https://apps.dev.microsoft.com/#/appList Microsoft Application Console] an und | |||
[[Image:microsoft-1-create-new.png| | [[Image:microsoft-1-create-new.png|300px]] | ||
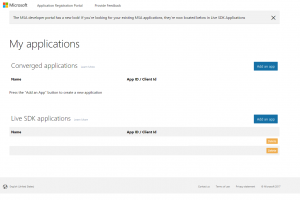
Note: If you have previously registered Applications with an older API your Application Console may look different. In this case you should create a new "Converged Application". | Note: If you have previously registered Applications with an older API your Application Console may look different. In this case you should create a new "Converged Application". | ||
[[File:microsoft-1-1-alternate-app-page.png| | [[File:microsoft-1-1-alternate-app-page.png|300px]] | ||
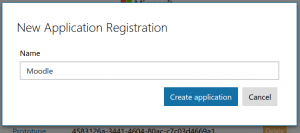
Choose a good name as this is what is shown to users when they are asked to approve the permissions. | Choose a good name as this is what is shown to users when they are asked to approve the permissions. | ||
[[File:microsoft-2-name-it.png| | [[File:microsoft-2-name-it.png|300px]] | ||
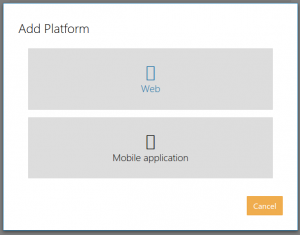
Next you have to add a platform to your application. | Next you have to add a platform to your application. | ||
[[File:microsoft-3-add-platform.png| | [[File:microsoft-3-add-platform.png|300px]] | ||
Choose "Web platform" | Choose "Web platform" | ||
[[File:microsoft-3.1-web-platform.png| | [[File:microsoft-3.1-web-platform.png|300px]] | ||
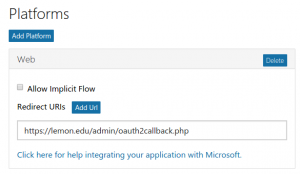
Uncheck the "Allow Implicit Flow" checkbox and set the callback URL. The callback URL should point to "your Moodle site URL + /admin/oauth2callback.php". If your Moodle site was available at <nowiki>https://lemon.edu/</nowiki> the callback URL would be <nowiki>https://lemon.edu/admin/oauth2callback.php</nowiki>. It is important that your Moodle site uses https and not http. Microsoft will not allow the callback url if it is not using https. | Uncheck the "Allow Implicit Flow" checkbox and set the callback URL. The callback URL should point to "your Moodle site URL + /admin/oauth2callback.php". If your Moodle site was available at <nowiki>https://lemon.edu/</nowiki> the callback URL would be <nowiki>https://lemon.edu/admin/oauth2callback.php</nowiki>. It is important that your Moodle site uses https and not http. Microsoft will not allow the callback url if it is not using https. | ||
[[File:microsoft-4-platform-settings.png| | [[File:microsoft-4-platform-settings.png|300px]] | ||
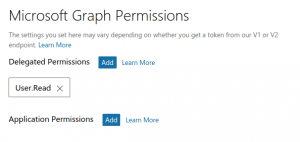
Make sure the "Microsoft Graph Permissions" section contains the "User.Read" permission. | Make sure the "Microsoft Graph Permissions" section contains the "User.Read" permission. | ||
[[File:microsoft-5-permissions.png| | [[File:microsoft-5-permissions.png|300px]] | ||
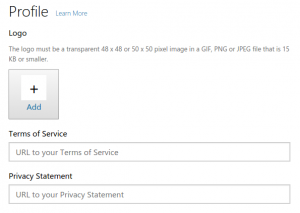
Set the options for the consent screen. | Set the options for the consent screen. | ||
[[File:microsoft-6-consent.png| | [[File:microsoft-6-consent.png|300px]] | ||
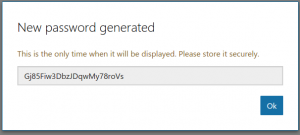
Save all the details and then generate a new password. | Save all the details and then generate a new password. | ||
[[File:microsoft-7-new-password.png| | [[File:microsoft-7-new-password.png|300px]] | ||
Enter the password in Moodle as the "Client secret" and the Application ID as the "Client id". | Enter the password in Moodle as the "Client secret" and the Application ID as the "Client id". | ||
[[File:microsoft-8-got-it.png| | [[File:microsoft-8-got-it.png|300px]] | ||
==Siehe auch== | ==Siehe auch== | ||
| Zeile 50: | Zeile 50: | ||
* [[OAuth2 Authentifizierung]] - ermöglicht es Nutzer/innen, sich mit ihrem Microsoft-Nutzerkonto in Moodle anzumelden | * [[OAuth2 Authentifizierung]] - ermöglicht es Nutzer/innen, sich mit ihrem Microsoft-Nutzerkonto in Moodle anzumelden | ||
[[en:OAuth 2 | [[en:OAuth 2 Microsoft service]] | ||
Version vom 19. Juni 2017, 08:33 Uhr
Neue Funktionalität
in Moodle 3.9!
Einen OAuth2 Client für Microsoft aufsetzen
Um einen OAuth2 Client für Microsoft aufzusetzen, müssen Sie sich als erstes eine neue App anlegen.
- Melden Sie sich auf der Seite Microsoft Application Console an und
Note: If you have previously registered Applications with an older API your Application Console may look different. In this case you should create a new "Converged Application".
Choose a good name as this is what is shown to users when they are asked to approve the permissions.
Next you have to add a platform to your application.
Choose "Web platform"
Uncheck the "Allow Implicit Flow" checkbox and set the callback URL. The callback URL should point to "your Moodle site URL + /admin/oauth2callback.php". If your Moodle site was available at https://lemon.edu/ the callback URL would be https://lemon.edu/admin/oauth2callback.php. It is important that your Moodle site uses https and not http. Microsoft will not allow the callback url if it is not using https.
Make sure the "Microsoft Graph Permissions" section contains the "User.Read" permission.
Set the options for the consent screen.
Save all the details and then generate a new password.
Enter the password in Moodle as the "Client secret" and the Application ID as the "Client id".
Siehe auch
- OneDrive Repository
- OAuth2 Authentifizierung - ermöglicht es Nutzer/innen, sich mit ihrem Microsoft-Nutzerkonto in Moodle anzumelden
