Step by Step Installation on a Mac OS X 10.5 Server
Overview
This guide shows all steps for the installation of Moodle on a Mac OS X 10.5 Server. This server is a commercial product.
This installation guide can't be useful for an installation on MAMP or XAMPP. If you are looking for an easy way to install Moodle on your local machine please use Complete install packages for Mac OS X 10.3/10.4/10.5 that can be downloaded from http://download.moodle.org/macosx/ ... but if you are planning to set up a Moodle internet server on a Mac then you should think about some more security as the ever local package could give.
Please feel free to add your ideas and wishes to the discussion page for this article. You may also write a complete chapter if you tried the facts yourself on your own Mac Server. I am most interested in the "user administration via LDAP" and I hope to get enough ideas how to get all Mac users into the Moodle user list automaticly.
System requirements
+ Apple Computer
+ Mac mini or Xserve
+ Processor:  Intel Core 2 Duo or PPC (G4, G5)
+ RAM: 1 GB or better
+ Hard Disk: 500 MB free
+ System Software: Mac OS X 10.5 Server
Install PHP 5.2.9 and the GD Library on the Mac OS X 10.5 Server
The Mac OS X Server 10.5 Leopard comes together with PHP 5.2.4 ... this is correct for Moodle 1.9.x but not the missing GD Library support ... so you have to install to get Moodle running on your server. For Moodle 2.0 the server needs PHP 5.2.8 or better ... in this case you must get a better PHP version. These instructions are helpful in both cases.
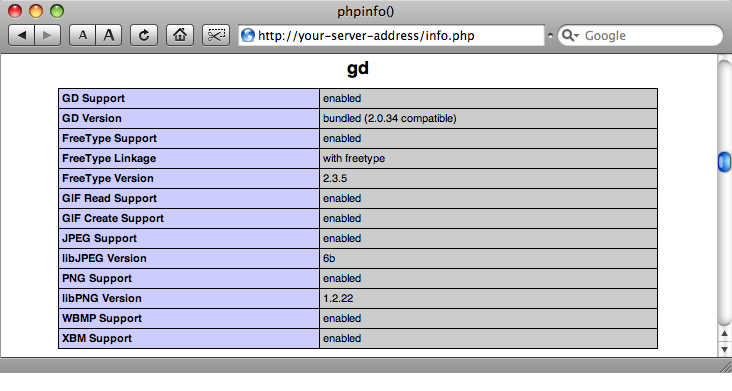
To see which PHP version is installed on your server you should edit the file /Library/WebServer/Documents/info.php. You must activate the function call phpinfo() by deleting the both slashes // at the start of the function line. After saving the file you can get all PHP informations in your browser. Please look at http://your-server-address/info.php ... you will not find any GD library support ... bad thing for Moodle!!
<?php
// You can use Server Admin to enable the Apache PHP module; it's disabled by default.
// You can uncomment the phpinfo() directive below to provide a default PHP info page
// but note that this displays information about your host's configuration.
phpinfo();
?>
The easiest way to get the GD library support and to get a better PHP version would be the installation of the PHP 5.2.9 package from http://www.entropy.ch/software/macosx/php/. Marc Liyanage precompiled this package to use it on Mac clients and Mac servers. Please get the package and install it by following the instructions on the download page. The installer does everything for you ... it copies PHP into the new folder /usr/local/php5 and changes the owner to root automaticly.
Now the Apache web server must get knowledge that you want to use the new PHP library from now on. Open the application Server Admin to switch to the new library. Go to the web server settings and find the entry php5_module. The normal place for PHP the Mac server is libexec/apache2/libphp5.so. Please change to /usr/local/php5/libphp5.so and save the settings.
The second thing to configure is the file php.ini. You will find this file inside the new package folder. Open the file /usr/local/php5/lib/php.ini and edit some settings for Moodle. To contact the database MySQL with PHP you have to set the default socket name for local MySQL connects. Also the other settings should be edit if you want.
; Default socket name for local MySQL connects.
; If empty, uses the built-in MySQL defaults.
mysql.default_socket = /var/mysql/mysql.sock

; Maximum amount of memory a script may consume (128MB)
memory_limit = 128M

; Maximum allowed size for uploaded files.
upload_max_filesize = 128M

; Maximum size of POST data that PHP will accept.
post_max_size = 128M
That's all ... save the file php.ini and restart the web server. Now you should look at http://your-server-address/info.php again. I hope that everything will be okay. You will find the version number PHP 5.2.9 and the running GD library support. Congratulations ... the first step for Moodle on the Mac server is done!
Configure the MySQL database for your Moodle installation
In standard case the database MySQL is installed on the Mac OS X 10.5 Server but it is not running yet. Please make sure that you start the MySQL database server.
Use the graphical way
Sorry ... there are some more installations and a lot of clicks to configure MySQL in a graphical way.
First of all start the Server Admin. You will find this program by the way Applications > Server > Server Admin. Activate MySQL on the local server. You must set the password for the user root before you can start MySQL.
For the next you must download the MySQL database administration tool phpMyAdmin from http://www.phpmyadmin.net . Move the folder to the web server documents as /Library/WebServer/Documents/phpMyAdmin and add the security phrase to the file config.inc.php. Now you will be able to start http://server-address/phpMyAdmin in your browser and to log into the database as the user root. Add a database moodle. Add a database user moodle to the server localhost. Don't forget to set a secure password. The database user moodle should be allowed to administrate the database moodle only. It is a bad way to set root to administrate the database moodle.
The installation of phpMyAdmin is a nice thing to look into the database while Moodle is running for some time. It's much easier to see in the graphical interface than in the command line tools.
Use the Terminal
If you want a quick installation then don't fear to use the Terminal. It's easier to tell you all the commands for the right way with the Terminal than showing you all the pictures to do the same with graphical tools. There are only a few commands to do everything I told you before.
Start the Terminal. You will find this program by the way Applications > Tools > Terminal. You will see that we must do the same steps as before but you can read them in a text form.
First of all you need to set the root password. If you didn't this before then use the first command line. If you want to change an existing password then use the second one.
Server:~ $ mysqladmin -u root password 'secret'
Server:~ $ mysqladmin -u root -p password 'topsecret'
The next steps are creating a new database moodle with correct character set and setting up a database user moodle to administrate the new database.
Server:~ $ mysqladmin -u root -p create moodle
Server:~ $ mysql -u root -p

mysql> ALTER DATABASE moodle CHARSET 'utf8';
mysql> GRANT ALL PRIVILEGES ON moodle.* TO moodle@localhost
   -> IDENTIFIED BY 'moodle!';
mysql> quit

Server:~ $
That's really all with the Terminal. You are just ready!
Copy the Moodle files to the web server
The documents for the web server are saved in the folder /Library/WebServer/Documents/ . You will place your Moodle folder here after you got it from http://download.moodle.org
Run the Moodle installation
Download the language packages
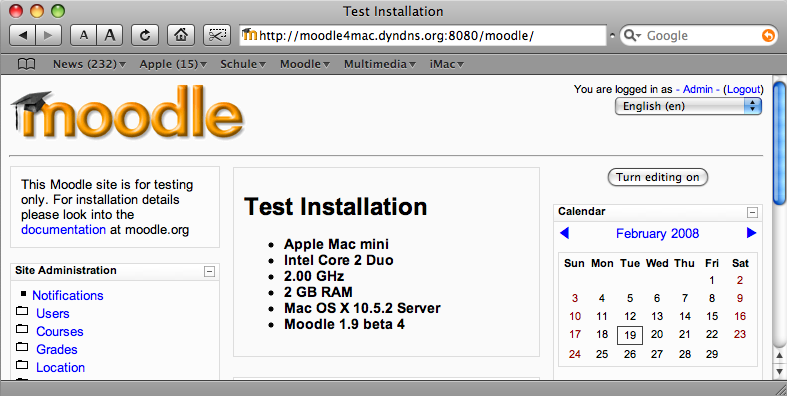
Moodle is running ...
User administration via LDAP
The following settings will work on 10.5 Server running LDAP - edit them to customize to your own environment. Please note that moodle requires some fields - it is best to have these fields completed in Workgroup Manager on 10.5 Server - otherwise they'll be prompted to enter info into their moodle profile on first login, but the way we've got it set up, moodle can't modify LDAP for security and data integrity. The necessary fields are user name, first name, surname, Email address, City/Town, country, description, ID number.
LDAP SERVER SETTINGS Host URL = ourserver.example.com Version = 3 LDAP encoding = utf-8
BIND SETTINGS Hide passwords = Yes Distinguished Name = (blank) Password = (blank)
USER LOOKUP SETTINGS User type = posixAccount (rfc2307) Contexts = cn=users,dc=ourserver,dc=example,dc=com Search subcontexts = Yes Dereference aliases = No User attribute = (blank) Member attribute = (blank) Member attribute uses dn = (blank) Object class = (blank)
FORCE CHANGE PASSWORD Force change password = No Use standard Change Password Page = No Password format = Plain text Password change URL = (blank)
LDAP PASSWORD EXPIRATION SETTINGS Expiration = no Expiration warning = 10 Expiration attribute = "" Grace logins = No Grace login attribute = (blank)
ENABLE USER CREATION Create users externally = No Context for new users = (blank)
COURSE CREATOR Creators = (blank)
CRON SYNCHRONIZATION SCRIPT Removed ext user = Keep internal
NTLM SSO Enable = No Subnet = (blank) First name = givenName (On every login, Never, Locked) Surname = sn (On every login, Never, Locked) Email address = mail (On every login, Never, Locked) Phone 1 = (blank) Phone 2 = (blank) Department = (blank) Address = (blank) City/Town = l (On every login, Never, Locked) Country = c (On every login, Never, Locked) Description = description (On every login, Never, Locked) ID number = uidNumber (On every login, Never, Locked) Language = (blank)


