Bulk user actions: Difference between revisions
From MoodleDocs
Tomaz Lasic (talk | contribs) No edit summary |
Helen Foster (talk | contribs) m (removing 1.9 template) |
||
| Line 1: | Line 1: | ||
{{Accounts}} | {{Accounts}} | ||
<p class="note">'''Please refer to [[TOC_with_notes#Accounts|these notes]] before editing this page.'''</p> | <p class="note">'''Please refer to [[TOC_with_notes#Accounts|these notes]] before editing this page.'''</p> | ||
Location: ''Administration > Users > Accounts > Bulk user actions'' | |||
[[Image:bulk user actions.png|thumb|Bulk user actions]] | [[Image:bulk user actions.png|thumb|Bulk user actions]] | ||
| Line 11: | Line 14: | ||
* Display a list of users on a page | * Display a list of users on a page | ||
* Download user data in text, ODS or Excel file format | * Download user data in text, ODS or Excel file format | ||
* Enrol users in selected courses | * Enrol users in selected courses | ||
* Force users to change their passwords | * Force users to change their passwords | ||
==Bulk user actions== | ==Bulk user actions== | ||
Revision as of 08:53, 11 July 2011
Please refer to these notes before editing this page.
Location: Administration > Users > Accounts > Bulk user actions
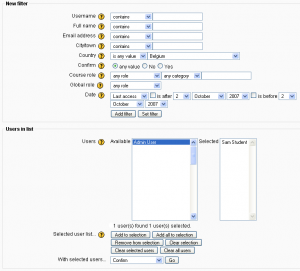
This feature enables administrators to select users by creating a filter and then perform any of the following actions:
- Confirm user accounts created through Email-based self-registration which are not yet confirmed by the user
- Send a message (requires site-wide Messaging to be enabled in Administration > Security > Site policies)
- Delete user accounts
- Display a list of users on a page
- Download user data in text, ODS or Excel file format
- Enrol users in selected courses
- Force users to change their passwords
Bulk user actions
To perform a bulk user action:
- Create a filter. Users can be filtered according to full name, surname, first name, email address, city/town, country, confirm, course role, global role, first access, last access, last login, username, authentication.
- Select users from the list.
- Choose an action from the dropdown menu.
- Click the Go button.
