Development:Customisable user profiles: Difference between revisions
From MoodleDocs
| Line 63: | Line 63: | ||
=== The "public" user profile page === | === The "public" user profile page === | ||
==See also== | ==See also== | ||
Revision as of 05:59, 4 May 2007
Overview
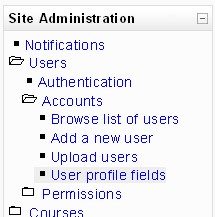
The main goal is to allow administrators to add/edit user profile fields. These fields may also be categorised, ordered, locked, hidden.
Database Changes
New tables
There are 3 new tables:
- user_info_field
- user_info_category
- user_info_data
Splitting the current user table
In version 1.9, the following fields will be moved from the user table and placed in a category named optional
- icq
- skype
- yahoo
- aim
- msn
- phone1
- phone2
- institution
- department
- address
- url
The remaining fields will remain hardcoded in the user profile form.
Admin's Interface
Various field flags
- required - a required field. Fields marked as required will also be displayed in the signup form;
- locked - can the user edit this field?;
- visible - can the user see this field? Options are:
- Not visible - only a site administrator can see and edit this field
- Visible to user - information is private to the user
- Visible to everyone - information is available to anyone who can view user profiles
Adding/Editing fields
Steps
- 1. Make a category
- For example: "Class Information"
- Then in the lower left-hand part of the page, you'll see "Create a new profile field:."
- 2. Choose: "Menu of choices"
- Example: Enter "p-teacher" then "Teacher" then a list of teachers who teach a given course.
- Example: Enter "p-major" then "Major" then a list of the majors offered at your school
- 3. Make another category, for example: "Personal Info"
- 4. Choose: "Text"
- Example: Enter "p-hobby" then "Hobbies"
- Example: Enter "p-birthday" then "Birthday"
- 5. Now go to your own profile and click the "edit profile" tab to see how it looks.
User's Interface
User profile page
The signup page
The signup form will be changed to include all required custom profile fields.
The "public" user profile page
See also
- Using Moodle Should I hack the mdl_user table, or add my own? forum discussion
