Course restore: Difference between revisions
From MoodleDocs
Helen Foster (talk | contribs) (see also link Restoring file aliases) |
Mary Cooch (talk | contribs) m (changed Settings to Administration) |
||
| Line 4: | Line 4: | ||
A course backup file (.mbz) may be restored from within any existing course for which you have permission. During the restore process, you will be given the option to restore as a new course or into an existing course. | A course backup file (.mbz) may be restored from within any existing course for which you have permission. During the restore process, you will be given the option to restore as a new course or into an existing course. | ||
# Go to '' | # Go to ''Administration > Front page settings > Restore'' (if you have front page permissions) or ''Administration > Course administration > Restore'' (if you have an empty course to restore into.) | ||
# Upload the backup file or choose a file in the course backup area or user private backup area and click Restore | # Upload the backup file or choose a file in the course backup area or user private backup area and click Restore | ||
# Confirm - Check that everything is as required then click the Continue button | # Confirm - Check that everything is as required then click the Continue button | ||
Revision as of 18:29, 25 September 2013
Restoring a course backup
A course backup file (.mbz) may be restored from within any existing course for which you have permission. During the restore process, you will be given the option to restore as a new course or into an existing course.
- Go to Administration > Front page settings > Restore (if you have front page permissions) or Administration > Course administration > Restore (if you have an empty course to restore into.)
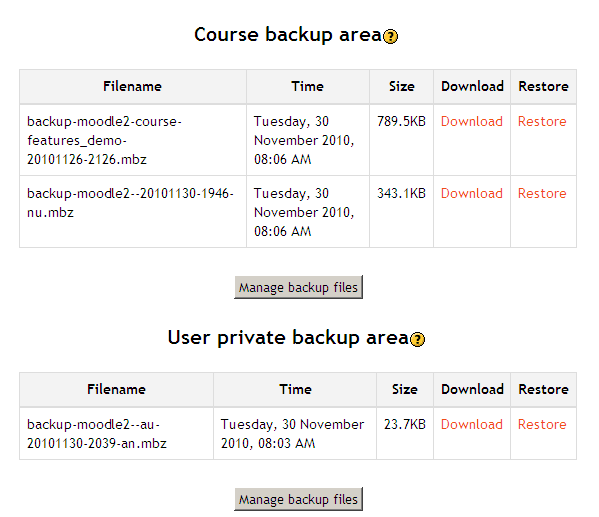
- Upload the backup file or choose a file in the course backup area or user private backup area and click Restore
- Confirm - Check that everything is as required then click the Continue button
- Destination - Choose whether the course should be restored as a new course or into an existing course then click the Continue button
- Settings - Select activities, blocks, filters and possibly other items as required then click the Next button
- Schema - Select/deselect specific items and amend the course name, short name and start date if necessary then click the Next button
- Review - Check that everything is as required, using the Previous button if necessary, then click the 'Perform restore' button
- Complete - Click the continue button
Course restore capabilities
- Create users on restore
- Configure restore options
- Restore activities
- Restore courses
- Restore sections
- Restore from files targeted as hub
- Restore from files targeted as import
- Roll activity configuration dates on restore
- Upload files to backup areas
- Restore user data
- Restore courses from automated backups
