|
|
| (166 intermediate revisions by 73 users not shown) |
| Line 1: |
Line 1: |
| Feel free to edit this page!
| | Testing email notification in the 34 /en/ wiki -- [[User:Sam Student|Sam Student]] ([[User talk:Sam Student|talk]]) 08:28, 17 November 2017 (UTC) |
| ==Moodle Site Backup for those who do not write Unix, Linux, or php commands.==
| |
|
| |
|
| | Test page for docs |
|
| |
|
| 1. First, it’s a good idea to reread the two Moodle FAQs about Beginning Administration: [https://docs.moodle.org/en/Beginning_Administration_FAQ]
| | [[Test link]] |
| and [https://docs.moodle.org/en/Beginning_Administration_2_FAQ]
| |
|
| |
|
| Also, revisit '''cPanel''', which is a common webhost interface, where you manage what you have on your hosted server space.
| |
|
| |
|
| You probably used cPanel when you installed Moodle. It includes '''File Manager'''. In addition, cPanel includes '''phpMyAdmin'''. This utility will be used to back up and, if necessary, query your database. PhpMyAdmin is documented in language that presumes computer expertise. But you can browse the Web for videos (on, for example YouTube) of how people with Moodle use phpMyAdmin. For example, there are Moodle videos using cPanel at http://www.e-blackboard.org/.
| |
|
| |
|
| | -Testing- |
|
| |
|
| == Backing Up to Upgrade Moodle ==
| | -Testing 2- |
|
| |
|
| 2. Backing up in order to upgrade Moodle can raise the specter of databases whose default “collation” or “character set” is not exclusively the utf-8 that Moodle requires. You can see a discussion of this issue, relevant to those who used Fantastico to install Moodle, here http://moodle.org/mod/forum/discuss.php?d=140949 | | {| cellpadding="2" cellspacing="0" border="1" |
| | !Col1 |
| | !Col2 |
| | |- |
| | |Test1 |
| | |Test2 |
| | |- |
| | |Test1 |
| | |Test2 |
| | |- |
| | |Test1 |
| | |Test2 |
| | |} |
|
| |
|
| == Course Backups First == | | ==Functions and Examples== |
|
| |
|
| 3. Every Moodler should download the free book Using Moodle 2nd edition in .pdf. https://docs.moodle.org/en/Using_Moodle_book
| | Following are the functions that constitute the basic log API for Moodle. |
| It tells you all about how to create Moodle courses. Its final chapter describes basic system administration, including how to automate the backing up of your courses. That automated course backup is really simple and you should do it.
| | <code> |
| | add_to_log($courseid, $module, $action, $url='', $info='', $cm=0, $user=0) |
| | user_accesstime_log($courseid=0) |
| | get_logs($select, array $params=null, $order='l.time DESC', $limitfrom='', $limitnum='', &$totalcount) |
| | get_logs_usercourse($userid, $courseid, $coursestart) |
| | get_logs_userday($userid, $courseid, $daystart) |
| | </code> |
| | The basic working of these functions can be categorized into two categories:- |
| | # Adding data to logs |
| | # Fetching data from logs |
| | Let us take a deeper look into both of these:- |
|
| |
|
| If a course is ever broken, fouled, or lost, there is a “restore” feature built right into Moodle’s front-page administration block. It restores courses from backups. In order to practice restoring a course, be sure to include among your Moodle courses a shell or “dummy” course.
| | <pre>something in pre tags</pre> |
| | <code>and something in code tags</code> |
|
| |
|
| The rest of Using Moodle’s final chapter explains the administration settings on Moodle’s front page. All those explanations are vital. However, Using Moodle cannot tell you how to backup your whole site.
| | <math>Insert formula here</math>==First edit in sandbox== |
| | An additional edit to sandbox |
| | This is where you can edit the content. |
| | Another edit to sandox. |
| | One more edit to sandbox |
|
| |
|
| == Besides your courses, what should you back up? == | | ==Testing gallery== |
| | ==Testing gallery==8/11 |
| | ==Testing gallery==8/11 again |
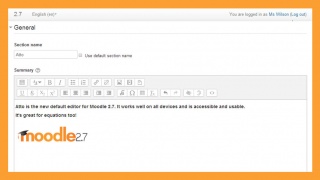
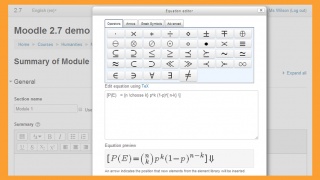
| | <gallery mode="packed-hover"> |
| | File:Atto_27.jpg|Atto |
| | File:Clean27.jpg|Clean |
| | File:MathJax.jpg|MathJax |
| | </gallery> |
|
| |
|
| 4. To understand a site backup, you should know that Moodle software is supported by three other software programs. (These will be installed on your webhost’s server, and your host maintains and updates them.) In most cases, these three are the open-source (free) software programs called Apache (server software), MySQL (which creates and stores your databases), and PHP (the language that allows Apache and MySQL to communicate). You can have alternatives to these particular three “brand names,” but you will always need all three types—plus the Moodle code itself.
| | ==Bootstrap stuff== |
|
| |
|
| It’s good to read the Site Backup FAQ [https://docs.moodle.org/en/Backup_FAQ] You will not understand everything, but that’s OK.
| | <div class="alert alert-block"><span class="close" data-dismiss="alert">×</span>'''Warning!''' Click the cross to close this label ...</div> |
|
| |
|
| Experienced system administrators back up their sites according to instructions here:
| | <div class="alert alert-info">Info here...</div> |
| [https://docs.moodle.org/en/Site_backup] But that page assumes that readers can write Unix/Linux commands and php code. If you cannot, the steps below should help you.
| |
|
| |
|
| | ==Nowiki tags== |
|
| |
|
| 5. If a disaster happens, you will need to restore, from zipped backup copies, two of the three components of your Moodle system. These two are
| | <code><nowiki>[[Category:Category name]]</nowiki></code> |
|
| |
|
| '''your moodle_data folder and
| | <nowiki><code>[[Category:Category name]]</code></nowiki> |
| your MySQL database(s).'''
| |
|
| |
|
| (The third component is the folder where you installed your Moodle code. I will discuss that component later.)
| | <code>[[Category:Category name]]</code> |
|
| | |
| One difficulty is that these three components are called by confusingly similar names.
| | [[de:Hauptseite]] |
| | | [[es:Zona de Pruebas]] |
| ::a. '''The data folder.''' This is also called data files, Moodle files, data directory, or moodledata (uploaddata if Fantastico installed your site). Sometimes this folder is also called dataroot because that’s where it’s located. | | [[fr:Documentation]] |
| | |
| ::b. '''Your database''', or data tables, usually in a MySQL database. Strictly speaking, these are not files; they are tables. Taking this backup is often called a MySQL dump, a database dump, or a database export.
| |
| | |
| ::c. '''Moodle code''': that is, the version of Moodle you’re using. If you don’t back this file up, you can instead download a recent “weekly” version of Moodle and reenter any tweaks you have added. This Moodle code, if you care, is stored on your server at a location called dirroot. So sometimes it’s called the Moodle directory.
| |
| | |
| == The Steps to a Low-Tech Site Backup ==
| |
| | |
| 6. Get an '''ftp''' (file transfer protocol) program. I bought a really simple one (Transit) for about $25, but there are free (open source) ftp programs such as CyberDuck and FileZilla. This ftp program copies a file from “them” (the server) to “us” (your desktop) by dragging and dropping.
| |
| | |
| 7. Back up your data folder: Use your ftp program to copy (that is, drag and drop) the file called “moodledata” or (in a Fantastico install) “uploaddata.” It will be zipped as a file that ends in .tar.gz You don’t need to unzip it, but keep it where you can find it.
| |
| | |
| 8. Back up your database: Here’s a video that shows how: [http://www.youtube.com/watch?v=ifPJzlqq1rQ]
| |
| | |
| In words, here’s how: Go to your server’s cPanel. Open adminMyPhp. In the left pane, you will see your database(s) listed. Normally, a Moodle database will begin with mdl, and mine has 198 tables in it. In that list, click on the database you want to back up.
| |
| | |
| The page will refresh and along the top you will now see a row of buttons. Click on the button Export.
| |
| | |
| You will see boxes with options in them (see below).
| |
| | |
| [[Image:PhpMyAdminExport.jpg]] | |
| | |
| Check “Select all. ” In the Structure box, I leave the defaults, and also click “Add DROP TABLE, etc.”
| |
| | |
| Go down to the bottom and find “Save as file”: add today’s date to the default name. After “Compression,” I select gzipped. Then, down in the lower right, press GO. A popup window will ask you whether you want to save the exported file. Say yes. Wait a few minutes.
| |
| | |
| AdminMyPhp will zip a copy of your database and send it to your home computer’s desktop.
| |
| | |
| Remember, I said that the third component's backup was less urgent?
| |
| | |
| I am told that one can use an ftp program to backup your Moodle code—the folder where your Moodle is stored. I have not done so yet. I can always download a fresh Moodle from the Web any time from Moodle downloads http://moodle.org/downloads/
| |
| | |
| == Another Site Backup ==
| |
| | |
| Finally, if you have an old computer, you can create a test Moodle site. That old computer should have at least 1 Gig of RAM. Download the Moodle package appropriate for your operating system, such as MAMP [https://docs.moodle.org/en/Complete_Install_Packages_for_Mac_OS_X]
| |
| | |
| or another one of the system packages described here: [https://docs.moodle.org/en/Administrator_documentation#Mac]
| |
| | |
| Use a flash drive to import your zipped course backups into that new Moodle installation. Upload the courses, glossary, and front page. Now you have a test Moodle. It’s not secure; so don’t open it up to the Web. But you will have a complete, working copy of your site.
| |
Testing email notification in the 34 /en/ wiki -- Sam Student (talk) 08:28, 17 November 2017 (UTC)
Test page for docs
Test link
-Testing-
-Testing 2-
| Col1
|
Col2
|
| Test1
|
Test2
|
| Test1
|
Test2
|
| Test1
|
Test2
|
Functions and Examples
Following are the functions that constitute the basic log API for Moodle.
add_to_log($courseid, $module, $action, $url=, $info=, $cm=0, $user=0)
user_accesstime_log($courseid=0)
get_logs($select, array $params=null, $order='l.time DESC', $limitfrom=, $limitnum=, &$totalcount)
get_logs_usercourse($userid, $courseid, $coursestart)
get_logs_userday($userid, $courseid, $daystart)
- Adding data to logs
- Fetching data from logs
Let us take a deeper look into both of these:-
something in pre tags
and something in code tags
 ==First edit in sandbox==
An additional edit to sandbox
This is where you can edit the content.
Another edit to sandox.
One more edit to sandbox
==First edit in sandbox==
An additional edit to sandbox
This is where you can edit the content.
Another edit to sandox.
One more edit to sandbox
Testing gallery
==Testing gallery==8/11
==Testing gallery==8/11 again
Bootstrap stuff
×Warning! Click the cross to close this label ...
Info here...
Nowiki tags
[[Category:Category name]]
<code>[[Category:Category name]]</code>