Managing badges: Difference between revisions
Mary Cooch (talk | contribs) (updating links) |
Mary Cooch (talk | contribs) |
||
| Line 76: | Line 76: | ||
*Users may manage their site and external badges by clicking on the user menu top right > ''Preferences >Badges > Manage badges''. From here, they can view, search for and download badges. | *Users may manage their site and external badges by clicking on the user menu top right > ''Preferences >Badges > Manage badges''. From here, they can view, search for and download badges. | ||
{| | {| | ||
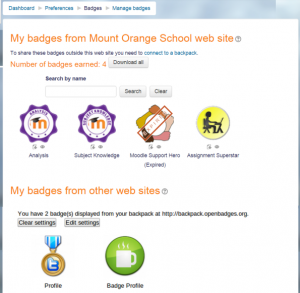
|[[File: | |[[File:BadgesDisplay.png|thumb|Example of a badges screen]] | ||
|} | |} | ||
*This then displays "badges" in the Administration block. | *This then displays "badges" in the Administration block. | ||
Revision as of 09:16, 11 September 2015
Badges may be managed at the course or site level. (Note that teachers in a course cannot by default access site badges unless they have been given a system role with badge managing capabilities) For information on adding course or site badges, see Using badges. Individual users can manage their badges from their profile.
Managing course badges
- If course badges have been enabled in Administration>Site administration>Badges>Badges settings, then a teacher will see a link Administration>Course administration>Badges>Managing badges. This will show a list of badges created and available for allocation, along with actions which may be performed on them:
- Badge status: Badges may be made available or not by enabling or disabling with the "eye" icon or enable/disable button
- Criteria : This shows how the badge is awarded
- Recipients: This shows the number of users awarded the badge
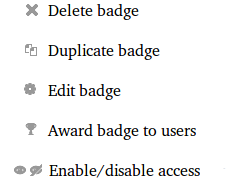
- Actions: The following actions are available
Note: Availability of enable and disable access actions depends on the current status of a badge (e.g. if a badge is available to users, "disable access" icon will be shown).
Before a badge has been issued to at least one user, all its details and settings can be edited by clicking the "Edit badge" action icon.
Clicking on the name of a badge takes you to the screen where you can manage details of that particular badge. The following tabs are available:
Overview
This screen provides an overview of the badge details:
Edit details
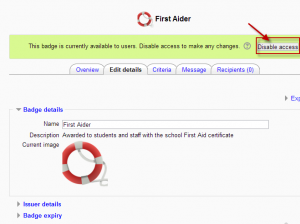
If you wish to change the details of a badge once you have set it up, you must first click to "disable access". Once you have edited the details, you must then click to "enable access" again.
Criteria
Here you can see the criteria set and any descriptions added when adding the badge
Message
This setting allows you to edit the message which goes to a badge earner. Among additional options here are "Attach badge to message" which allows adding an image file to an email and "Notify badge creator" selector which allows to set frequency of notifications sent to badge creator when this badge is issued to users.
Badge notification messages may be sent via email and/or instant messaging. The badge notification email has the issuer name and contact set as From address. The badge notification instant message appears to be sent from the primary site admin for site badges and from the primary teacher for course badges.
Default message outputs for badge notifications may be set by an administrator in Administration > Site administration > Plugins > Message outputs > Default message outputs. By default, badge recipient notifications are sent via instant message when a user is logged in or offline and are sent via email when a user is offline.
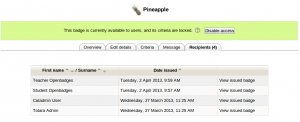
Recipients
This tab displays a list of users who have already earned the badge
Managing site badges
- Badges should be enabled by default in Administration>Site administration>Advanced features and can be managed from Administration>Site administration>Badges>Manage badges. (For information on adding site badges see Using badges
- All existing badges are displayed in a table showing current badge image, name, status, criteria, how many users have already earned this badge and a set of available actions.
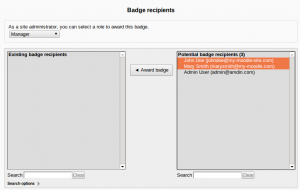
- Other settings are the same as for course badges.Badges that have manual award among their criteria can be issued by one user to another. Users who issue a badge must have "moodle/badges:awardbadge" capability. Site administrators can choose their role when issuing a badge.
Deleting badges
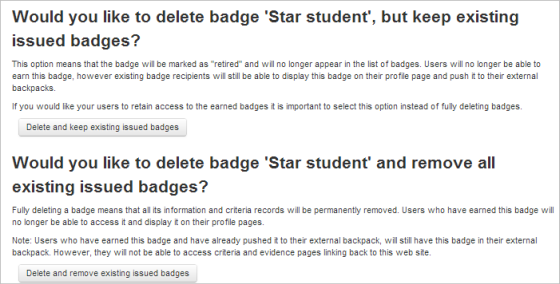
Once a badge has been awarded, there are two options for deleting it, available by clicking the X icon for the badge in question from the Manage badges screen for site or course badges.
- Delete, but keep existing issued badges -if this option is chosen, then the badge will no longer be available but students who have earned the badge will still have it displayed on their profiles.
- Delete and remove all existing issued badges - if this option is chosen, then the badge will no longer be available and students who earned the badge will no longer have it displayed on their profiles.
Note: Even though the badge is deleted from Moodle, if a student has added it to an external backpack, it will still be visible online, although the award criteria will no longer be available.
Individual user badge management
- Users may manage their site and external badges by clicking on the user menu top right > Preferences >Badges > Manage badges. From here, they can view, search for and download badges.
- This then displays "badges" in the Administration block.
Preferences
Here users can decide whether to automatically display all badges earned. (Badges can be individually displayed or hidden from Preferences > Badges > Badge preferences
Backpack settings
These can be accessed from Preferences > Badges > Backpack settings.
Backpack connection
If the email address a user has for Moodle is the same as their Open Badges email address, then they will be automatically connected here and may choose to disconnnect if they wish. If the email address a user has for Moodle is not the same, then they can add the email address which will connect them to their backpack. They can then choose to "push" to their backpack badges which they have earned on Moodle.The badge must then be added to a public collection for it to be visble on their Moodle profile.
Badge import settings
Here, a user is prompted to choose which public collections to import and display.

