wiziq live class module: Difference between revisions
Helen Foster (talk | contribs) m (category) |
m (→Downloads) |
||
| Line 51: | Line 51: | ||
Comprehensive information on WiZiQ’s Live Class Module for Moodle and downloads are available here: | Comprehensive information on WiZiQ’s Live Class Module for Moodle and downloads are available here: | ||
[http://moodle.org/mod/data/view.php?d=13&rid=1113 | [http://moodle.org/mod/data/view.php?d=13&rid=1113 Live Class module on Moodle] | ||
[http://www.wiziq.com/downloads/moodle Live Class module on WiZiQ] | |||
[http://www.wiziq.com/downloads/moodle | |||
[[Category:Contributed code]] | [[Category:Contributed code]] | ||
Revision as of 15:49, 19 May 2008
WiZiQ launched its much awaited free virtual classroom module for Moodle. The integration enables Moodle users to schedule and launch live classes in WiZiQ’s virtual classroom, which is free for both teachers and students. A free user account is required on WiZiQ.com to use WiZiQ Live Class module available as an ‘activity’ and ‘block’.
WiZiQ Live Class module- A quick tutorial for teachers
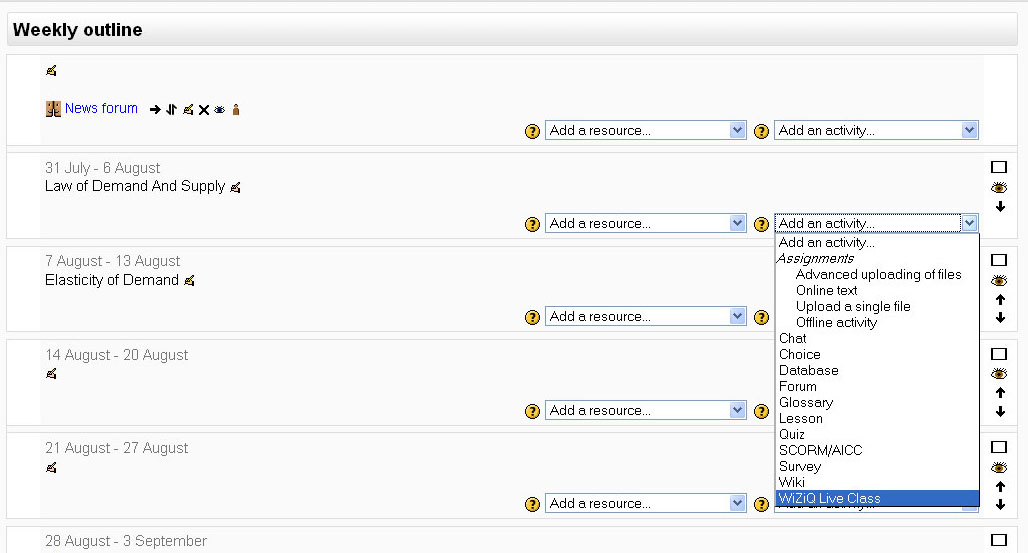
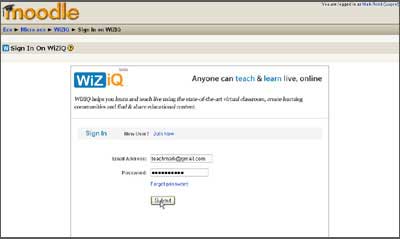
Step 1: After installation, a new activity module 'WiZiQ Live Class’ starts showing in Moodle. Admins and Teachers can select ‘WiZiQ Live Class’ to create a new live class for their course, like any other standard activity Also available a 'block' for WiZiQ Live Classes that lists all the upcoming live classes. When you select ‘WiZiQ Live Class’ you get a sign-up screen
Step 2: Sign-up is a one-time activity that creates your account on WiZiQ to manage your live classes.
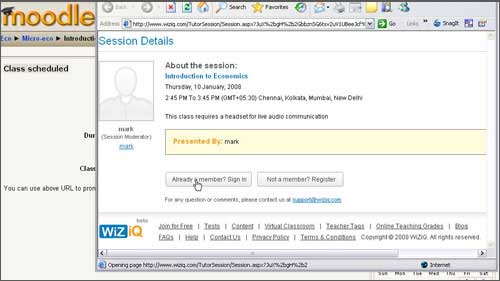
If you are already a member of WiZiQ, you need not sign-up again, Just click on ‘sign-in’.
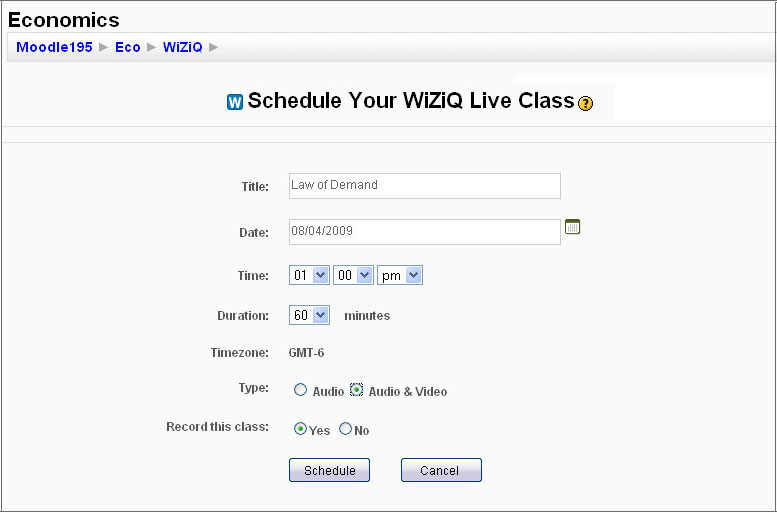
Step 3: While setting up a new live class, the teacher and the administrator can specify the class subject, date and time, duration and its type (audio or audio and video both).
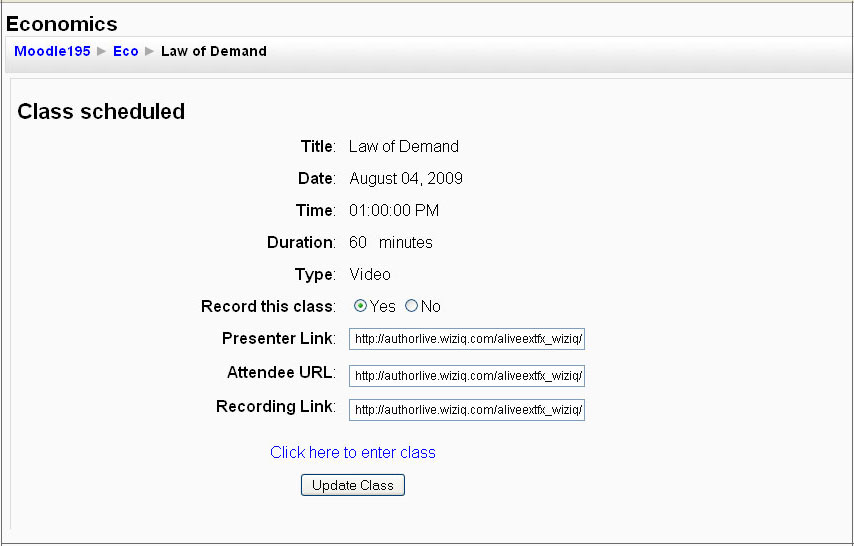
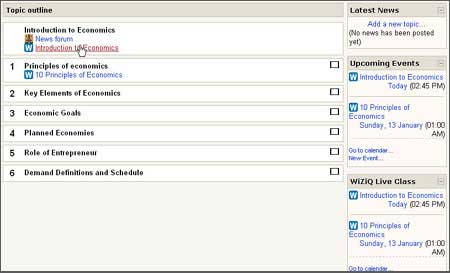
Step 4: All your scheduled classes are private. After you successfully schedule your class, the class link starts showing in Moodle’s Calendar, in the topic outline, in upcoming events block and in ‘WiZiQ Live Class’ block for the course.
Also, a unique Class URL is generated for your class to promote the class through email. This class URL is a sort of permalink which remains active after the class too, to take the users to its recording.
Step 5: At the scheduled date and time, you and your students can enter the live class by simply clicking on the class link.
Step 6: Sign in to your WiZiQ account. With cookies enabled, this is a single time activity required to enter your first live class and you need not sign in time and again to enter your classes. Students need to create their WiZiQ account.
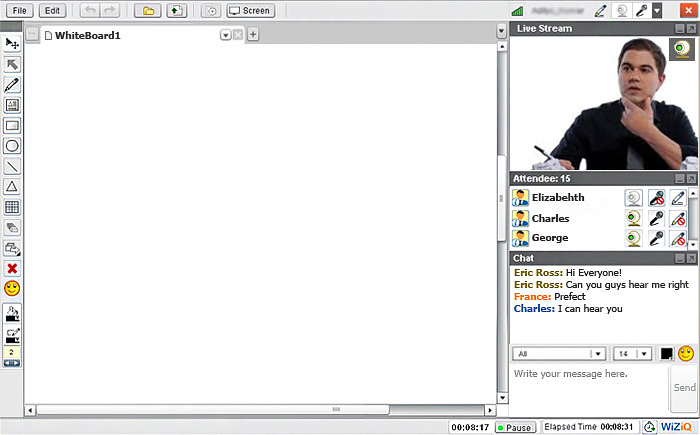
Step 7: You enter your live class enabled with 2-way audio and video communication, live chat, whiteboard and content sharing.
Downloads
Comprehensive information on WiZiQ’s Live Class Module for Moodle and downloads are available here:
