Book settings: Difference between revisions
Mary Cooch (talk | contribs) No edit summary |
(clarified custom titles) |
||
| Line 36: | Line 36: | ||
== Allow or disallow custom titles == | == Allow or disallow custom titles == | ||
If you disallow custom titles, the chapter title (the one that appears on the table of contents) will appear as a header at the top of your content. If you enable custom titles, you will be able to create a title different from the one that appears in the ToC. | If you disallow custom titles, the chapter title (the one that appears on the table of contents) will appear as a header at the top of your content. If you enable custom titles, you will be able to create a title different from the one that appears in the ToC or display no title at all. If you enable custom titles, you will need to enter the chapter title as part of the page content. | ||
[[Image:Book5.png|frame|none|permit custom titles?]] | [[Image:Book5.png|frame|none|permit custom titles?]] | ||
Revision as of 15:31, 25 January 2010
Turn on editing in your course and choose the book resource from the drop down resources menu:
Give your book a name and a summary
Tell your students what your book is called and provide a brief description of its content. Keep in mind that the name you give your book will become the text for the link to it on your main course page. This is true of all the activities you create in Moodle.
Indicate how you want chapters numbered
There are several predefined numbering types:
- None - chapter and subchapter titles are not formatted at all, use if you want to define special numbering styles. For example letters: in chapter title type "A First Chapter", "A.1 Some Subchapter",...
- Numbers - chapters and subchapters are numbered (1, 1.1, 1.2, 2, ...)
- Bullets - subchapters are indented and displayed with bullets.
- Indented - subchapters are indented.
Note that the width of the table of contents is set by the administrator of your site.
Enable or disable printing
Disabling printing means hiding the print icons. (The print option is one of this resource's most popular features, so you might not want to disable it.)
Allow or disallow custom titles
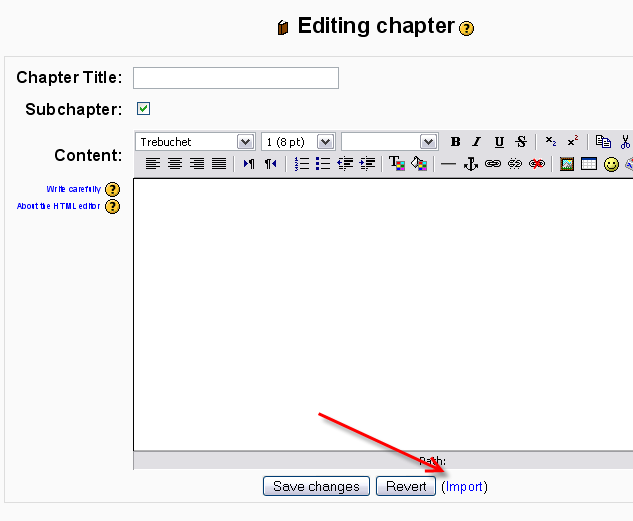
If you disallow custom titles, the chapter title (the one that appears on the table of contents) will appear as a header at the top of your content. If you enable custom titles, you will be able to create a title different from the one that appears in the ToC or display no title at all. If you enable custom titles, you will need to enter the chapter title as part of the page content.
Add a chapter
Titles of chapters appear as links in the table of contents to the left of your content. Keep your titles short.
View work to date
So far, you see the table of contents on the left and the content on the right. Note the print icons near the top.
To add another chapter, click on the red cross in the Table of Contents. The new chapter will be inserted directly after the chapter whose title is on the same line as the red cross you click.
Add a sub chapter
Note that the sub chapter box is checked. A chapter may have many sub chapters, but sub chapters cannot have subchapters. In order to keep this resource simple, you are limted to two levels.
Using Book
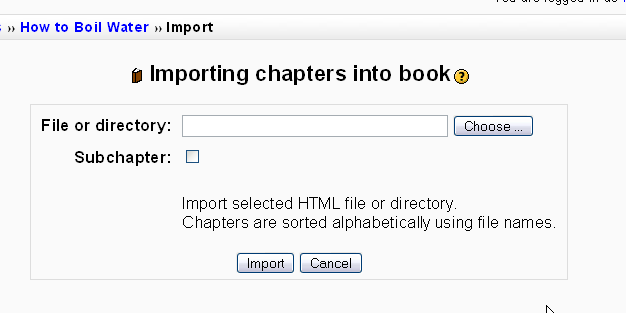
One may, of course, use book to present information in a well-structured, user-friendly format. But there are other possibilities. Because this module allows one to import individual web pages or folders of web pages, it is useful for group work. Example: Each student creates a simple web page about your school and the teacher, (that's you!) uploads the pages to the book. Viola! You and your students have created a useful, interesting resource for new students and their parents. You could do this to create a class cook book and nutrition guide, a resource about local civic organizations, triangles in our daily lives, world leaders, you name it.
Note: Relative file links are converted to absolute chapter links. Images, Flash and Java are relinked too. Remember to upload images and multimedia files as well as html files to your server, of course. Javascripts, SSI page includes, etc., will probably be lost, however, so keep your pages simple and static.


