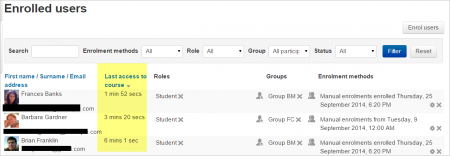
The Enrolled users screen shows all participants enrolled in the course with details about their enrolment.
Enrolled users
Enrolled users:
- Can be assigned to groups
- Have grades
- Can submit assignments
- Are visible in the list of participants
- Can subscribe to forums
- Can participate in choices
Only enrolled users are true participants in course.
The enrolled users page Course administration > Users > Enrolled users lists all users enrolled in the course, together with their last access time, roles, groups and enrolment methods.
Roles
To assign an enrolled user a role, click the 'Assign roles' icon (a plus sign) in the roles column then select the desired role.
To remove a role assignment, click the delete icon (a cross) next to the role name.
Notes:
- Only roles which can be assigned in the course context type are available to select. The course context type may be set by an admin by editing the role via Site administration > Users > Permissions > Define roles.
- Only roles which a user is allowed to assign are available to select.
Groups
To add a user to a group (requires at least one group to have been created previously), click the 'Add to group' icon (a plus sign) in the groups column, select the desired group then click the 'Save changes' button.
Enrolling users
See Manual enrolment for two methods of enrolling users.
Searching enrolled users
The search facility allows a teacher to search for specific enrolled users. This is useful when a course has many users enrolled with different methods.
Editing enrolment start and end dates
Enrolment start and end dates for particular users can be edited as follows:
- Click the edit icon in the enrolment methods column
- Edit dates as required, then click the 'Save changes' button.
