Box.net portfolio: Difference between revisions
From MoodleDocs
Mary Cooch (talk | contribs) (added screenshots) |
Mary Cooch (talk | contribs) mNo edit summary |
||
| Line 2: | Line 2: | ||
==Admin settings to enable the Box.net portfolio== | ==Admin settings to enable the Box.net portfolio== | ||
*Go to Settings > Site administration > Plugins > Portfolios > Manage Portfolios; | *Go to ''Settings > Site administration > Plugins > Portfolios > Manage Portfolios''; | ||
*Select from the drop down next to Box.net "Enabled and visible"; | *Select from the drop down next to Box.net "Enabled and visible"; | ||
*Click the "Settings" and if desired, give Box.net a customised name (not essential) | *Click the "Settings" and if desired, give Box.net a customised name (not essential) | ||
*Click the link to Open Development page [http://www.box.net/developers/services | *Click the link to Open Development page [http://www.box.net/developers/services | ||
] | ] | ||
*Create | *Create an account and the click "Create new application " and make a new application. (This is for the API key you need for Box.net to work) | ||
*The names you enter don't matter but in the Redirect URL box, copy and paste in the URL given you on your Box.net "Settings" link | *The names you enter don't matter but in the Redirect URL box, copy and paste in the URL given you on your Box.net "Settings" link | ||
*Paste the API key you get into the API box and click "Save" | *Paste the API key you get into the API box and click "Save" | ||
| Line 29: | Line 29: | ||
[[File:Confirmboxnetexport.png]] | [[File:Confirmboxnetexport.png]] | ||
*Click " | *Click "Continue". If you haven't done this before you will be prompted to log in to your account. Agree and log in. | ||
*The "export complete" message will appear. Clicking "continue" will take you to Box.net if you wish. | *The "export complete" message will appear. Clicking "continue" will take you to Box.net if you wish. | ||
Revision as of 19:03, 13 October 2011
Admin settings to enable the Box.net portfolio
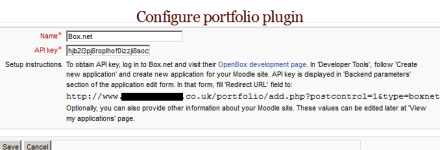
- Go to Settings > Site administration > Plugins > Portfolios > Manage Portfolios;
- Select from the drop down next to Box.net "Enabled and visible";
- Click the "Settings" and if desired, give Box.net a customised name (not essential)
- Click the link to Open Development page [http://www.box.net/developers/services
]
- Create an account and the click "Create new application " and make a new application. (This is for the API key you need for Box.net to work)
- The names you enter don't matter but in the Redirect URL box, copy and paste in the URL given you on your Box.net "Settings" link
- Paste the API key you get into the API box and click "Save"
Sending/"pushing" your files to Box.net
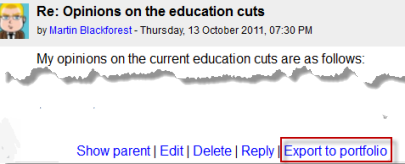
- You can export items such as assignments, chat and forum posts to enabled portfolios such as Box.net. Here is an example with a forum post:
- At the bottom of your completed forum post are the words "export to portfolio".
- Click the words "export to portfolio" and then select from the dropdown Box.net (If it is the only portfolio enabled, it wil be the only choice!)
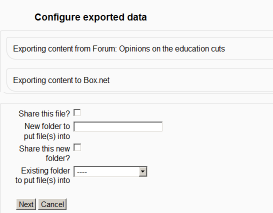
- On the next screen, choose your sharing options and which folder to export to:
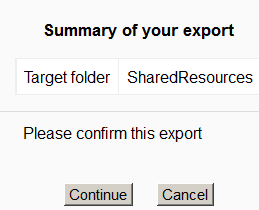
- Click to confirm the export:
- Click "Continue". If you haven't done this before you will be prompted to log in to your account. Agree and log in.
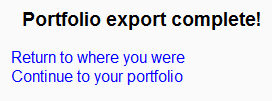
- The "export complete" message will appear. Clicking "continue" will take you to Box.net if you wish.
