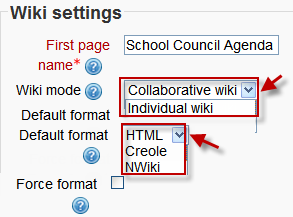
Wiki settings
From MoodleDocs
Adding a wiki
- As an editing teacher for a course, click "Turn Editing On", and go to the section in which you want to add the wiki.
- From the dropdown menu labeled "Add an activity", select "Wiki". This will take you to the wiki settings page titled "Adding a new wiki".
- In an existing wiki, the wiki settings can be found in Settings > Wiki administration > Edit settings.
Wiki administration settings
Wiki name
- The name you give to your wiki here will appear as the link on the course page for your students to click.
Wiki description
- Explain the purpose of your wiki here. (This description may or may not be compulsory depending on your admin's settings.)
Display description on course page
New feature
in Moodle 3.10!
If this box is checked, then the description you added above will appear with the wiki link on the course page.
First page name
- The name you add here will form the first page of your new wiki.
Wiki mode
- Choose between "Individual wiki" where each student gets their own, or "collaborative wiki" where students work together on a single wiki.
=Default format
- Set the default type of editing your wiki will use. Chooose from
- HTML - editing using the normal text editor
- Creole - a popular wiki editing language. If this is selected, a small editing toolbar will appear.
- NWiki - a wiki editing language used in the contributed NWiki module.
Force format
If you check this box then students cannot choose their own method of editing the wiki.
Common module settings
The Common module settings section appears in many modules besides wiki. It sets Groups interactions levels and the ID number.
Locally assigned roles
In Settings > Wiki administration > Locally assigned roles selected users can be given additional roles in the activity.
Wiki permissions
Role permissions for the activity can be changed in Settings > Wiki administration > Permissions.
