wiziq live class module
Introduction
WiZiQ launched its free virtual classroom module, Live Class, for Moodle. Available as a non-standard activity and block, this module is absolutely free to use. The integration enables Moodle users to schedule and launch live classes in WiZiQ’s virtual classroom. A free user account is required on WiZiQ.com to use the WiZiQ Live Class module available as an ‘activity’ and ‘block’. The WiZiQ Live Class module enables Moodle users to use WiZiQ’s Web based virtual classroom equipped with real-time collaboration tools like live chat, 2-way audio and video communication, whiteboard and content (.pdf, .swf, .doc, .docx, .xls, .xlsx, .ppt, and .pps) sharing.
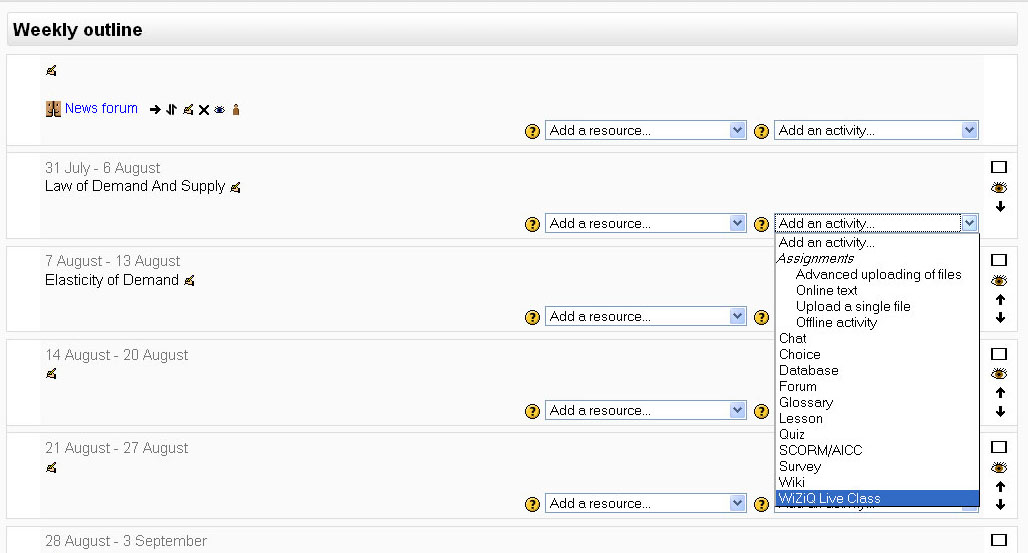
‘Activity’ features the scheduling of live classes within the Moodle course and ‘Block’ lists the live classes on the schedule. Any teacher or administrator on Moodle can schedule a live class by choosing ‘WiZiQ Live Class’ from ‘Add an activity’ drop-down list within the Moodle system. Using the module requires registration on WiZiQ.
Features
- An administrator or a teacher is able to schedule a virtual class within Moodle.
- Registration to create a user account on WiZiQ so that Moodle users using WiZiQ Live Class do not require to sign in time and again to schedule or enter their virtual classes.
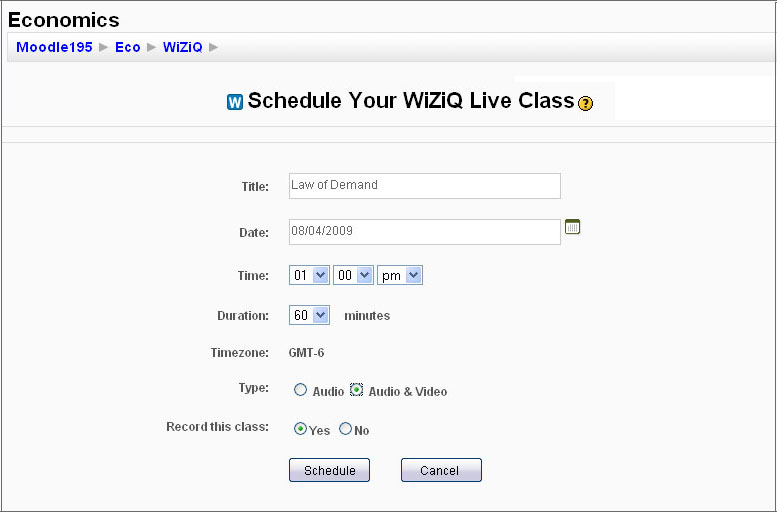
- While scheduling a class, the creator can enter the class title, date, time, and class type (with audio or audio and video both).
- After a class is scheduled successfully, a private URL is generated. This URL acts as a permalink for the class that can be safely used in emails, blogs or websites to promote the class.
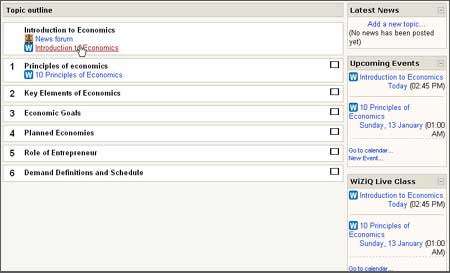
- The class gets listed as an event on the Moodle calendar and is also accessible as an event in the ‘Upcoming events’ block.
- All classes are recorded. links for all Live Class events remain active after classes so that users can access recordings of these classes for review or revision.
Installation
To make the understanding of these steps simple, we presume a Moodle installation at 'www.myMoodle.net' with its code located on the server in a directory named /home/myMoodle/public_html
- After you download the code for WiZiQ's Live Class module, copy the code folders for block and activity in their respective directories:
   * Block into /home/myMoodle/public_html/moodle/blocks
   * Activity into /home/myMoodle/public_html/moodle/mod
- To install this module, login as Administrator. Go to "Site Administration" and click on the ‘Notifications’ link. This installs the "Activity" and "Block" in your Moodle site. Please note that to install this module in Moodle version 1.6, go to Administration and click on the ‘Admin…’ link
- To confirm the installation, go to "Site Administration" and click on the ‘Modules’ link. You find an entry there for ‘WiZiQ Live Class’ in the ‘Activities’ and ‘Blocks’ link.
To install the documentation/help files for activity module:
1. After you have installed the WiZiQ live class activity, copy these help files named: join_help.html, schedule_help.html, signin_help.html from /home/myMoodle/public_html/moodle/mod/wiziq
2. Create ‘wiziq’ folder at this location: /home/myMoodle/public_html/moodle/lang/en_utf8/help/wiziq and copy the help files there.
WiZiQ Live Class module - A quick tutorial for teachers
Step 1: After installation, a new "activity" feature, 'WiZiQ Live Class’ starts showing in Moodle. Admins and teachers can select ‘WiZiQ Live Class’ to create a new class for their course, like any other standard activity. Also, a 'block' feature is created for WiZiQ Live Classes that lists all the upcoming live classes. When you select ‘WiZiQ Live Class’ you get a sign-up screen:

Step 2: Sign-up is a one-time activity that creates your account on WiZiQ to manage your live classes.
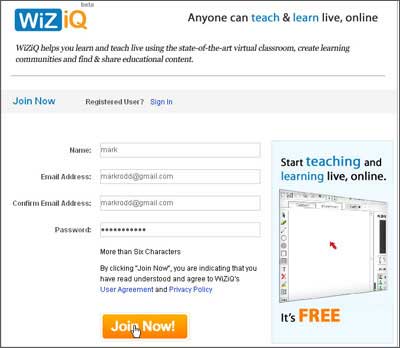

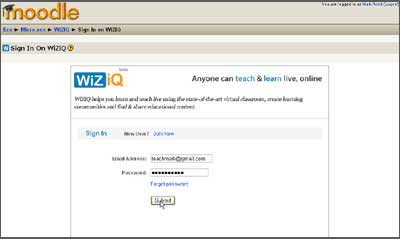
If you are already a member of WiZiQ, you need not sign-up again, Just click on ‘sign-in’.

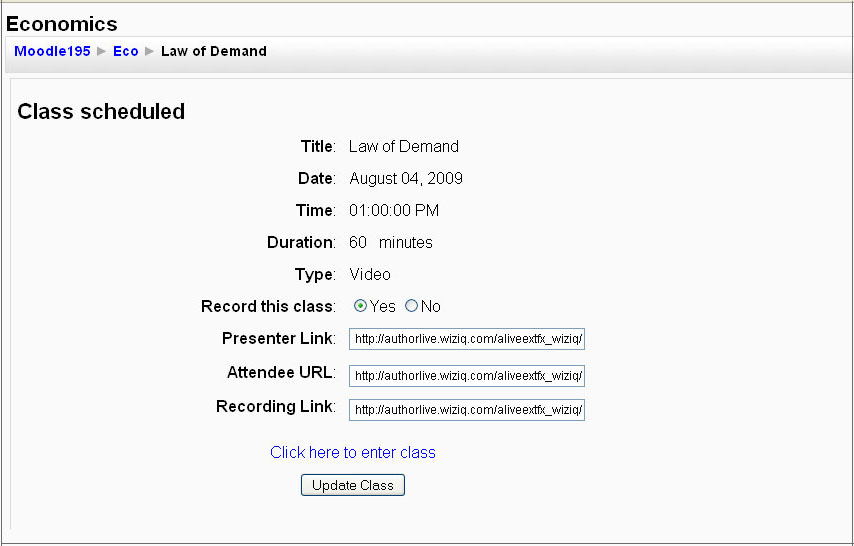
Step 3: While setting up a new class, the teacher and the administrator can specify the class subject, date and time, duration and its type (audio or audio and video both).

Step 4: All your scheduled classes are private. After you successfully schedule your class, the class link starts showing in Moodle’s Calendar, in the topic outline, in the upcoming events block and in the ‘WiZiQ Live Class’ block for the course. Also, a unique URL is generated for your class to promote the class through email. This class URL is a sort of permalink, which remains active even after the class, to take students to its recording.

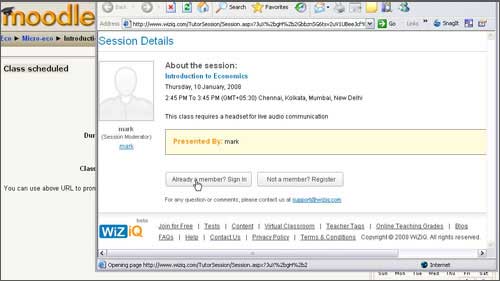
Step 5: At the scheduled date and time, you and your students can enter the class by simply clicking on the class link.

Step 6: Sign in to your WiZiQ account. With cookies enabled, this is a single time activity required to enter your first class and you need not sign in time and again to enter your classes. Students need to create their WiZiQ account to access classes.

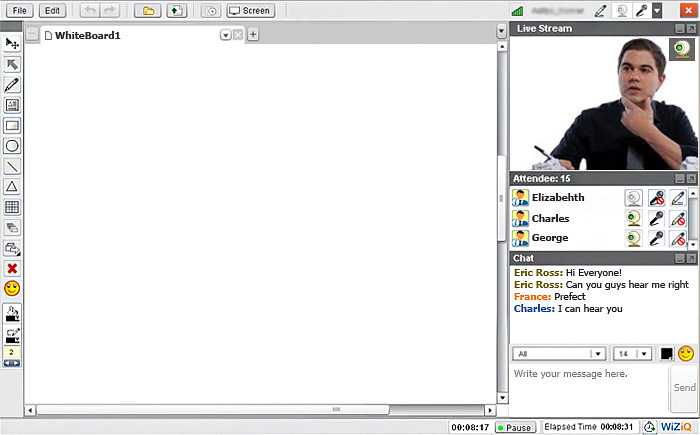
Step 7: You enter your class enabled with 2-way audio and video communication, live chat, whiteboard and content sharing.

Support
Support for this module is available on the WiZiQ Support Forum and support@wiziq.com. Please check the forums before contacting support as most issues have already been addressed there. If you cannot find a related issue, it's recommended that you start a new thread rather than contacting support as other users can also view support exchange on the forum and benefit if they have a similar issue.
Forum Threads on Moodle
Downloads
Comprehensive information on WiZiQ’s Live Class Module for Moodle and downloads are available here:
Live Class module on Moodle Live Class module on WiZiQ
News and Updates
Information on all updates is provided here: