Private files: Difference between revisions
From MoodleDocs
Helen Foster (talk | contribs) (removing repositories template, adding category) |
Helen Foster (talk | contribs) (repositories template) |
||
| Line 1: | Line 1: | ||
{{ | {{Repositories}} | ||
In Moodle, each user has a private files area for uploading and managing a set of files. | In Moodle, each user has a private files area for uploading and managing a set of files. | ||
| Line 20: | Line 17: | ||
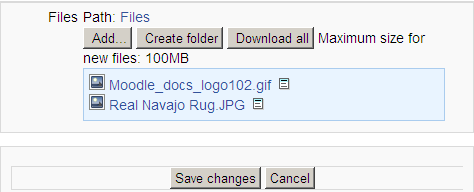
[[Image:Files_standard_added_files_1.png|center|frame|Standard file add- create directory, showing 2 files]] | [[Image:Files_standard_added_files_1.png|center|frame|Standard file add- create directory, showing 2 files]] | ||
*Uploaded files may be downloaded, renamed, moved or deleted by clicking the icon next to the file. After making any changes, '''remember to click the 'Save changes' button'''. | *Uploaded files may be downloaded, renamed, moved or deleted by clicking the icon next to the file. After making any changes, '''remember to click the 'Save changes' button'''. | ||
[[eu:Fitxategi_pribatuak]] | [[eu:Fitxategi_pribatuak]] | ||
[[fr:Fichiers personnels]] | [[fr:Fichiers personnels]] | ||
[[ja:プライベートファイル]] | [[ja:プライベートファイル]] | ||
Revision as of 14:18, 4 October 2011
In Moodle, each user has a private files area for uploading and managing a set of files.
The private files area is accessible via Navigation > My home > My profile > My private files or the My private files block. If the private files repository is enabled by a site admin, it is available as a source within the filepicker when selecting files to use in a course.
Private files management
To add a file to your private files area
- On the Navigation menu, click My profile > My private files
- Click "Manage my private files" button
- The standard file picker Add-Create folder popup will appear.
- If desired, create or move to a folder,
- Click on the Add button
- Browse for and select a file
- Click the 'Save changes' button
- Uploaded files may be downloaded, renamed, moved or deleted by clicking the icon next to the file. After making any changes, remember to click the 'Save changes' button.
