Picasa portfolio: Difference between revisions
From MoodleDocs
No edit summary |
Helen Foster (talk | contribs) (Enabling the Picasa portfolio updated instructions) |
||
| Line 1: | Line 1: | ||
{{Portfolios}} | {{Portfolios}} | ||
==Enabling the Picasa portfolio | ==Enabling the Picasa portfolio== | ||
[[ | Note: In order to use either the Picasa or Google Docs portfolios (also the Google Docs or Picasa repositories) an administrator must register their Moodle site with Google and obtain a client ID and secret. The client ID and secret can then be used to configure all Google Docs and Picasa plugins. | ||
# Log in as an administrator and go to ''Settings > Site administration > Plugins > Portfolios > Manage Portfolios'' | |||
# Activate the Picasa portfolio by selecting 'Enable and visible' in the dropdown menu | |||
# If you've not yet registered your Moodle site with Google, see [[Google OAuth 2.0 setup]] for instructions on how to do so. If your site is already registered, enter the client ID and secret then save changes. | |||
==Sending "pushing" your images to Picasa== | ==Sending "pushing" your images to Picasa== | ||
Revision as of 15:20, 13 June 2012
Enabling the Picasa portfolio
Note: In order to use either the Picasa or Google Docs portfolios (also the Google Docs or Picasa repositories) an administrator must register their Moodle site with Google and obtain a client ID and secret. The client ID and secret can then be used to configure all Google Docs and Picasa plugins.
- Log in as an administrator and go to Settings > Site administration > Plugins > Portfolios > Manage Portfolios
- Activate the Picasa portfolio by selecting 'Enable and visible' in the dropdown menu
- If you've not yet registered your Moodle site with Google, see Google OAuth 2.0 setup for instructions on how to do so. If your site is already registered, enter the client ID and secret then save changes.
Sending "pushing" your images to Picasa
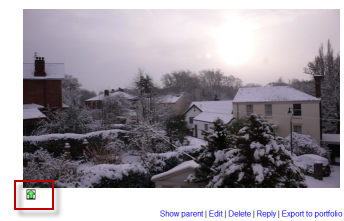
- You can export to Picasa images attached to forum posts or uploaded in assignments, for example.
- The image will have a green icon next to it. Click this icon to export to Picasa:
- If other portfolios are enabled, choose Picasa from the dropdown menu. If not, you will only have Picasa as your option!
- If you have not logged in before you will be asked for permission to connect to Google (as Picasa and Google are connected)
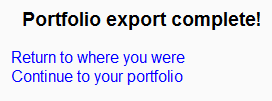
- Agree and log in. The "export complete" message will appear.
- Clicking "Continue" will take you -if you wish - to Picasa, where you will see your image added.


