Plagiarism Prevention URKUND Settings: Difference between revisions
Dan Marsden (talk | contribs) (→Global Configuration of URKUND: add instruction to enable log store) |
Dan Marsden (talk | contribs) (→Global Configuration of URKUND: legacy log store no longer used.) |
||
| Line 18: | Line 18: | ||
==Global Configuration of URKUND== | ==Global Configuration of URKUND== | ||
# Go to ''Admin > Advanced Features'' find the setting “Enable plagiarism plugins” - make sure the box is ticked.[[File:Enableplagiarism.png]] | # Go to ''Admin > Advanced Features'' find the setting “Enable plagiarism plugins” - make sure the box is ticked.[[File:Enableplagiarism.png]] | ||
# Go to ''Admin > Plugins > Plagiarism Prevention > URKUND'' | # Go to ''Admin > Plugins > Plagiarism Prevention > URKUND'' | ||
## Tick the box "Use URKUND" | ## Tick the box "Use URKUND" | ||
Latest revision as of 09:33, 14 December 2015
Activation of your URKUND Account
- obtain a URKUND Subscription from www.urkund.com
Installation of the plugin
Installation using Git
from the root of your install:
git clone git://github.com/danmarsden/moodle-plagiarism_urkund.git plagiarism/urkund
then add plagairism/urkund to your .gitignore Visit the Admin > Notifications page in Moodle to trigger the upgrade scripts
Installation using a Zip file
Download the zip: https://github.com/danmarsden/moodle-plagiarism_urkund/zipball/master or the tar.gz: https://github.com/danmarsden/moodle-plagiarism_urkund/tarball/master
Then Extract these files into a new folder under /plagiarism/urkund and visit the Admin > Notifications page in Moodle to trigger the upgrade scripts
Global Configuration of URKUND
- Go to Admin > Advanced Features find the setting “Enable plagiarism plugins” - make sure the box is ticked.

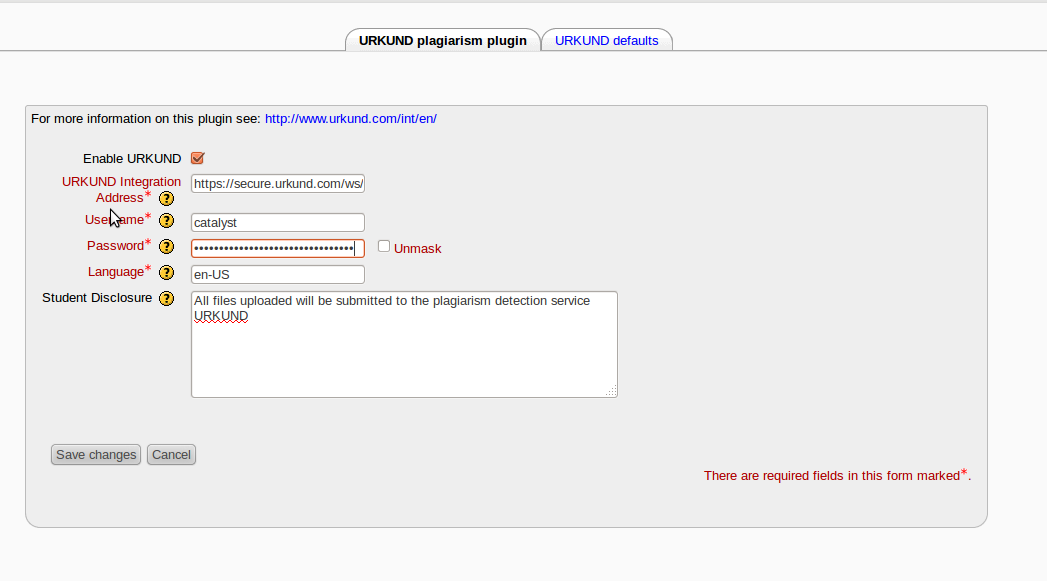
- Go to Admin > Plugins > Plagiarism Prevention > URKUND
- Tick the box "Use URKUND"
- Enter your URKUND UIS username
- Enter your URKUND UIS password
- Set the Student Disclosure statement. - this is displayed to all students on the upload screen to notify them that the URKUND system is in use.
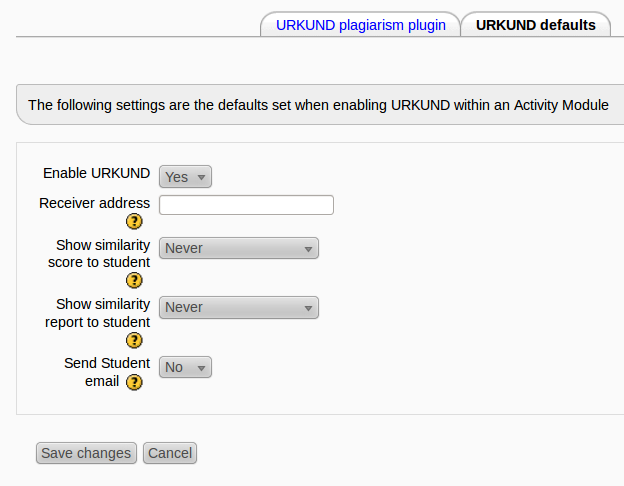
- in the page Admin > Modules > Activities > URKUND click on the tab "URKUND Defaults"
- Configure the default settings to be used inside a Moodle module when creating/editing a new module.
- Configure the default settings to be used inside a Moodle module when creating/editing a new module.


Advanced Configuration
The ability to enable/disable URKUND within a Moodle module such as an assignment is managed using a capability that is by default given to all managers and editing teachers on the site. If you want to force all assignments on your site to use URKUND and prevent your teachers from changing these settings you can set the defaults above and then remove the capability “moodle/plagiarism_urkund:enable” from your teacher roles.
You can also use this capability to selectively allow certain teachers to use URKUND by setting the default above “Enable URKUND” to “No” - and giving the capabiltiy “moodle/plagiarism_urkund:enable” only to the teachers you want to be able to use URKUND