Creating custom roles
Template:Roles and capabilities
Please refer to these notes before editing this page.
Custom Roles are roles that are not part of the core code, not dowloaded with the installation files. There are always reasons to establish a custome role, and each custom role needs to be created. The basic process is the same for all custom roles so in this page we will create a role then use it as a Parent Role.
We can start this exercise by adding a role the name of "Perant Test" to our Moodle and we are going to link this parent to "Stedunt Test", a test tole we have for students in our Moodle.
Go to: Site Administration > Users > Permissions > Define Roles
Scroll to the bottom of the page and click on Add New Role button.
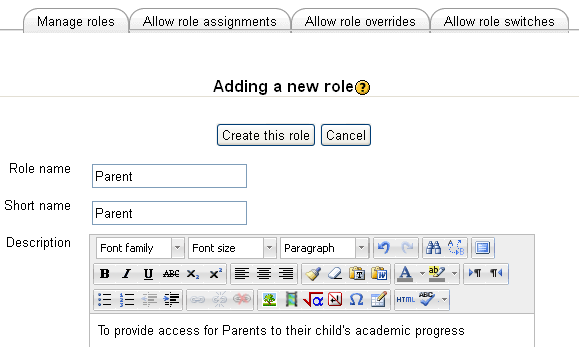
This brings up the Adding a new role screen.
In the Role name dialog, enter the name of the role that you want to create, "Parent" and retype the name in the "Short name" dialog.
In the Summary dialog enter something like as shown here:
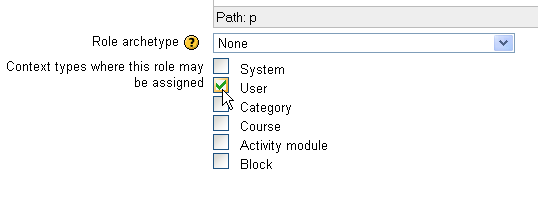
Moodle 2 uses Roles in a context, so we have to place the Role into a context so we can use it. Scroll down to "Context where this role may be assigned" and click on the User check box.
This creates a Custom Role and it is the Context in which the role is to be used that determines what permissions the role actually begins with.

