Question types
You may add a variety of different types of questions:
Multiple choice
Moodle provides you with a lot of flexibility when creating this common question type. Figure 5-5 shows an example question. You can create single answer and multiple answer questions, display pictures in the question and weight individual answers.
Figure 5-5. A multiple-choice question
There are two types of multiple choice questions - single answer and multiple answer.
- Single-answer questions
- These questions allow one and only one answer to be chosen by providing radio buttons next to the answers. You will specify non-negative marks for each answer, usually zero marks for wrong answers, maximum marks for correct answers and partial marks for partially correct answers.
- Multiple-answer questions
- These questions allow one or more answers to be chosen by providing check boxes next to the answers. Each answer may carry a positive or negative grade, so that choosing ALL the options will not necessarily result in good grade. If the total grade is negative then the total grade for this question will be zero. Careful: it is possible to create questions that have scores greater than 100%.
Figure 5-6 shows the multiple choice editing page.
Figure 5-6. Editing a Multiple Choice Question
To set up a multiple choice question you proceed as follows:
- Start out by giving the question a descriptive name. You’ll use the name to track your questions later so “Question 1” isn’t a good idea. The name will be used in the question lists on the quiz editing page. It will not be shown to the students, so you can choose any name that makes sense to you and possibly other teachers.
- Create the question text. If you’re using the HTML Editor, you can format the question just like a word processing document
- If you want to add an image to the question, you have two options
- If you’ve already uploaded an image to your Files area (see Chapter 4 for details), it will be available to add to the question stem in a dropdown menu under the Question text area
- If you’re using the HTML editor, you can click the image icon. This will pop-up the Insert Image window. You can choose to upload an image into your files area from this window, or you can add the URL of an image on the web. If you add a file to your files area, click the name of the file after you upload it to insert the link into the URL text entry at the top of the screen. Then click OK.
- Choose whether students can only select one answer or multiple answers
- Write your first answer in the Choice 1 text field.
- Select a grade percentage for the answer. This is the percentage of the total points for the question that selecting this response is worth. You can select negative percentages as well as positive percentages. So if a question is worth 10 points, selecting a correct response in a multiple answer question may give you 50% of the possible points. Selecting a wrong answer may take away 10%.
- If you wish, you can add feedback for each response. It may be a bit ore work, but it’s good practice to tell the students why each answer is right or wrong using the feedback area. If students know why an answer is right or wrong, they can analyze their own thinking and being to understand why an answer is correct. Your feedback will only be displayed if you select Show Feedback in the quiz body options.
- Fill in the rest of the response choices in the rest of the form. Any unused areas will be ignored.
- Select the “Save Changes” button at the bottom of the screen.
You have now added a multiple choice question to the question category.
Short answer
In response to a question (that may include a image), the respondent types a word or phrase. There may several possible correct answers, with different grades. Answers may or may not be sensitive to case.
To create a short answer question:
- Give your question a descriptive name
- Create the question stem. If you want students to fill in a blank, use the underscore to indicate where the blank is.
- Select an image to display if you want to add a picture to the question (see step 3 in the multiple choice description above for more detail).
- Choose whether capitalization is important. Case sensitivity can be tricky. Will you accept george washingtion as well as George Washington as an answer?
- Next, fill in the answers you will accept. You can give each answer a percentage of the grade as well. You could give common misspellings partial credit with this option. If the "Case sensitive" option is selected, then you can have different scores for "Word" or "word".
- Create feedback for each acceptable answer.
- Click Save Changes to add the question to the category
You can use the asterisk character (*) as a wildcard to match any series of characters. For example, use ran*ing to match any word or phrase starting with "ran" and ending with "ing". If you really do want to match an asterisk then use a backslash like this: \*
Without wildcards the answers are compared exactly, so be careful with your spelling!
You may like to prototype your short answer questions to catch common acceptable answers you hadn’t thought of. Start out by creating a few acceptable answers, then include the question in a quiz for no points. Be sure to tell students you are testing a new question. Once the quiz is over, review students’ answers and add their acceptable answers to the list.
Numerical
From the student perspective, a numerical question looks just like a short-answer question. The difference is that numerical answers are allowed to have an accepted error. This allows a continuous range of answers to be set.
For example, if the answer is 30 with an accepted error of 5, then any number between 25 and 35 will be accepted as correct.
Numerical questions can also have case-insensitive non-numerical answers. This is useful whenever the answer for a numerical question is something like N/A, +inf, -inf, NaN etc.
Figure 5-8. Numerical Question
To create a numerical question
- Give the question a descriptive name (This is only seen in the question list that you see as a teacher when you are putting together a quiz)
- Type the equation or numerical question for your students to solve
Moodle has a various text filters that allow you to type an equation and have it properly typeset when displayed. The Moodle Algebra filter is very good for writing common matematical expressions in a simple way. More complicated expressions kan use the TeX syntax. If they don't work the administrator may have not enabled them.
- Select an image to display if you want to add a picture to the question (see step 3 in the multiple choice description above for more detail).
- Enter the correct answer. 23.4 23,4 and 2.34E+1 would all work. (you can only add one correct answer in the user interface. If you import the question with a GIFT format file you can specifiy multiple answer(intervals) with accompanying feedback and point-percentage. This is done similar to the CLOZE Numerical format. There is no units support in the Cloze type.) It is possible, though not simple, to get support for several answer intervals and unit support if you create the question in the numerical interface and export it in Moodle XML format. Than you can duplicate the <answer> segment and put in another answer interval and the feedback and grading factor you want for that interval. Than import it again. You will not be able to edit the question in the normal numerical interface though.
- Enter the accepted error, the range above or below the correct answer. For example, if the correct answer is 5, but you will accept 4 or 6 as answers, your accepted error is 1.
- Enter feedback for the question. It is possible to use all kinds of HTML formating for the feedback but it must be written by hand. Unfortunately (in 1.5.3 anyhow) it is right justified and has no identifying formatting.
- Units can be specified and work to a degree. Unfortunately if the student answers with the right number but no unit he can get full points. And if he thinks of another unit and has the right number and no unit, he gets no differentiated feedback, just wrong. You must also give the conversion factor . So if your main answer was 5500 with unit W and you wanted to allow the unit kW you would have to specify the factor 0.001. If you wanted to allow Watt you would use the factor 1.
- Click Save Changes to add the question to the category
True/false
In response to a question (that may include an image), the respondent selects from two options: True or False.
If feedback is enabled, then the appropriate feedback message is shown to the respondent after answering the quiz. For example, if the correct answer is "False", but they answer "True" (getting it wrong) then the "True" feedback is shown.
Matching
After an optional introduction, the respondent is presented with several sub-questions and several jumbled answers. There is one correct answer for each question.
The respondent must select an answer to match each sub-question.
Each sub-question is equally weighted to contribute towards the grade for the total question.
Embedded answers (Cloze)
Embedded answers (Cloze) questions consist of a passage of text (in Moodle format) that has various answers embedded within it, including multiple choice, short answers and numerical answers.
Questions consist of a passage of text (in Moodle format) that has various answers embedded within it, including multiple choice, short answers and numerical answers.
There is currently no graphical interface to create these questions - you need to specify the question format using the text box or by importing them from external files.
Random short-answer matching
From the student perspective, this looks just like a Matching question. The difference is that the subquestions are drawn randomly from Short Answer questions in the current category.
After an optional introduction, the respondent is presented with several sub-questions and several jumbled answers. There is one correct answer for each question.
The respondent must select an answer to match each sub-question.
Each sub-question is equally weighted to contribute towards the grade for the total question.
The questions and answers are randomly drawn from the pool of "Short Answer" questions in the current category. Each attempt on a quiz will have different questions and answers.
Description
This is not a real question. It simply prints some text (and possibly graphics) without requiring an answer. This can be used to provide some information to be used by a following group of questions, for example.
Calculated
Calculated questions offer a way to create individual numerical questions by the use of wildcards that are substituted with individual values when the quiz is taken.
Third-party question types
Besides the question types described above that are part of the core Moodle distribution there are question type plugins contributed by the community.
Rendered Matching
Drag and Drop
Tutorial: A simple example
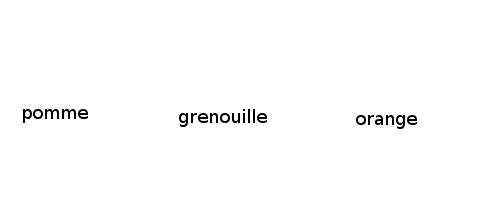
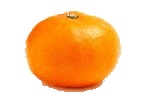
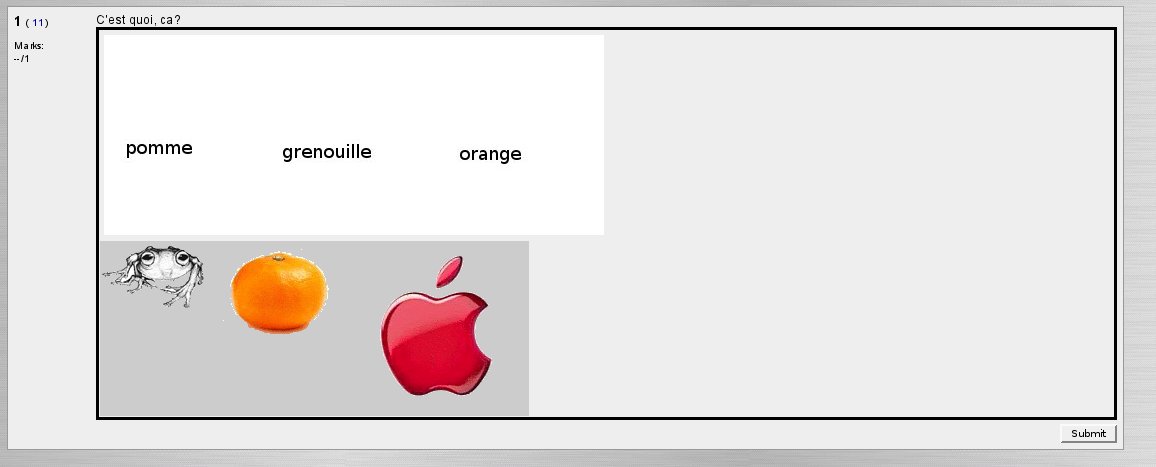
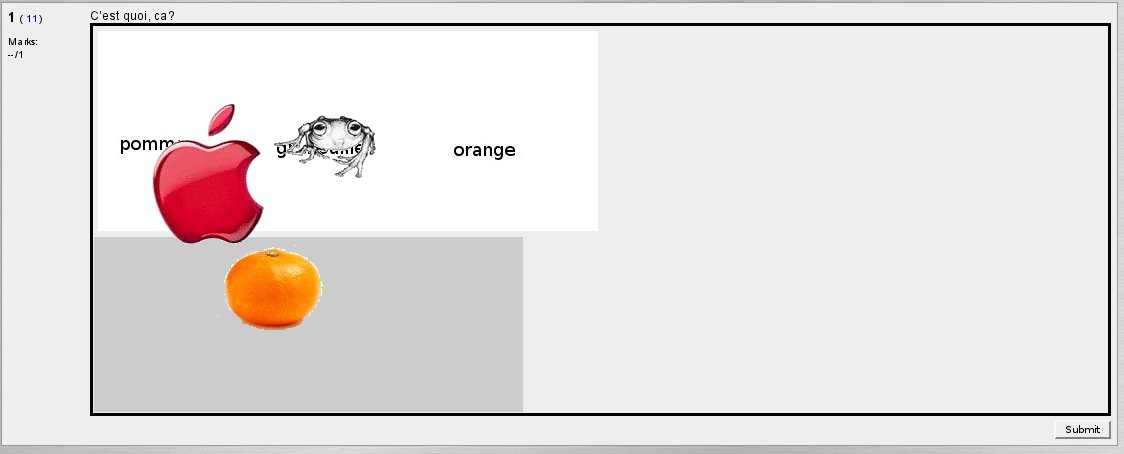
I want to make a drag and drop question for a beginning french class - to test the knowledge of the words pomme(apple), orange, and grenouille(frog). To do so, I will use a background image with these words, and drag-and-droppable images of an apple, orange, and frog. I create the images and upload them to my moodle course files.
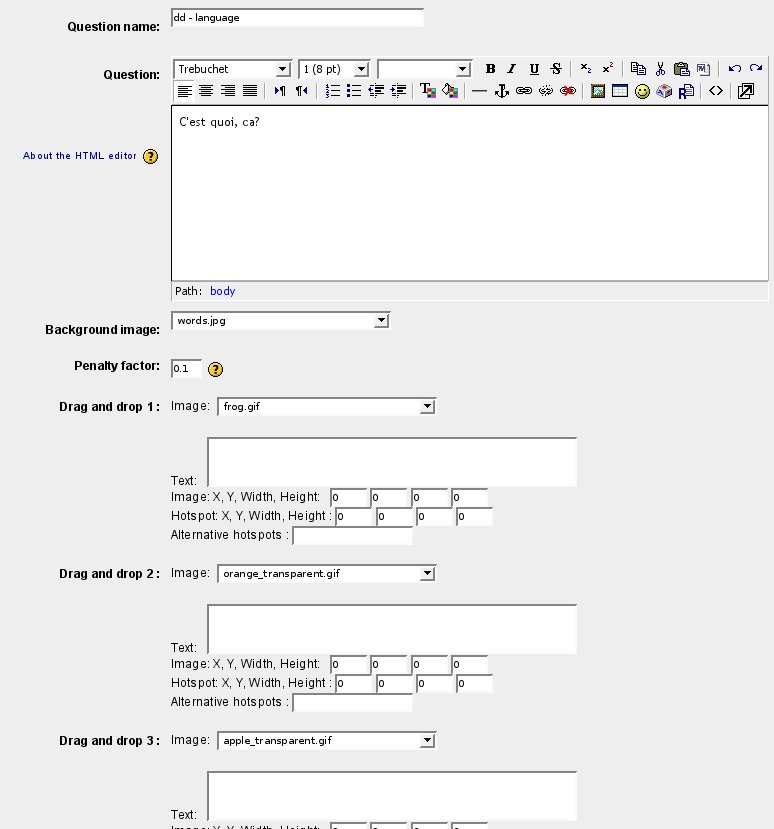
- hen I edit a new drag and drop question. For this example, I've left the "Text" field
empty. If some text is entered here, it will be shown under the initial position of the drag and drop image during the quiz.
(Note that the fields "Image: X, Y, Width, Height:", " Hotspot: X, Y,
Width, Height :", and " Alternative hotspots :" can be ignored.  These
are for advanced usage - when you need to align images accurate to the
pixel, or when you need to have more than one possible "correct" hotspot
for an image.  The x,y,width,height values will automatically be filled
in when graphically positioning the images/hotspots in the second step.)
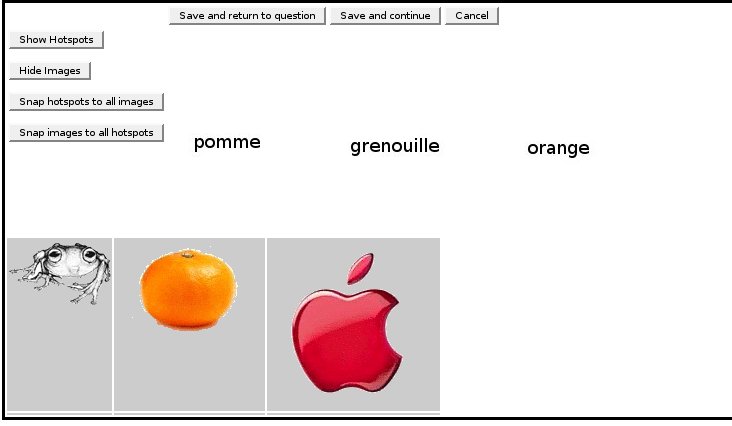
Then I click on "Position the hotspots" to proceed to the second step.
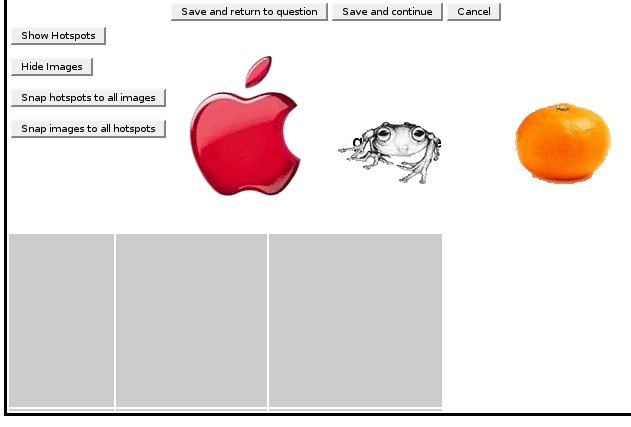
Initially, the images are underneath the background image:
I drag and drop the images to where they should be:
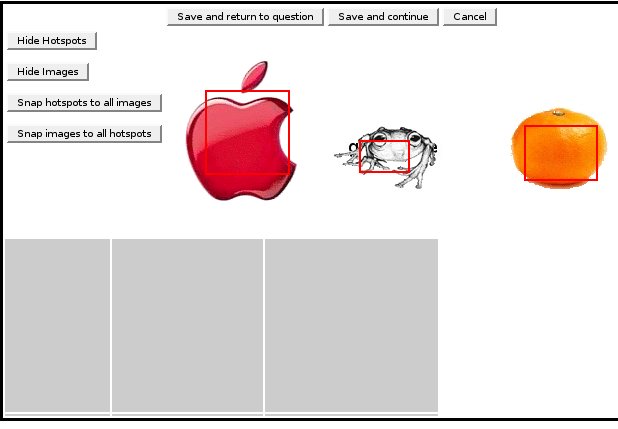
Now, I want to position the hotspots. When the student answers the question, if any part of the drag and drop image overlaps it's hotspot, it will be considered correctly positioned. I click the button "Snap hotspots to all images". The hotspots are the red boxes that appear:
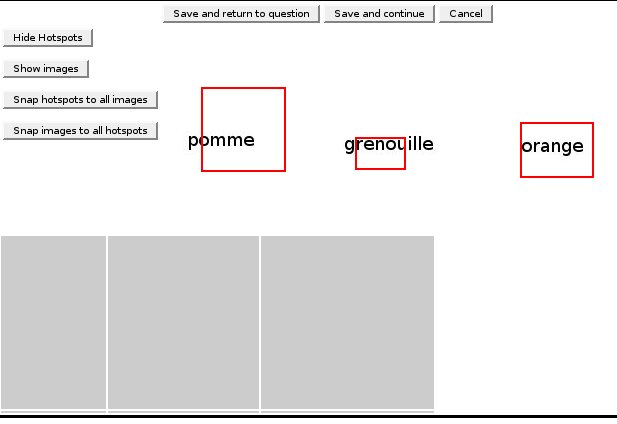
I'd like to position the hotspots so that they cover each word, but not any of the empty space around each word. With the images and the hotspots both visible, it's hard to see what I need to see - the words on the background image. It could also be a little difficult to reposition and resize the hotspots, because it is easy to click on the drag and drop image instead of the hotspot. To make life easier, I click on the button "Hide images".
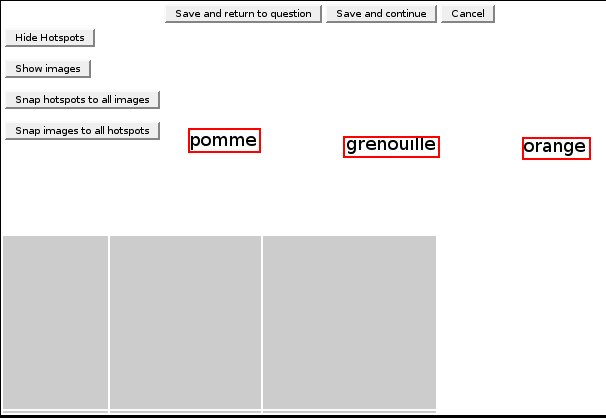
Now I can see the background image without the drag and drop images getting in the way. By holding down the shift key as I click and drag on the lower-right side of the hotspots, I can resize the hotspots. Without the shift key pressed, I can position the hotspots by dragging them. When I'm done, it looks like this:
Satisfied, I click on the button "Save and continue". This finishes the editing of the question.
When added to a quiz, the question looks like this:
