Using web services: Difference between revisions
No edit summary |
No edit summary |
||
| Line 9: | Line 9: | ||
[[Image:Enable_protocol.jpg|thumb]] | [[Image:Enable_protocol.jpg|thumb]] | ||
In this step you will enable some web service protocols. Usually external applications that users wish to use should dictate which protocols are enabled. | In this step you will enable some web service protocols. Usually external applications that users wish to use should dictate which protocols are enabled. | ||
== Enable the web service documentation == | |||
During this step you can also enable the web service user documentation. If this documentation is enabled, the specific web service descriptions will be available to the user. This last option is destined to web service client developer. | During this step you can also enable the web service user documentation. If this documentation is enabled, the specific web service descriptions will be available to the user. This last option is destined to web service client developer. | ||
Settings block > Site Administration > Plugins > Web services > Manage protocols<br/> | Settings block > Site Administration > Plugins > Web services > Manage protocols<br/> | ||
Revision as of 02:53, 18 January 2011
Template:Moodle 2.0This document explains how an administrator set up a web service for ordinary users. It is useful if you want many user to access a service. All user will have a specific and unique security key (also known as "token") to access the service.
Enable the web service in Moodle
For security reasons, web services should only be enabled if you intend to make use of it.
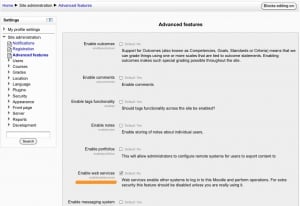
  Settings block > Site Administration > Advanced features

  Check Enable web services option and Save Changes
Enable a protocol
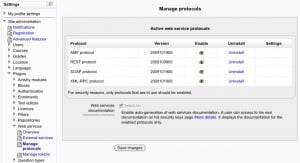
In this step you will enable some web service protocols. Usually external applications that users wish to use should dictate which protocols are enabled.
Enable the web service documentation
During this step you can also enable the web service user documentation. If this documentation is enabled, the specific web service descriptions will be available to the user. This last option is destined to web service client developer.
  Settings block > Site Administration > Plugins > Web services > Manage protocols

  Enable the desired protocol (SOAP, REST, XMLRPC, AMF, ...)
Enable capabilities to users
for create token
you need to set "moodle/webservice:createtoken" capability to the users
for protocols
you need to set the activated protocol (webservice/rest:use, webservice/soap:use,...) capability to the users
Create a service with funtions
A brief note about custom web services
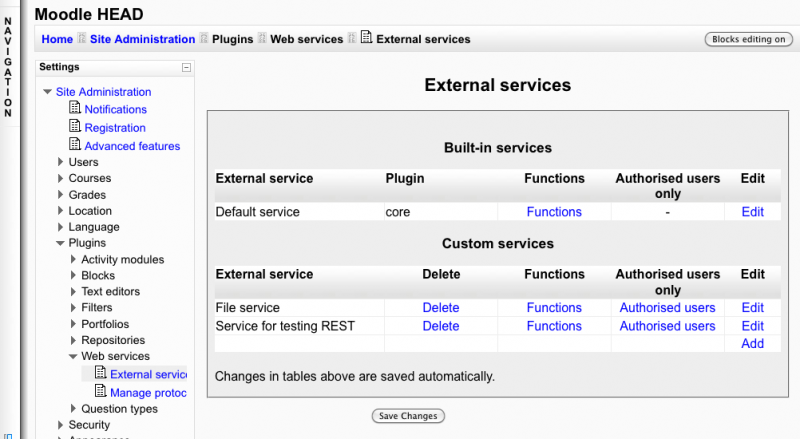
There is no such thing as a default web service in Moodle, so anyone looking for one (or for a list of available services) may get rather confused. Instead, you must create a custom service.
Creating a custom service does not mean you are really creating an entirely new web service yourself. You don't have to program anything. Instead, a 'custom web service' just lets you select which of the standard web service functions are available via that service.
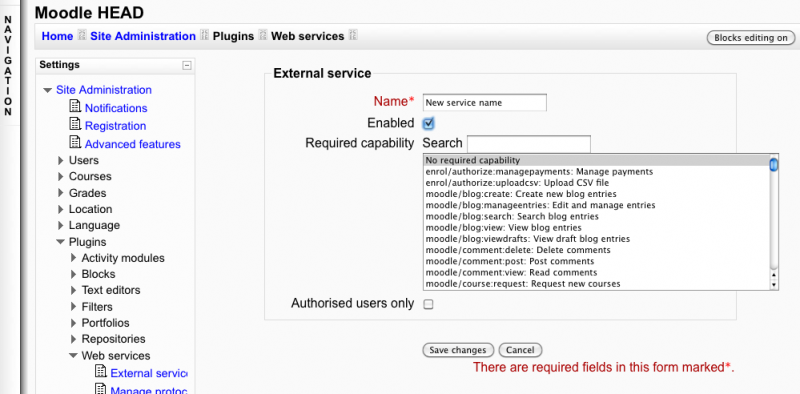
Add new custom service page
This allows you to enable only the specific functions that you need to expose, therefore increasing security. The procedure is included below.
  Settings block > Site Administration > Plugins > Web services > External Services
  Click on Add new custom service
A service is a group of web service functions. You need to create first the service then add the function. When you create the service do not check "Authenticated users", we want all users (only the one with "moodle/webservice:createtoken" capability) to be able to use the web service. If you want you can select a required capability. Any user access a web service will be checked against it. It is just an additional and optional security layer for your own usage.
  Enter a name, check enable
  Click on Save changes
Add a function to the service
  Settings block > Site Administration > Plugins > Web services > External Services

  Click on the Functions link for the newly created service
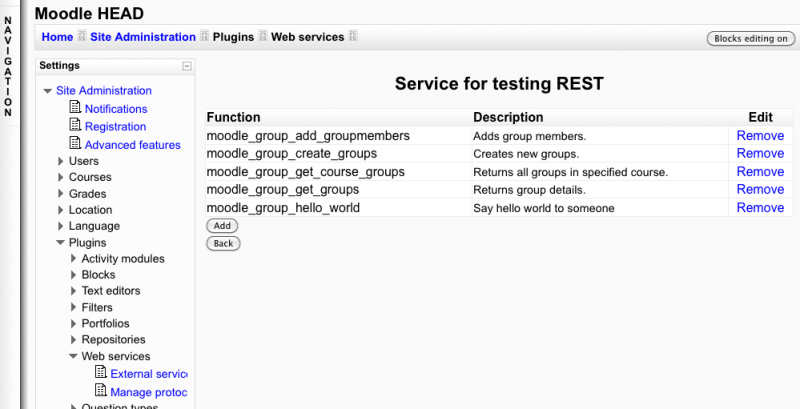
Service functions page
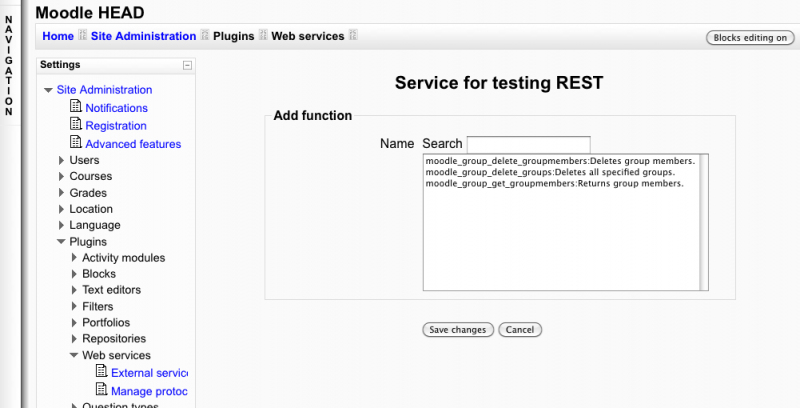
Select Add function operation, then select a function and Save changes
Congratulation, the web service are set up.
User gets and use his/her security key
- a user goes on his/her profil block and access the security keys page. During the first access, the key is created. Note that the user can decide to regenerate a new key. He/She can also access the web service documentation if it is enabled.
- the user enters the key on the external application requesting a Moodle security key.
