Assign users to group: Difference between revisions
From MoodleDocs
(→Steps to add users to a group 1.9: auto create link) |
No edit summary |
||
| Line 39: | Line 39: | ||
[[fr:Affecter des utilisateurs à un groupe]] | [[fr:Affecter des utilisateurs à un groupe]] | ||
[[de:Gruppenmitglieder verwalten]] | |||
Revision as of 15:32, 25 November 2008
Template:Moodle 1.8 Groups are used in many contexts. In this example, we will add currently enrolled users in a course to a group.
Steps to add users to a group 1.9
In 1.9 the screens are presented differently and there are more features.
- Click on the Groups icon in the course administration block
- Select the group in the left column, or create the group and then select it
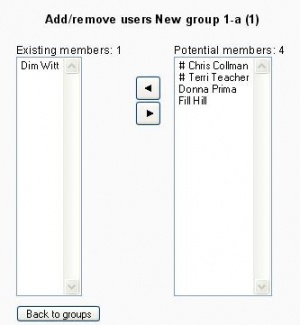
- Click on "Add/remove user" button below the "Members of:" column on the left
- Select the user (use shift key to select more than one)
- Click on the "Add" button
- Click on "Back to groups" button to return to the groups menu
In 1.9 the types of potential users are listed under their roles in the course.
In 1.9 there is an option on the features group page to automatically assign students to a group with Auto-create_groups.
Steps to add users to a group 1.8
To assign users to a group:
- On the Groups page, click the "Add/remove users" button.
- In the "Potential members" list, select the students you want to add to the group.
- Click the arrow button that points towards the "Existing members" list.
The special characters in front of the name shows the role:
# Admin
- Trainer
Tips and tricks
- Some sort of group setting must be enabled in the course.
