Wimba/Voice tools index
From MoodleDocs
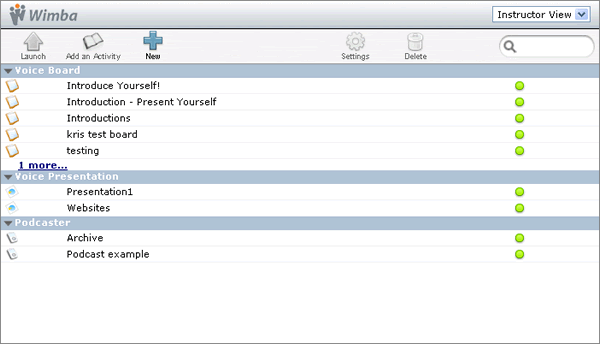
The Voice Tools index provides access to all of your existing Voice tools. It is a place to manage your voice tools: you can create, edit and delete voice tools here and access the student's view.
Viewing a Voice Tool
- Select the Voice Tool and click the Launch icon
 If you want to see the Voice Tool as a student, first switch to the Student View using the drop-down at the top-right.
Creating a Voice Tool
- Click the New icon

- Choose the type of Voice tool you want: Voice Board, Voice Presentation or Podcaster.
- Complete the voice tool settings for your new Board, Presentation or Podcaster (See Voice Tool Settings)
- Click Create to create the Voice Tool. You are returned to the Voice Tools index.
Adding a Voice Tool Activity
- Select the Voice Tool you wish to use for the activity. If you haven't created it yet, you must start with 'Creating a Voice Tool' (above).
- Click the Add an Activity icon

- Complete the Activity Settings
- Click Create.
Editing a Voice Tool
- Select the Voice tool and click Settings

- Amend the settings and click 'Save All'. You are returned to the Wimba Voice Tools index.
Deleting a Voice Tool
- Select a Voice Tool
- Click the Delete icon

- You will be prompted to confirm, if you are sure click OK. Take care, this is a permanent delete!
See also
- Official Wimba Guide: Wimba Modules for Moodle (PDF - See pages 9-15)
