Themed resource: Difference between revisions
Jason Hardin (talk | contribs) (New page: =Resource Description' The theme resource was designed and developed to provide an instructor with a way to add multiple Moodle HTML resources to multiple courses with the same look and f...) |
Jason Hardin (talk | contribs) |
||
| Line 52: | Line 52: | ||
NewTheme.html: | NewTheme.html: | ||
<code | <code html4strict> | ||
<div class="themedresource_newtheme"> | <div class="themedresource_newtheme"> | ||
<div class="hd hd-generaltable"> | <div class="hd hd-generaltable"> | ||
| Line 91: | Line 91: | ||
Please note that to achieve the rounded borders you need this structure: | Please note that to achieve the rounded borders you need this structure: | ||
<code | <code html4strict> | ||
<div class="hd hd-generaltable"> | <div class="hd hd-generaltable"> | ||
<div class="c"></div> | <div class="c"></div> | ||
| Line 102: | Line 102: | ||
</code> | </code> | ||
In the example above, the "some-nested-class" is "roundedtext". | In the example above, the "some-nested-class" is "roundedtext". | ||
= Adding a Theme to a Course and a new Themed Content Resource= | = Adding a Theme to a Course and a new Themed Content Resource= | ||
Revision as of 03:24, 31 March 2010
=Resource Description'
The theme resource was designed and developed to provide an instructor with a way to add multiple Moodle HTML resources to multiple courses with the same look and feel without a lot of inline CSS styles. The themed resource allows an instructor to design an html template outside of Moodle using HTML and CSS and upload this template to the Moodle themed resource and user it over and over again with custom fields. Once a template has been added to a Moodle course it can be reused in any themed resource in that course. The resources and be backed up and restore to another course and that course can use the same html template. The themed resource provides instructors with a quick way to create many html resources with the same look and feel without a lot of copying and pasting of the html structure.
Developers
Moodlerooms Inc, Sam Chaffee and Jason Hardin
Add a Themed Content Resource to a Course
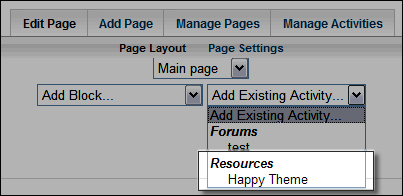
Adding a Themed Content Resource to a Course is done through the Flex page Add Existing Activity drop down list, which requires that you have turned editing on. Locate the name of the Themed Content resource and select it from the drop down.
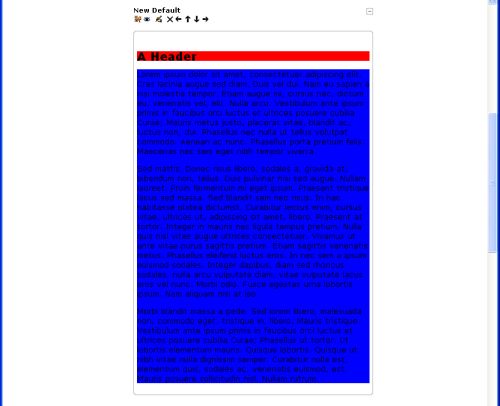
The Themed Content resource should now be displayed in the center column of the course and look similar to the image below.
The Themed Content resource looks like the image below when editing is turned off.
Create a Theme for a Themed Content Resource
A theme for the Themed Resource requires a .zip file with the following elements:
- An .html template
- This template should contain html found in the body of an html document.
- A .css file
- The .css file should contain styles for the markup in the template.
- An optional folder named 'images' containing any images used for the styles (such as a background)
- The .html, .css, and .zip file should all have the same name. For example, NewTheme.html and NewTheme.css should be zipped into a file called NewTheme.zip.
The template must contain the tag %%CONTENT%% which will be replaced by the text, etc. that is entered in the content field when setting up a Themed Resource.
CSS selectors defined in the .css file should be prepended with 'themedresource_' in order to prevent namespace collisions with other selectors defined elsewhere in Moodle.
To link to an image in the images folder of the theme the relative url must be prepended by the %%THEMEDIR%% tag. For example, to define a background image in the stylesheet:
.themedresource_content {
background-image: url('%%THEMEDIR%%images/background.jpg');
}
The following is an example of a simple Themed Resource theme, called "NewTheme".
NewTheme.html:
A Header
 %%CONTENT%%
NewTheme.css:
.themedresource_newtheme .roundedtext {
   border-style:solid;
   border-width:1px;
   padding:5px;
   border-color:#B4B4B5;
}
.themedresource_newtheme .themedresource_header {
   background-color: red;
}
.themedresource_newtheme .themedresource_content {
   background-color: blue;
}
Produces this:
Please note that to achieve the rounded borders you need this structure:
. . . Whatever other structure and content
In the example above, the "some-nested-class" is "roundedtext".
Adding a Theme to a Course and a new Themed Content Resource
Now that you have created a theme for your themed content resource you need to upload it to the course in order to use the theme in a themed content resource. To upload the theme you click on the manage activities tab
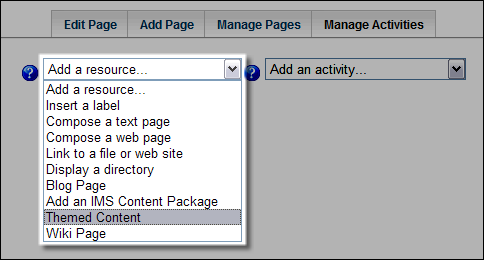
Select "themed content" from the add a resource drop down
Enter in the information for the themed content resource like you would normally. When you are down locate the choose and upload button after the theme drop down and click the button.
In the popup window click the upload button
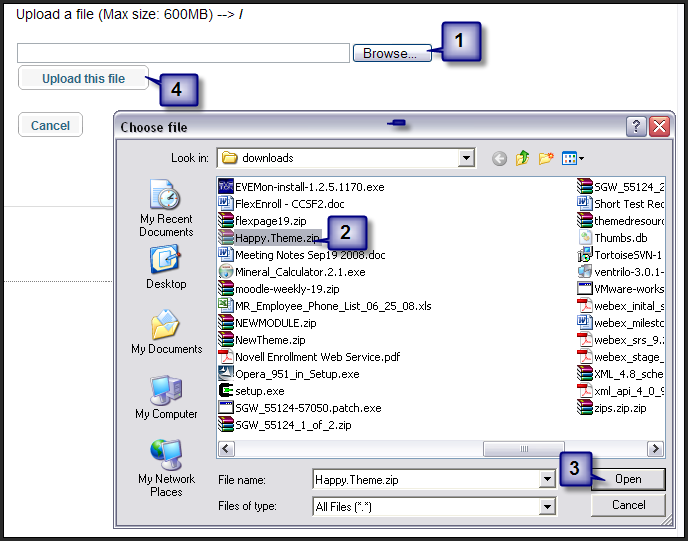
This will bring you to the choose a file window in Moodle. In this window you will
- Click the browse button
- Locate the zipo of your theme
- Click that open button
- Click the Upload this file button
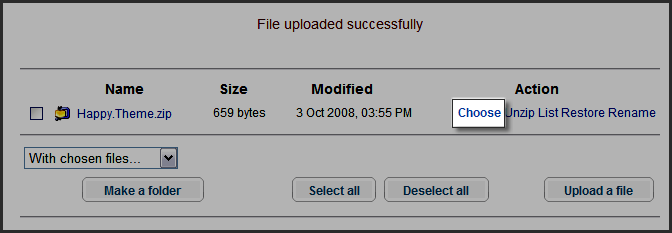
Now click the choose link next to the zip file for the theme you have uploaded
This will add the name of the zip file to the text field next to the choose or upload a file button. Click the save and display button. This will display the resource with the new theme:

See also
