Talk:Authentication
I just added Guest Login Button (You can hide or show the guest login button on the login page) it's not clear if this just hides the button, or if hiding the button means that guest access is effectively useless.
- Hopefully the extra sentence I just added makes things clear now ;-) --Helen Foster 12:18, 26 June 2008 (CDT)
Draft
The primary authentication page is an introduction to this subject. Authentication is a menu item that only has sub menus in the administration block. Thusly, this page should be an introduction to this concept, outline each of the sub menus, have lots of links, not a lot of how to, a few examples of concepts, many references in See also (including FAQ link)and perhaps be the heading for link on a template called Authentication.
Here are Chris's working notes that will form an introduction to Authentication. Typically, this will be no more than 3 sentences , with a second short paragraph that provides some context for breaking Authentication into sub menus, hopefully with a very simple example.
Definition: From authenticate and the greek "authentikos, 'principal, genuine'." or
- Authentication is the process of determining whether someone or something is actually who or what it asserts itself to be, the process confirms that the identification of the individual or data is accurate.
- Authorization is the process of determining what types of activities are permitted by a user. Usually, authorization is in the context of authentication: once you have authenticated a user, they may be authorized different types of access or activity.
- Roles are part of the authorization process that permits a user to perform certain activities. Permissions are specific task authorizations that a user may or may not be allowed to perform (inclucing viewing and changing).
- Enrolment in a course is acheived by assigning a role to a user in the course context.
Authentication, roles & permissions and enrolment. The authentication starts when a user enters a Moodle site. Most users think of the login screen as the first step in authentication of a user. After authentication, Moodle will give an initial set of authorizations to a user by assigning them an initial role. A user entering into a new or different context (for example a course) will assume certain permissions based upon their role which was given to them by some authorization process. A user who loses their authentication loses all authority and any previous roles.
Overview of authentication
A standard Moodle has 15 types of authentication methods and additional contributed code plugins are available.
Manage authentication
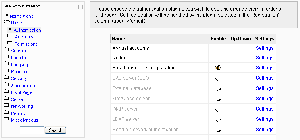
The Manage authentication menu is where the site administrator can edit settings of different authentication methods. Installed authenticn plugins will appear on this screen, with a hide/view and edit links.
There are also some common settings for the authentication process. For example settings that determine the default self email registration authentication method, an alternative login URL, alternative instructions at login, filters for accepted email domains and an optional URL for those who forget their password.
Email-based self-registration
Email-based self-registration authentication method enables users to create their own accounts. They then receive an email at the address they specified in their account profile to confirm their account.
This is the same as the edit screen in manage authentications.
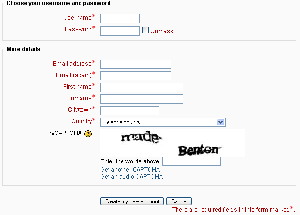
Here the site administrator can enable reCAPTCHA which deters 'bots' from automatically creating user names and passwords on the Moodle site.
It also determines which profile fields the user can fill in and which are locked upon self registration.
Manual accounts
A manual account authentication is when the site administrator creates a user profile via any one of several methods. This screen contains user profile fields which maybe locked, similar to the email self registration. The site administrator my "lock", "unlock" or "unlock if blank" specific user profile fields.
Moodle Network
Moodle Network feature allows a Moodle administrator to establish a link with another Moodle, and to share some resources with the users of that Moodle. This makes single-sign-on between Moodles possible.
Peer to Peer and community hubs are two different flavors of a Moodle network that can be useful in user authentication.
No login
This is a negative authentication which prevents a user from logging in under their name or any user from placing this email address in their profile. There are no general settings. It is activated only on a specific user's page under advanced settings by the site administrator.
See Also
- Authentication FAQ
- Multi authentication in Upgrading to Moodle 1.8
- Using Moodle User authentication forum
- Using Moodle Do users need e-mail addresses? forum discussion
- Using Moodle Admin approving self registrations? forum discussion
Old Authentication page info is here
Location: Administration > Users > Authentication > Manage authentication (or Administration > Users > Authentication prior to Moodle 1.9)
Authentication methods
One of the first things you need to consider when setting up your Moodle site is user authentication i.e. enabling people to login to your Moodle site.
Authentication methods (also known as authentication plugins) include:
- Manual accounts
- No login
- Email-based self-registration
- CAS server (SSO)
- External database
- FirstClass server
- IMAP server
- LDAP server
- Moodle Network authentication
- NNTP server
- No authentication
- PAM (Pluggable Authentication Modules)
- POP3 server
- RADIUS server
- Shibboleth
- NTLM/Integrated Authentication (3rd party plugin)
Setting the authentication method
To set the authentication method:
- Access Administration > Users > Authentication > Manage authentication.
- On the Manage authentication page, click on the closed eye icon to enable your chosen authentication plugin. In Moodle 1.8 onwards, you can choose to use more than one authentication method (see Multi-authentication below). Use the up/down arrow icons to arrange the plugins in order, with the plugin handling the most logins at the top of the page.
- If you have chosen Email-based self-registration and wish potential users to be able to create their own accounts, select "Email-based self-registration" from the self registration drop-down menu in the common settings section. Potential users will then be presented with a "Create new account" button on the login page.
- If you have courses with guest access, set the Guest login button to show.
- Click the "Save changes" button.
- Click on Settings opposite the authentication plugin(s) you have chosen.
- Configure the required settings and click the "Save changes" button.
Multi-authentication
Template:Moodle 1.8From Moodle 1.8 onwards, multi-authentication is supported. Each authentication plugin may be used to find a username/password match. Once found, a user is logged in and alternative plugins are not used. Therefore the plugin which handles the most logins should be moved to the top of the page in order that less load is put on authentication servers.
Common settings
Self registration
If you wish users to be able to create their own user accounts, i.e. self-register, then select Email-based self-registration from the drop-down menu.
Warning: Enabling self registration results in the possibility of spammers creating accounts in order to use forum posts, blog entries etc. for spam. This risk can be minimized by limiting self registration to particular email domains with the allowed email domains setting (see below). Alternatively, self registration may be enabled for a short period of time to allow users to create accounts, and then later disabled.
Note: The Email-based self-registration authentication plugin must be enabled to allow users who previously self-registered to login. Selecting Email-based self-registration as the self registration method allows potential users to self register.
Guest login button
You can hide or show the guest login button on the login page. Hiding the guest login button disables guest access to the Moodle site, however logged-in users can still enter any courses which allow guest access without being required to enrol.
Alternate login URL
This should be used with care, since a mistake in the URL or on the actual login page can lock you out of your site. If you do mess it up, you can remove the entry from your database (table mdl_config) using, e.g., phpmyadmin for mysql.
Forgotten password URL
Template:Moodle 1.9If your lost password handling is performed entirely outside of Moodle (for example, only by a help desk), you can set the url of that service here. Anybody pressing a "lost password" link in Moodle will be redirected to this URL. Note that this will disable all of Moodle's lost password recovery options regardless of authentication method(s) in use.
Allowed and denied email domains
Authentication may be restricted to particular email domains when using Email-based self-registration so that, for example, only students with a university email can login.
(Note: Prior to Moodle 1.9, the allowed and denied email domains settings can be found in Administration > Server > Email.)
ReCAPTCHA
A CAPTCHA is a program that can tell whether its user is a human or a computer. CAPTCHAs are used by many websites to prevent abuse from bots, or automated programs usually written to generate spam. No computer program can read distorted text as well as humans can, so bots cannot navigate sites protected by CAPTCHAs.
Template:Moodle 1.9From Moodle 1.9.1 onwards, spam protection may be added to the Email-based self-registration new account form with a CAPTCHA element - a challenge-response test used to determine whether the user is human.
ReCAPTCHA keys can be obtained from http://recaptcha.net by signing up for an account (free) then entering a domain. The public and private keys provided can then be copied and pasted into the recaptchapublickey and recaptchaprivatekey fields in the manage authentication common settings, and the changes saved.
In addition to setting reCAPTCHA keys, email-based self-registration should be set as the self registration authentication plugin in the manage authentication common settings and the reCAPTCHA element should be enabled in the Email-based self-registration settings.
Locking profile fields
To prevent users from altering some fields (e.g. students changing profile information to inappropriate or misleading information), the site administrator can lock profile fields.
- These fields are optional. You can choose to pre-fill some Moodle user fields with information from the LDAP fields that you specify here. If you leave these fields blank, then nothing will be transferred from LDAP and Moodle defaults will be used instead. In either case, the user will be able to edit all of these fields after they log in.
- Update local: If enabled, the field will be updated (from external auth) every time the user logs in or there is a user synchronization. Fields set to update locally should be locked.
- Lock value: If enabled, will prevent Moodle users and admins from editing the field directly. Use this option if you are maintaining this data in the external auth system.
- Update external: If enabled, the external auth will be updated when the user record is updated. Fields should be unlocked to allow edits. Note: Updating external LDAP data requires that you set binddn and bindpw to a bind-user with editing privileges to all the user records. It currently does not preserve multi-valued attributes, and will remove extra values on update.
If you are using a mixture of authentication types (such as IMAP and manual), then the fields you lock in the authentication options will only apply to the type of authentication indicated by the drop down box at the top of the screen. Remember to test the field locking by logging in with the proper type of account! If you test with a manual account but have set the field locking to apply to IMAP accounts, you will not be able to tell if it worked!
See also
- Authentication FAQ
- Multi authentication in Upgrading to Moodle 1.8
- Using Moodle User authentication forum
- Using Moodle Do users need e-mail addresses? forum discussion
- Using Moodle Admin approving self registrations? forum discussion


