Page content
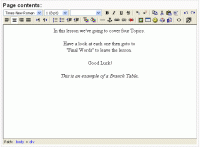
The page content is the typical place a student sees in a lesson to receive information-content.
(Note: This page is a work in progress. It will be written for 1.6 Check to see if it applies to 1.5 template as well. There should be many links on this page, because these features are used throughout Moodle.--Chris collman 2 21:12, 6 May 2006 (WST) )
Moodle is very robust when it comes to placing content before a student. It has both an HTML source code and a friendly WYSIWYG interface with standard icons for different editing functions.
Tool Bar
The toolbar should be familiar to users of word processors. The toolbar creates HTML code for the user. It is possible to see or reveal the code on the page with the icon that looks like <>. More help with HTML can be found here.
Text Editing
Brief review of text editing features Fonts, Centering, etc Special Characters Colors Paragraph Clean Word HTML
Image Insertion
![]() The Image Icon will assist you in creating HTML code. The Image Icon on the tool bar brings up this popup window. We should mention here that JPG, GIF and PNG files are recognized Moodle images file types.
The Image Icon will assist you in creating HTML code. The Image Icon on the tool bar brings up this popup window. We should mention here that JPG, GIF and PNG files are recognized Moodle images file types.
- The basic steps are to locate the file
- Using the File Browser Window for previously uploaded files, OR
- Upload a file
- Locate and click on the location the file will go to in the File Browser Window
- Use Browse button to locate file (local machine)
- Use Update button to place file in File Browser Window,
- click on file in File Browser Window to place file in "Insert URL"
- Enter Alternative Text
- Optional Use Layout, spacing and size parameters
- Best practice is to put all of a single activities images in a folder such as "Lesson Example"
- It is possible to zip a local folder with images and upload it to a course lesson. See files Click here for more information on files.
- Remember to use the Refresh feature on your browser if the image does not appear to change in the Moodle Lesson.
Links & Anchors
The Link (chain icon)
An HTML link creates a path to external, internal or the current page. The icon saves writing code. One method is to copy the address bar from the location you want, click on the link icon,then paste it URL. Another method is to press the Browse button. This will take you to the Files area of the course. From here it is possible to select an existing file or to upload a new file and link to it.
There are three fields when the Link icon is used.
- URL the web based address. Note a course file has a URL address via the browse button
- Title - what appears when the mouse rolls over the link
- Target - What kind of window should be called up.
- Anchors - A pull down list allows you to select an anchor.
Anchor
An HTML anchor identifies text within a page which can be referenced by a link.
To use the Anchor, highlite the word, then click on the Anchor icon. Give the anchor a name.
Anywhere on the page, high lite the word you would like to link to the Anchor. Use the Link icon and the pulldown menu to find the correct anchor.
Tables
Add, edit, adjust
Path
What is that line at the bottom of Page Content show?
Content examples
Description of question or branch page contents Basic and some creative
See Also
- Index of Help Files - Scroll down to "Reading and Writing"
- Files - Uploading, creating, moving, deleting course files and folders
