Emoticon images: Difference between revisions
Helen Foster (talk | contribs) (1.9 template, Emoticon images 2.0 link) |
Helen Foster (talk | contribs) m (removing link to 2.0 page) |
||
| Line 1: | Line 1: | ||
{{Moodle 1.9}}=Custom Emoticons= | {{Moodle 1.9}}=Custom Emoticons= | ||
This page describes the steps required to deploy your own custom smiley (emoticon) set in Moodle 1.9 | This page describes the steps required to deploy your own custom smiley (emoticon) set in Moodle 1.9. | ||
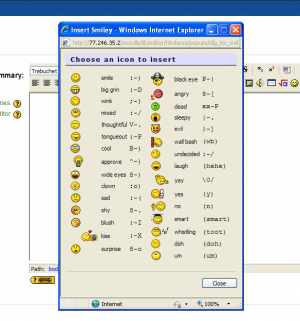
[[Image:New smilies.PNG|300px|Imaging showing new smiley set]] | [[Image:New smilies.PNG|300px|Imaging showing new smiley set]] | ||
Latest revision as of 11:24, 11 July 2011
Moodle1.9
Custom Emoticons
This page describes the steps required to deploy your own custom smiley (emoticon) set in Moodle 1.9.
Locating Emoticon Files
Firstly, we need to locate the folder containing the smilies Moodle is currently using. This is usually the /pix/s folder. However, note that custom themes can also contain custom smilies so you might need to also look for /pix/s in the theme folder for your custom theme. Try inserting a smiley into some text, then take a look at the properties of the image that has been inserted. This should reveal the location of that image on the server.
Once the smiley folder has been located, make a backup copy of the 's' folder (e.g. 's_back') and replace the emoticons with your set.
The emoticon file names are used to identify what the icon represents, therefore you may need to rename the GIF files accordingly (For example laugh.gif may need to be renamed biggrin.gif).
Changing Insert Smiley Popup Dialog Dimensions
If your new smileys are bigger than the default - or want to provide additional icons in the Insert Smiley popup - then you will need to resize the dialog:
- Look in /lib/editor/htmlarea/ for the file dialog.js and make a backup of this file.
- Search for the line beginning case "dlg_ins_smile": x = and alter the x and y numbers accordingly.
Providing Additional Smilies in the Insert Smiley Popup Dialog
Look in /lib/editor/htmlarea/popups for the file dlg_ins_smile.php and make a backup copy of this file. Search down dlg_ins_smile.php for the line $emoticons = array ( 'smiley' => ':-)',
At the bottom of the $emoticons array add references to the extra emoticons you want to include.
If you're complimenting Moodle's smilies with some of your own then you'll also need to modify the help files for your language:
- Look in /lang/*your language*/ - for example /lang/en_utf8 - for the file pix.php. This contains the emoticon "tooltips" - the helpful text that appears above an emoticon when you hover the mouse over it. Make a backup copy of this file.
- Add new tooltips for your extra smilies to the end of pix.php (the the sample files for an example).
If you already have the HTML editor open in your browser then refresh the page, press the insert smiley button and your new emoticons will be displayed.
Reconfigure the HTML Editor
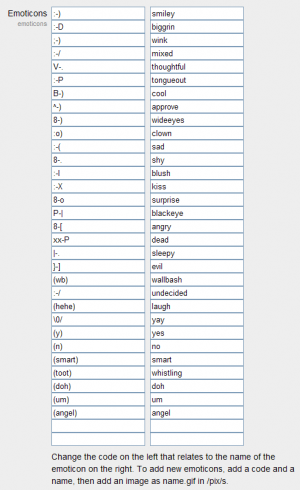
The editor can recognise ASCII emoticons and replace them with GIF images. We can, if we wish, include our newly specified smilies.
- Ensure you are logged in as a Moodle administrator. From the Site Administration block click on Appearance HTML Editor.
- Add your new emoticons to the list. The desired ASCII smiley is specified on the left and the name of the GIF image (not including ".GIF") is specified on the right.

