|
|
| Line 1: |
Line 1: |
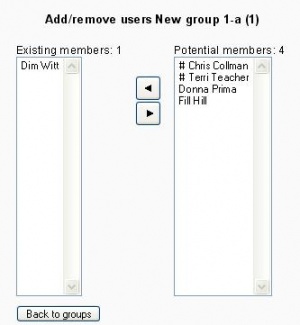
| {{Moodle 1.8}} | | {{Moodle 1.8}}[[Image:Administration Block Course Group add users.JPG|left|thumb|Add/remove users]]To assign users to a group: |
| In the course administration block under group, there is a 3 part form (shown here under groupings).
| | # On the Groups page, click the "Add/remove users" button. |
| | | # In the "Potential members" list, select the students you want to add to the group. |
| First select the grouping, which will reveal the groups. Then select the group and in the bottom left select the add users to group button. In the example below there are 4 students enroled in the course and the teachers are indicated by the #. One student has been added by clicking on the student's name and using the triangle arrow button to move them.
| | # Click the arrow button that points towards the "Existing members" list. |
| | |
| | |
| [[Image:Administration Block Course Group add users.JPG]] | |
| | |
| | |
| There is a very handy "Printer friendly" button after clicking the "back to groups" button.
| |
| | |
| The view below shows our Grouping "New Grouping 1", with each of the sub groups and their students. You may notice that one student is enroled in more than one group.
| |
| | |
| | |
| [[Image:Administration Block Course Group Group PrinterFriendly.JPG]]
| |
| | |
|
| |
|
| [[Category:Groups]] | | [[Category:Groups]] |
Revision as of 12:00, 25 October 2007
Moodle1.8
To assign users to a group:
- On the Groups page, click the "Add/remove users" button.
- In the "Potential members" list, select the students you want to add to the group.
- Click the arrow button that points towards the "Existing members" list.
